Igniter CMS Documentation
Comprehensive Documentation - Version 2.0
Introduction
- Item Name : Igniter CMS Starter Application
- Item Version : v 1.2
- Author : A. Kassama
- Support Email : kassamadeveloper(at)gmail.com
- License : MIT License
- Download
Installation/Setup
Requirements
- PHP (recommended version: 8.0 or higher)
- Enable `zip`, `gd`, and `intl` extension in php ini
- Composer installed.
- MySQL, Postgre, SQLite or another supported database
- Web server (Apache, Nginx, etc.)
Installation Steps
- Clone or download the project from the repository (GitHub).
- Navigate to the project folder and run
composer installto install dependencies. -
Set the database config in the
.envfile to configure environment and database settings.
                                        database.default.hostname = localhost

                                        database.default.database = igniter_cms_db

                                        database.default.username = root

                                        database.default.password = db_password

                                        database.default.DBDriver = MySQLi

                                        database.default.DBPrefix =

                                        database.default.port = 3306
- Set the base URL in
.envfile.app.baseURL = 'http://localhost/igniter-cms/' - Make sure you create the database in your local server.
- Generate App Key:
php spark generate:key. This command will generate/update the application key (APP_KEY) in .env file. - Run database migrations with
php spark recreate:tables. - Open the base url in browser. E.g.
https://localhost/igniter-cms/.
Note: To reset database you can use these commands php spark recreate:tables
Using the Installer
- Download the Igniter CMS (zip) from this zip file.
-
Extract the contents into your local web server directory (e.g.,
htdocs,www, orpublic_html). - Alternatively, clone to repo into your local web server directory.
-
Open the installer in your browser (for example:
http://localhost/igniter-cms-installer/). - Follow the on-screen instructions to provide your database and application details.
-
Once installation is complete, the installer will configure your application, generate the
.envfile, set up the database, install dependencies -
The
/installfolder should be deleted after installation. Note it would be automatically removed in "production" environment for security. - You can now access your site at the base URL you configured during installation.
Permissions
Ensure writable and public/uploads directories are writable by the web server.
Dashboard
The dashboard is the landing page of the backend and includes the following features:
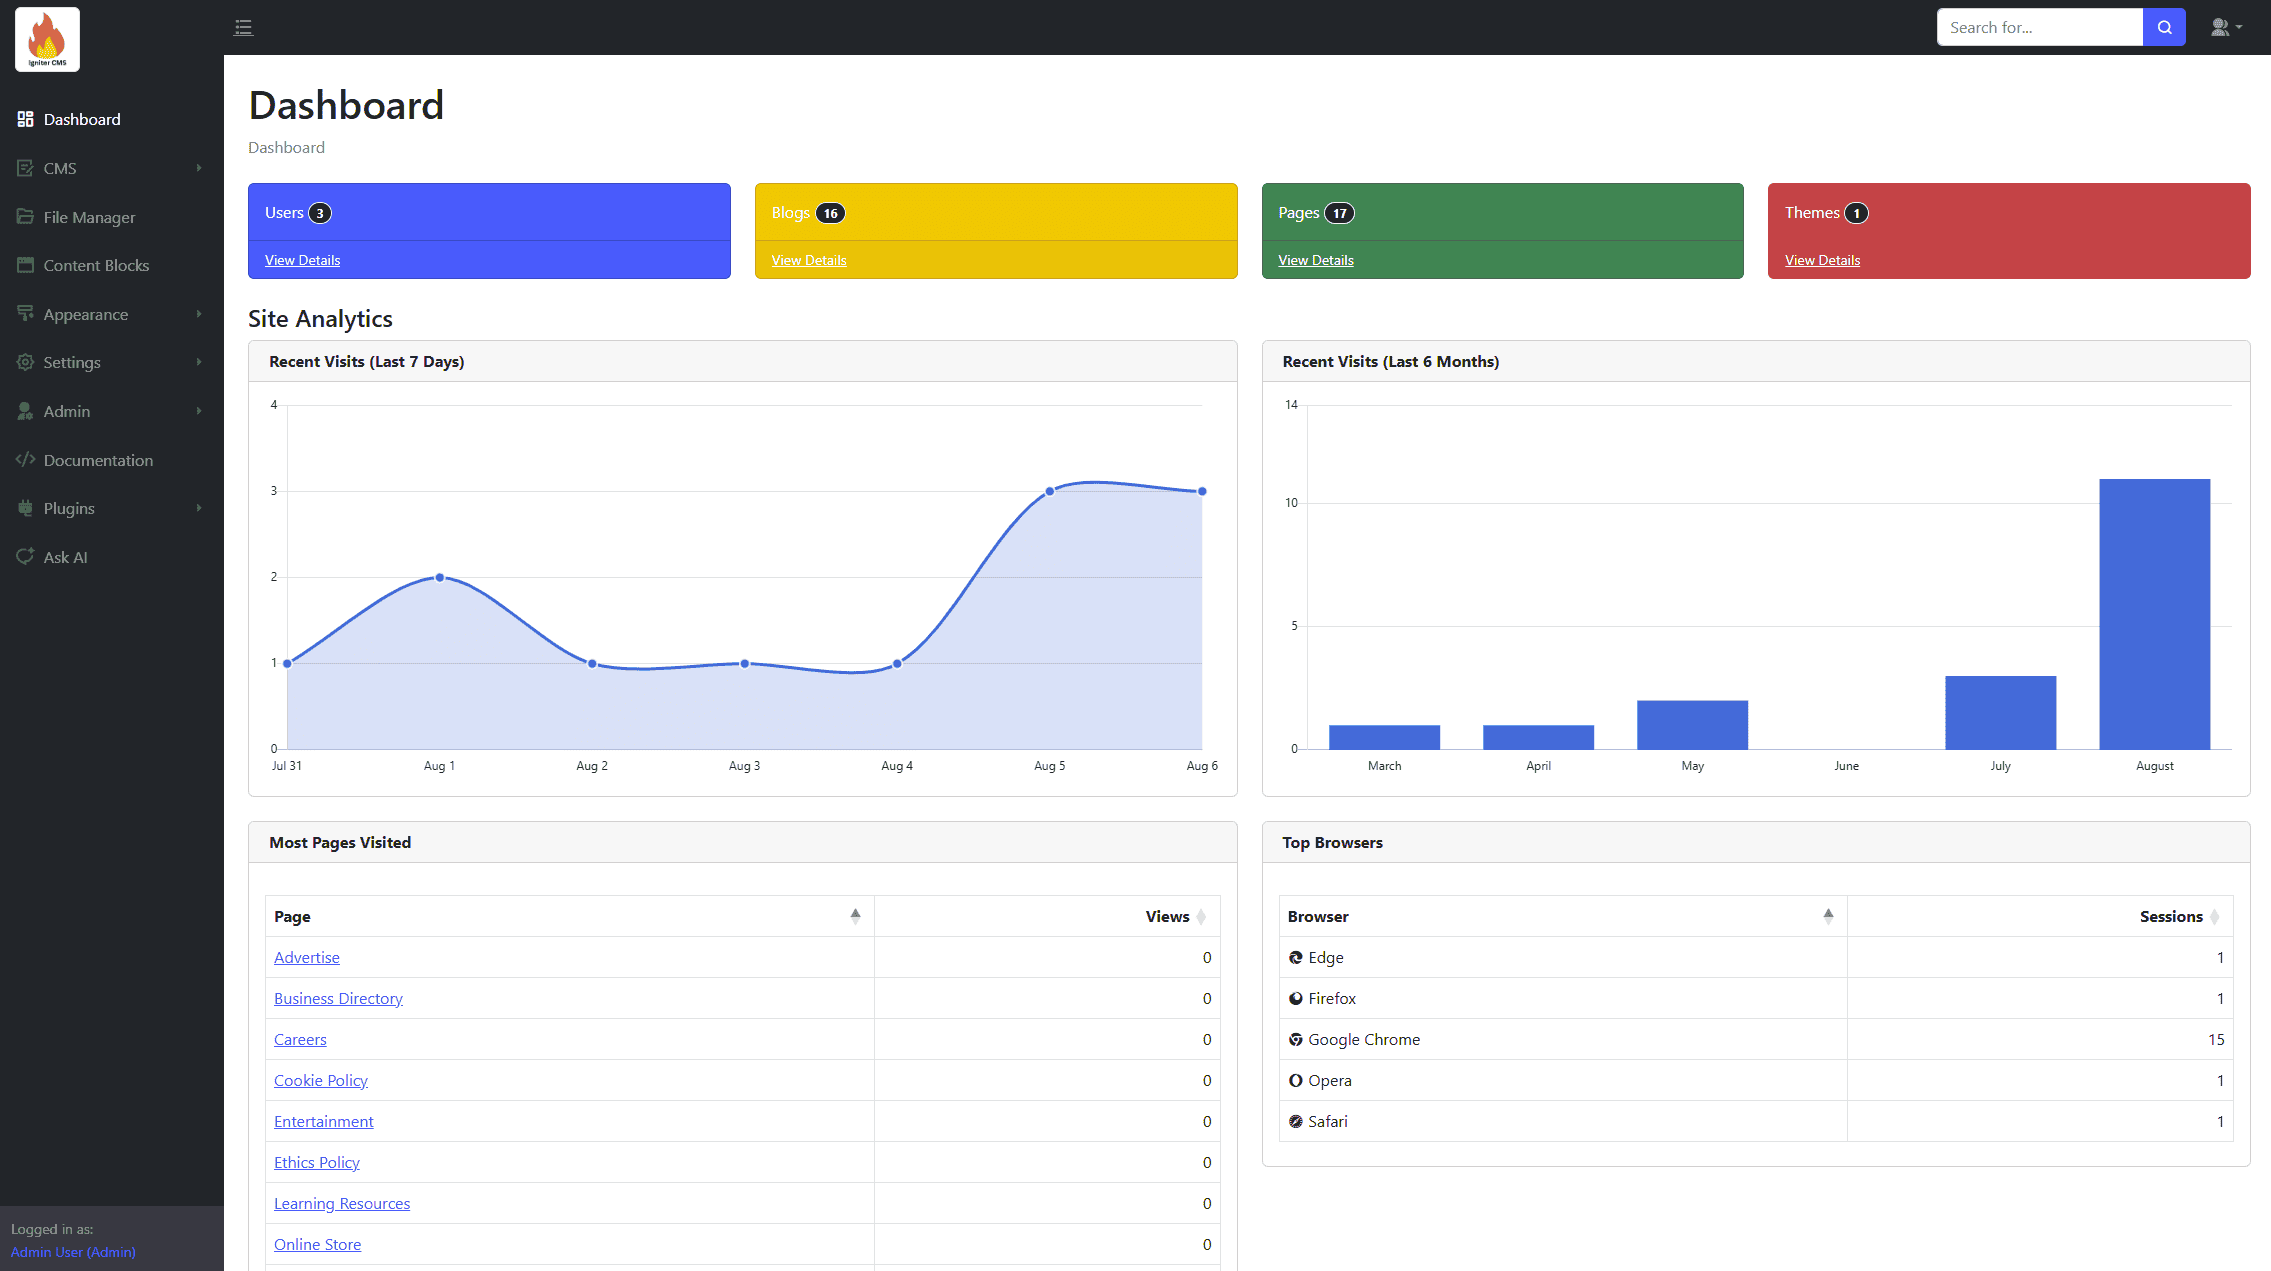
- Summary cards of total Users, Blogs, Pages, and Themes.
- Site Analytics:
- Recent Visits (Last 7 Days - Chart).
- Recent Visits (Last 6 Months - Chart).
- Most Pages Visited (Table).
- Top Browsers (Table).
- Table of Recent Posts (10).
CMS Management
The CMS module allows you to manage the website's content, including blogs, pages, and navigations.

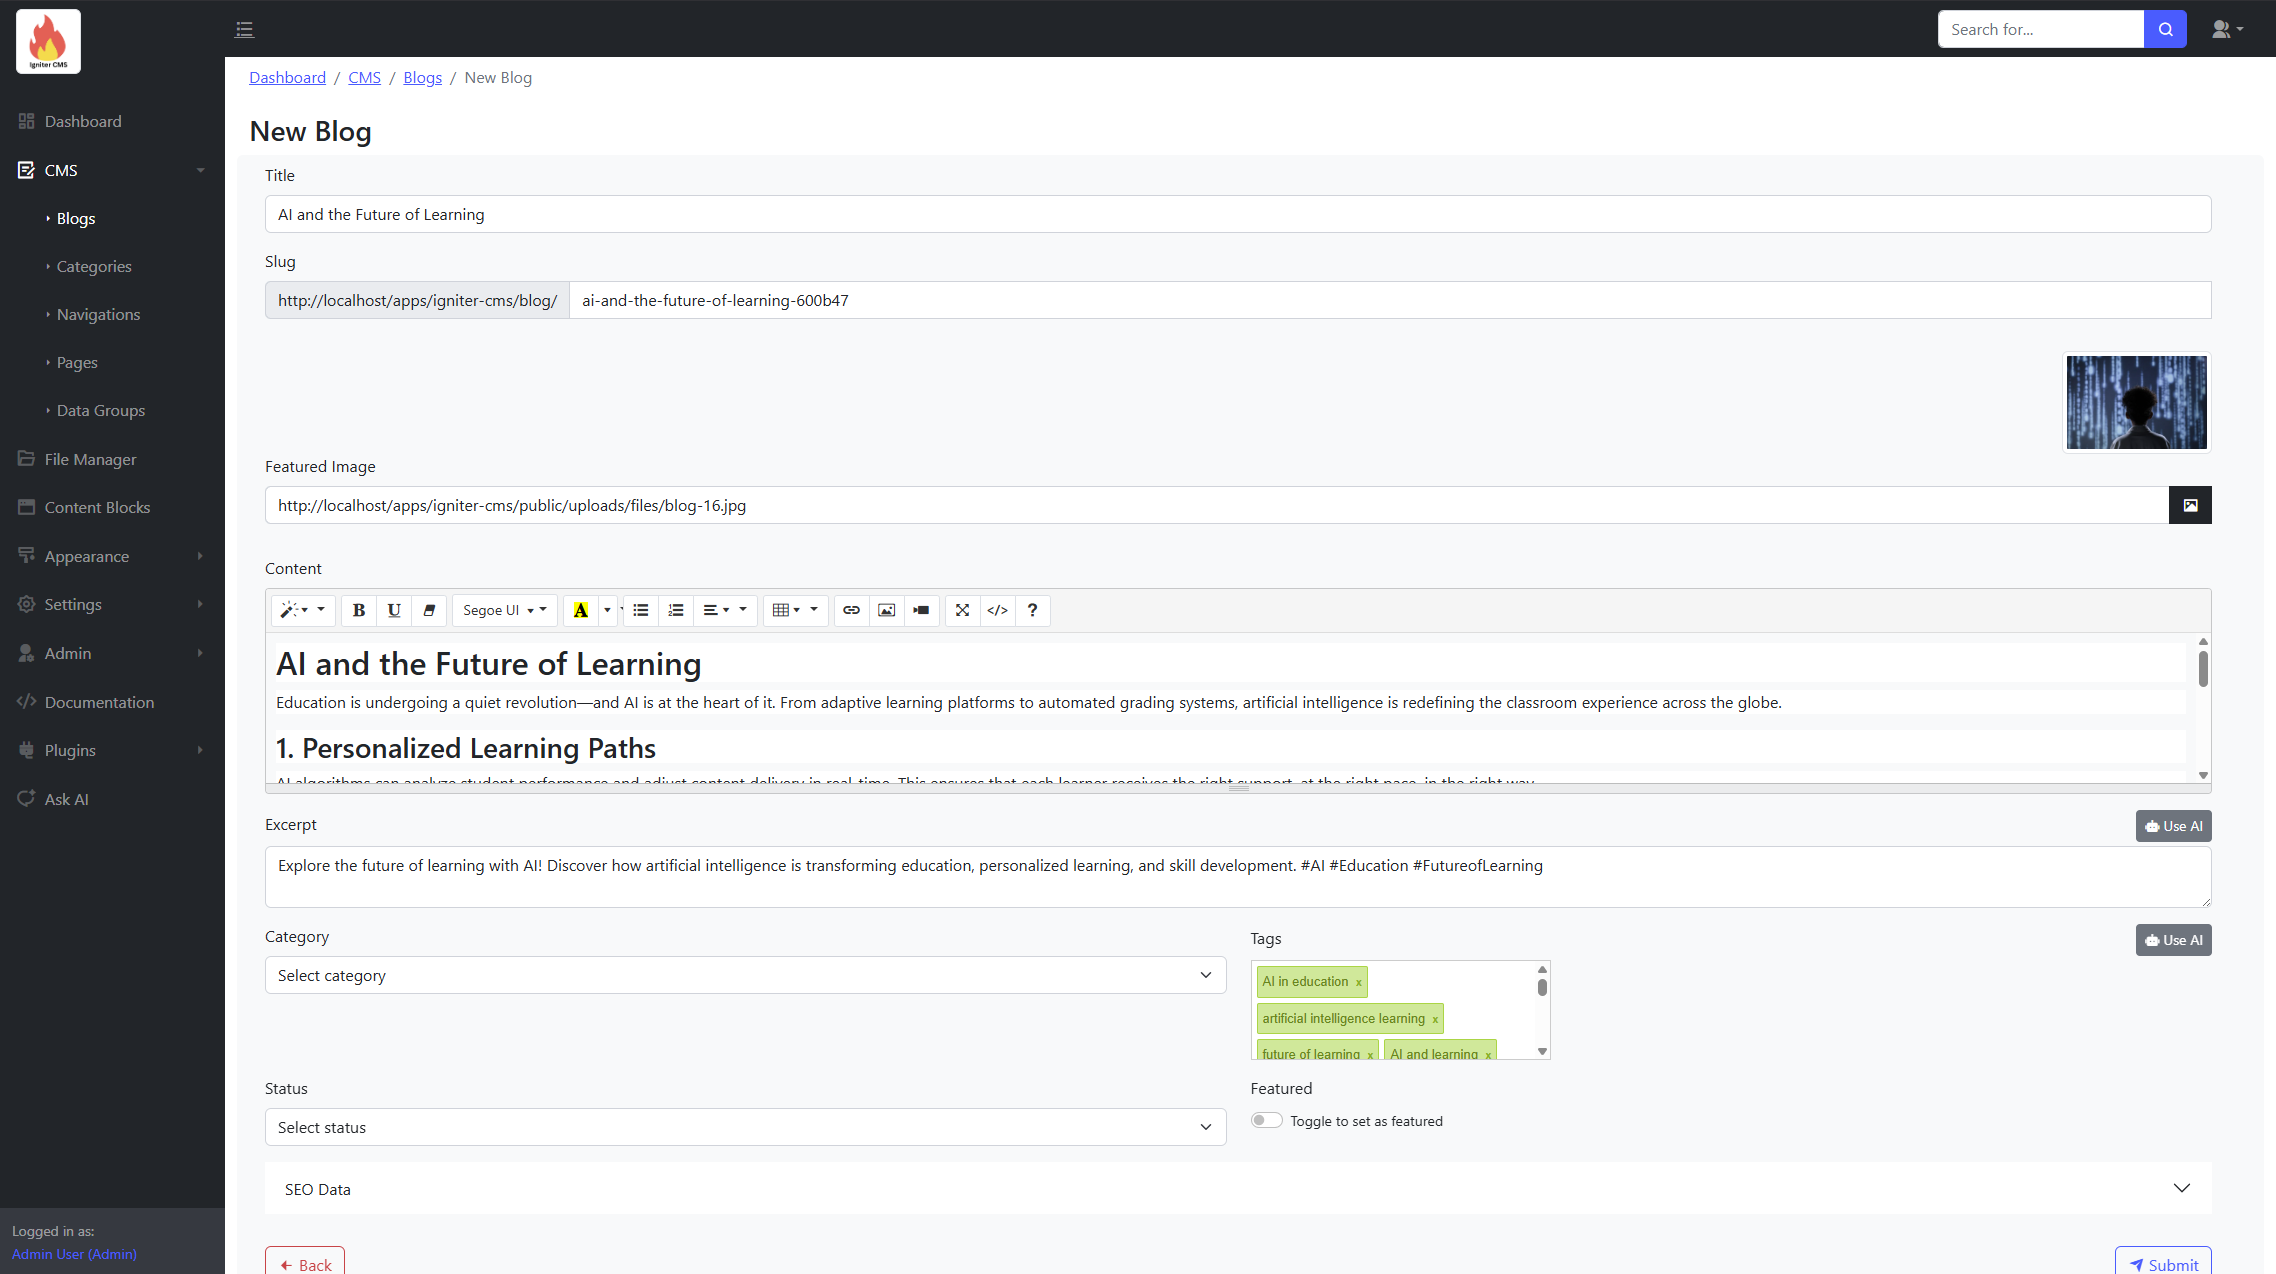
Blogs
Create, update, and remove blogs. Features include:
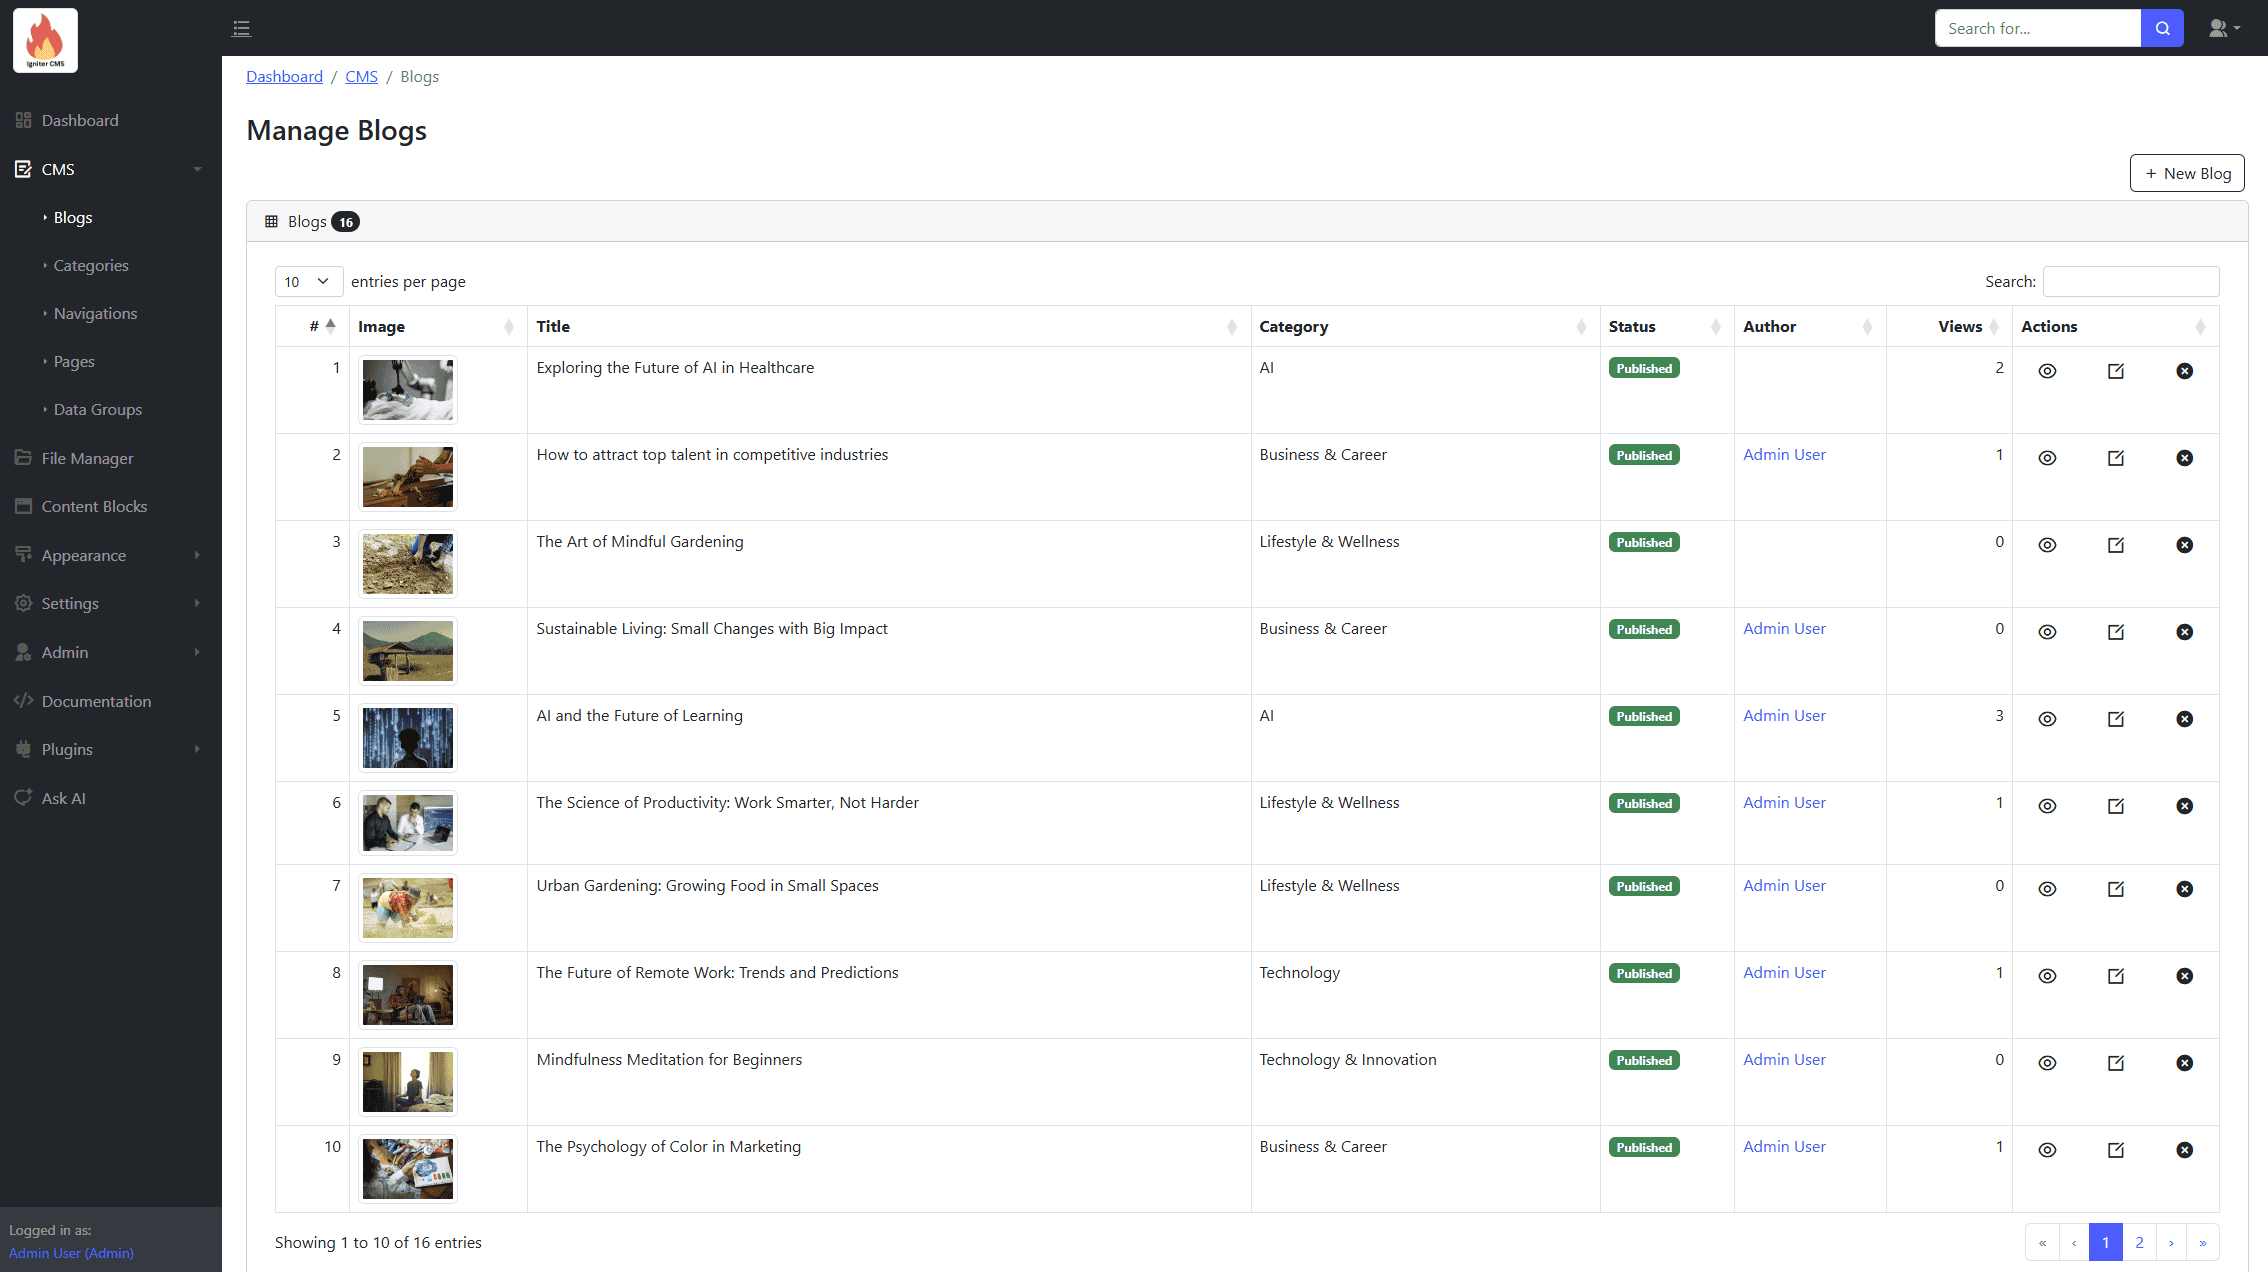
- Form for blog details, including title, content, and tags.
- Slug generation from the title.
- Image selection via input icon (copy file path under the "Actions" tab).
- Category selection and SEO data customization.
- Status toggles (e.g., Published or Draft).
Categories
Manage blog categories. Features include:
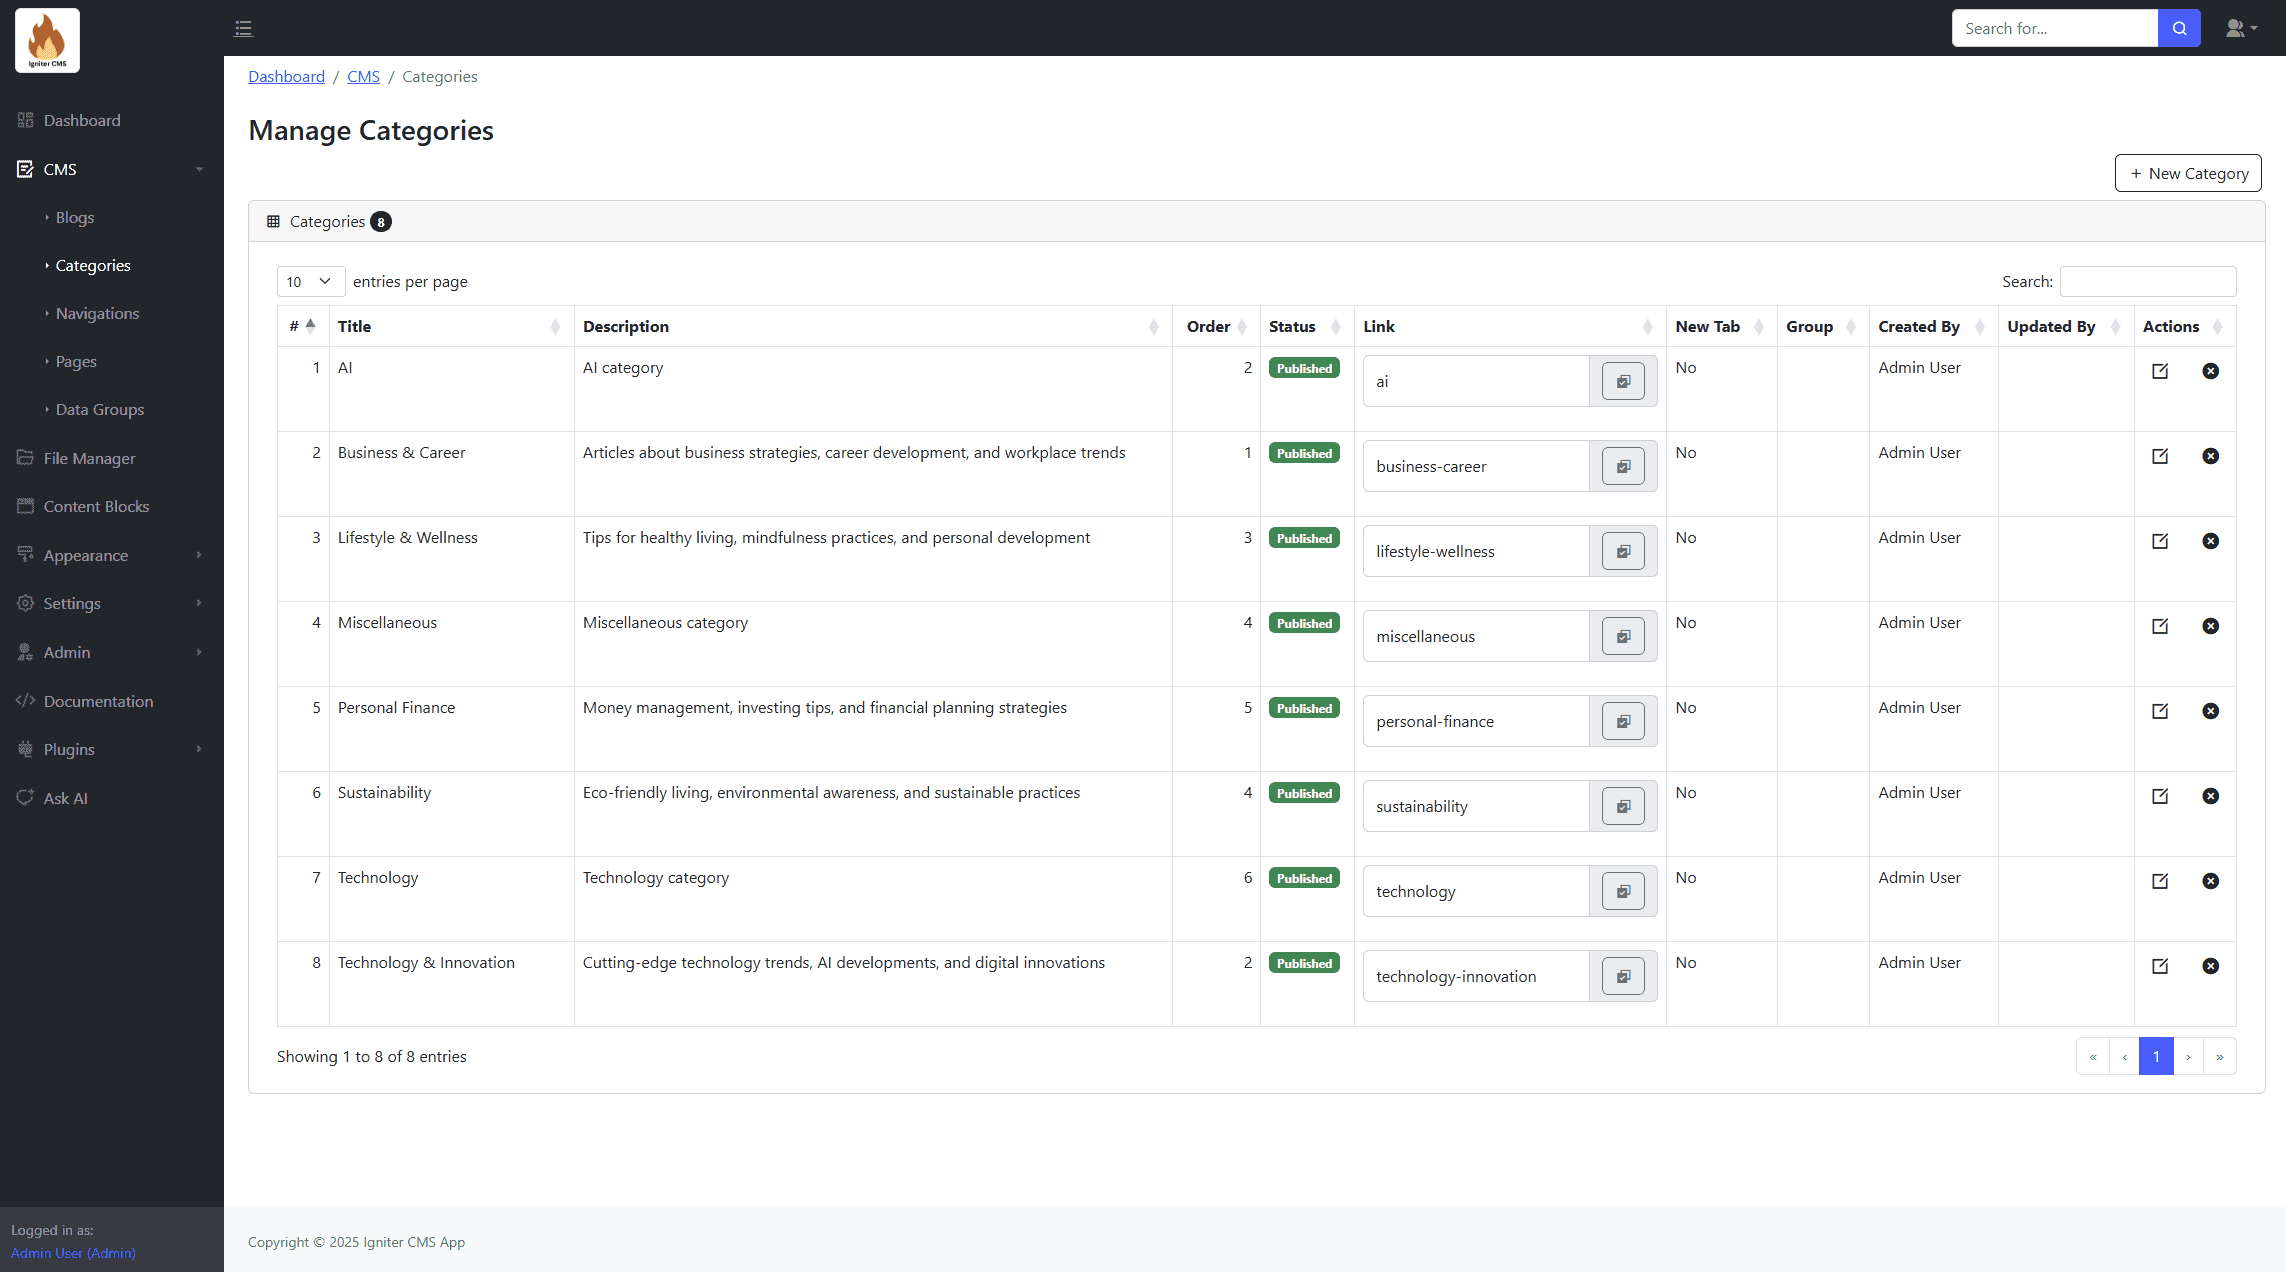
- Create, update, and remove categories.
Navigations
Manage site navigations. Features include:
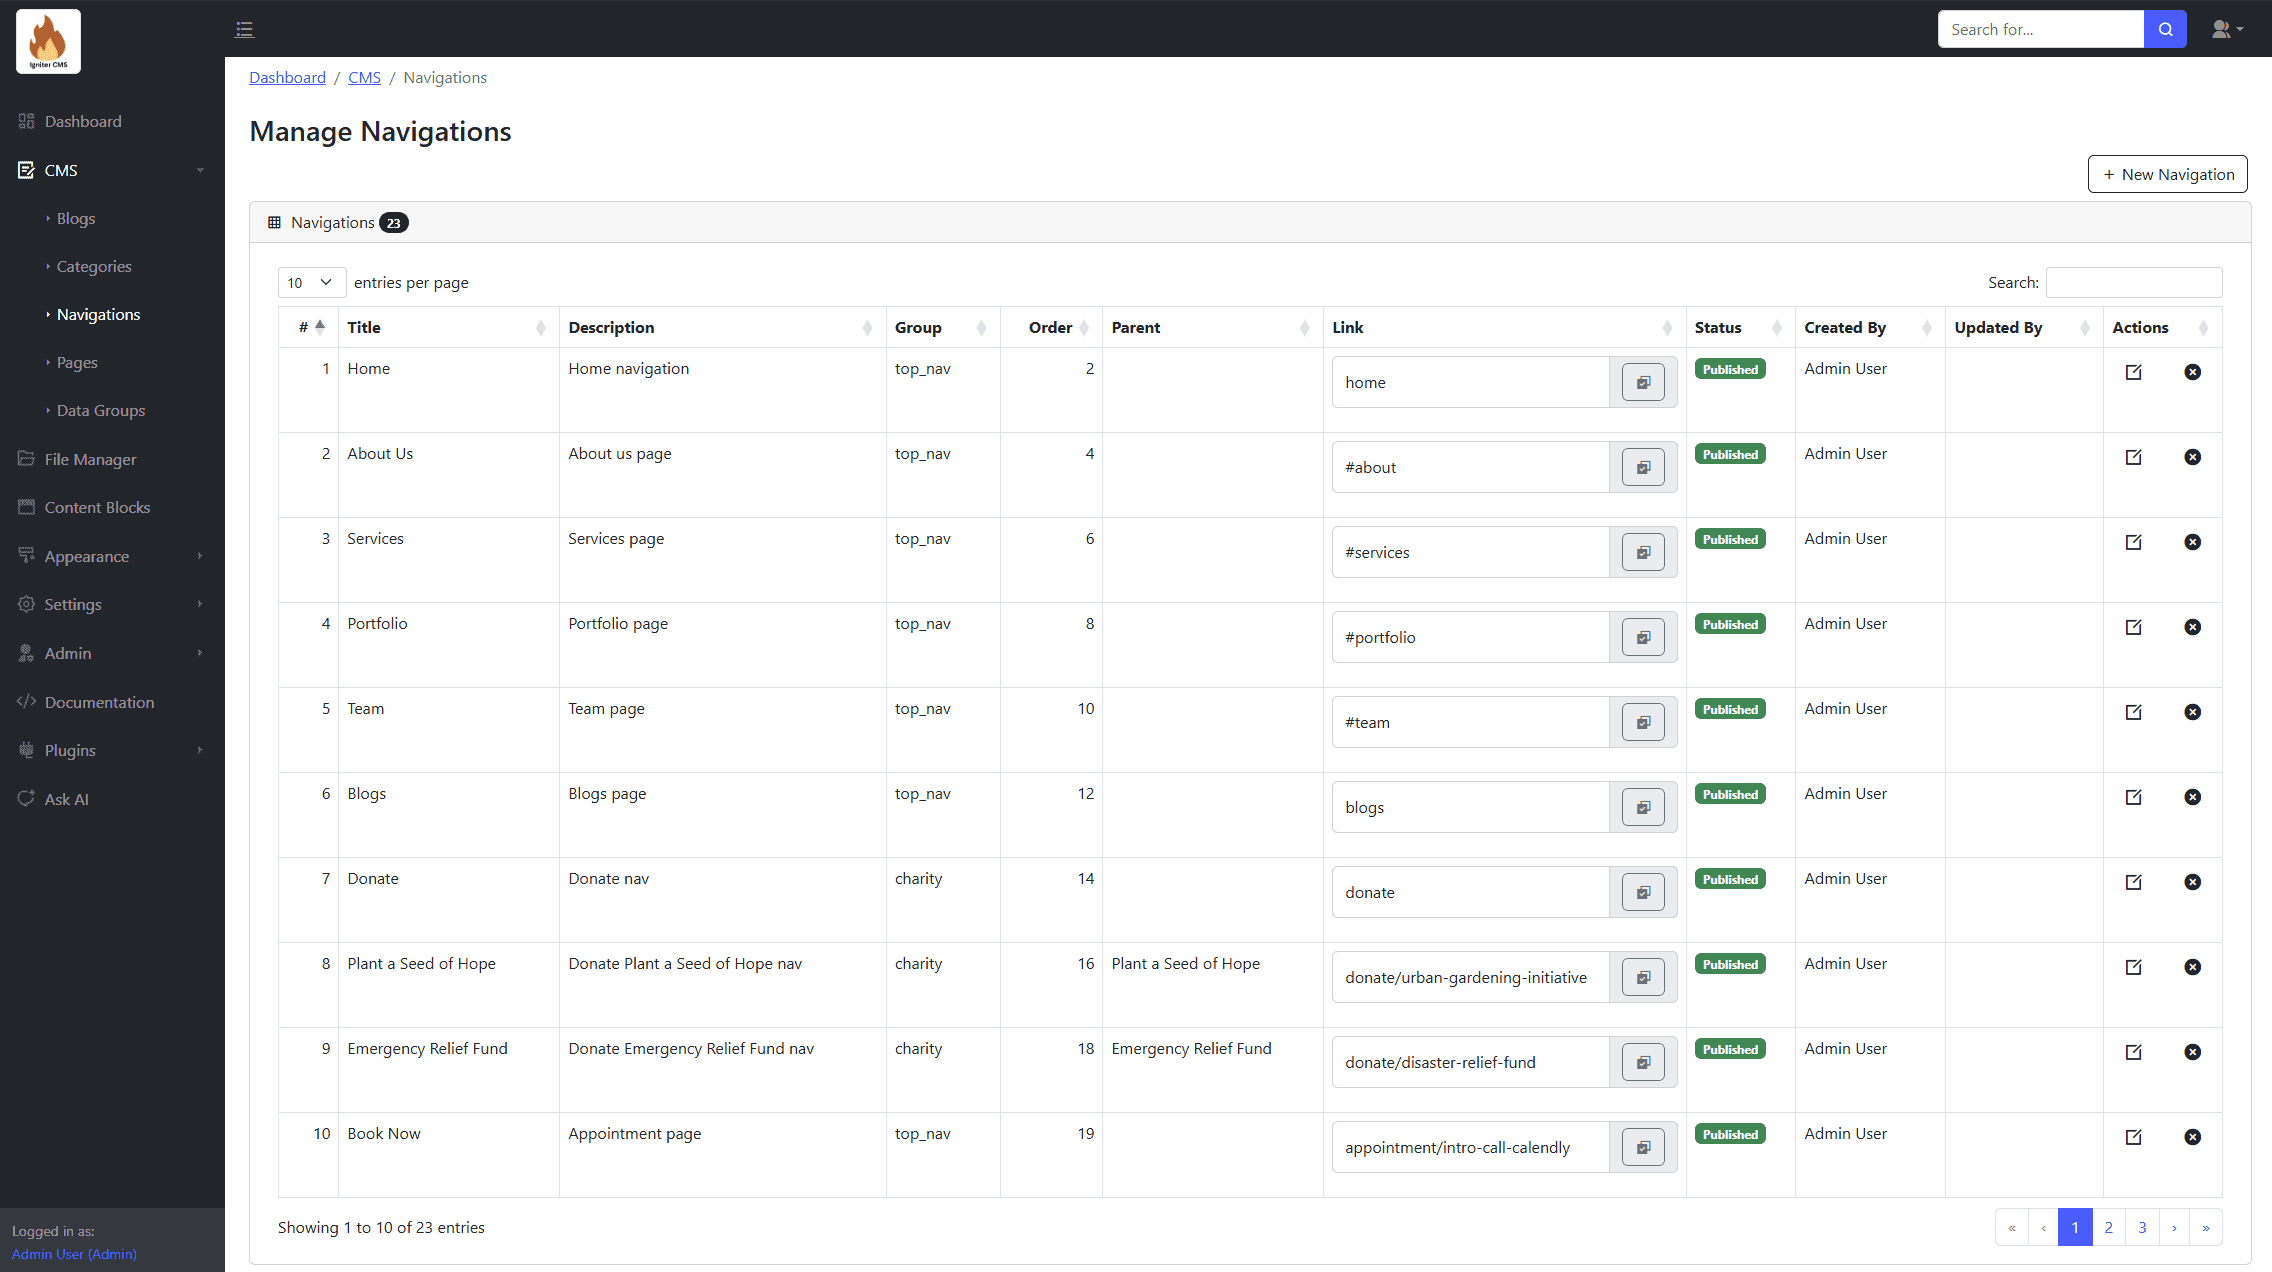
- Create, update, and remove navigations.
- Assign "group" for filtering or selection.
- Set parent navigation to create sub-navigations.
Pages
Create, update, and remove pages. Features include:

- Form for page details, including title and content.
- Slug generation from the title.
- SEO data customization.
- Status toggles (e.g., Published or Draft).
Data Groups
Organize and manage structured data entries for various purposes. Features include:
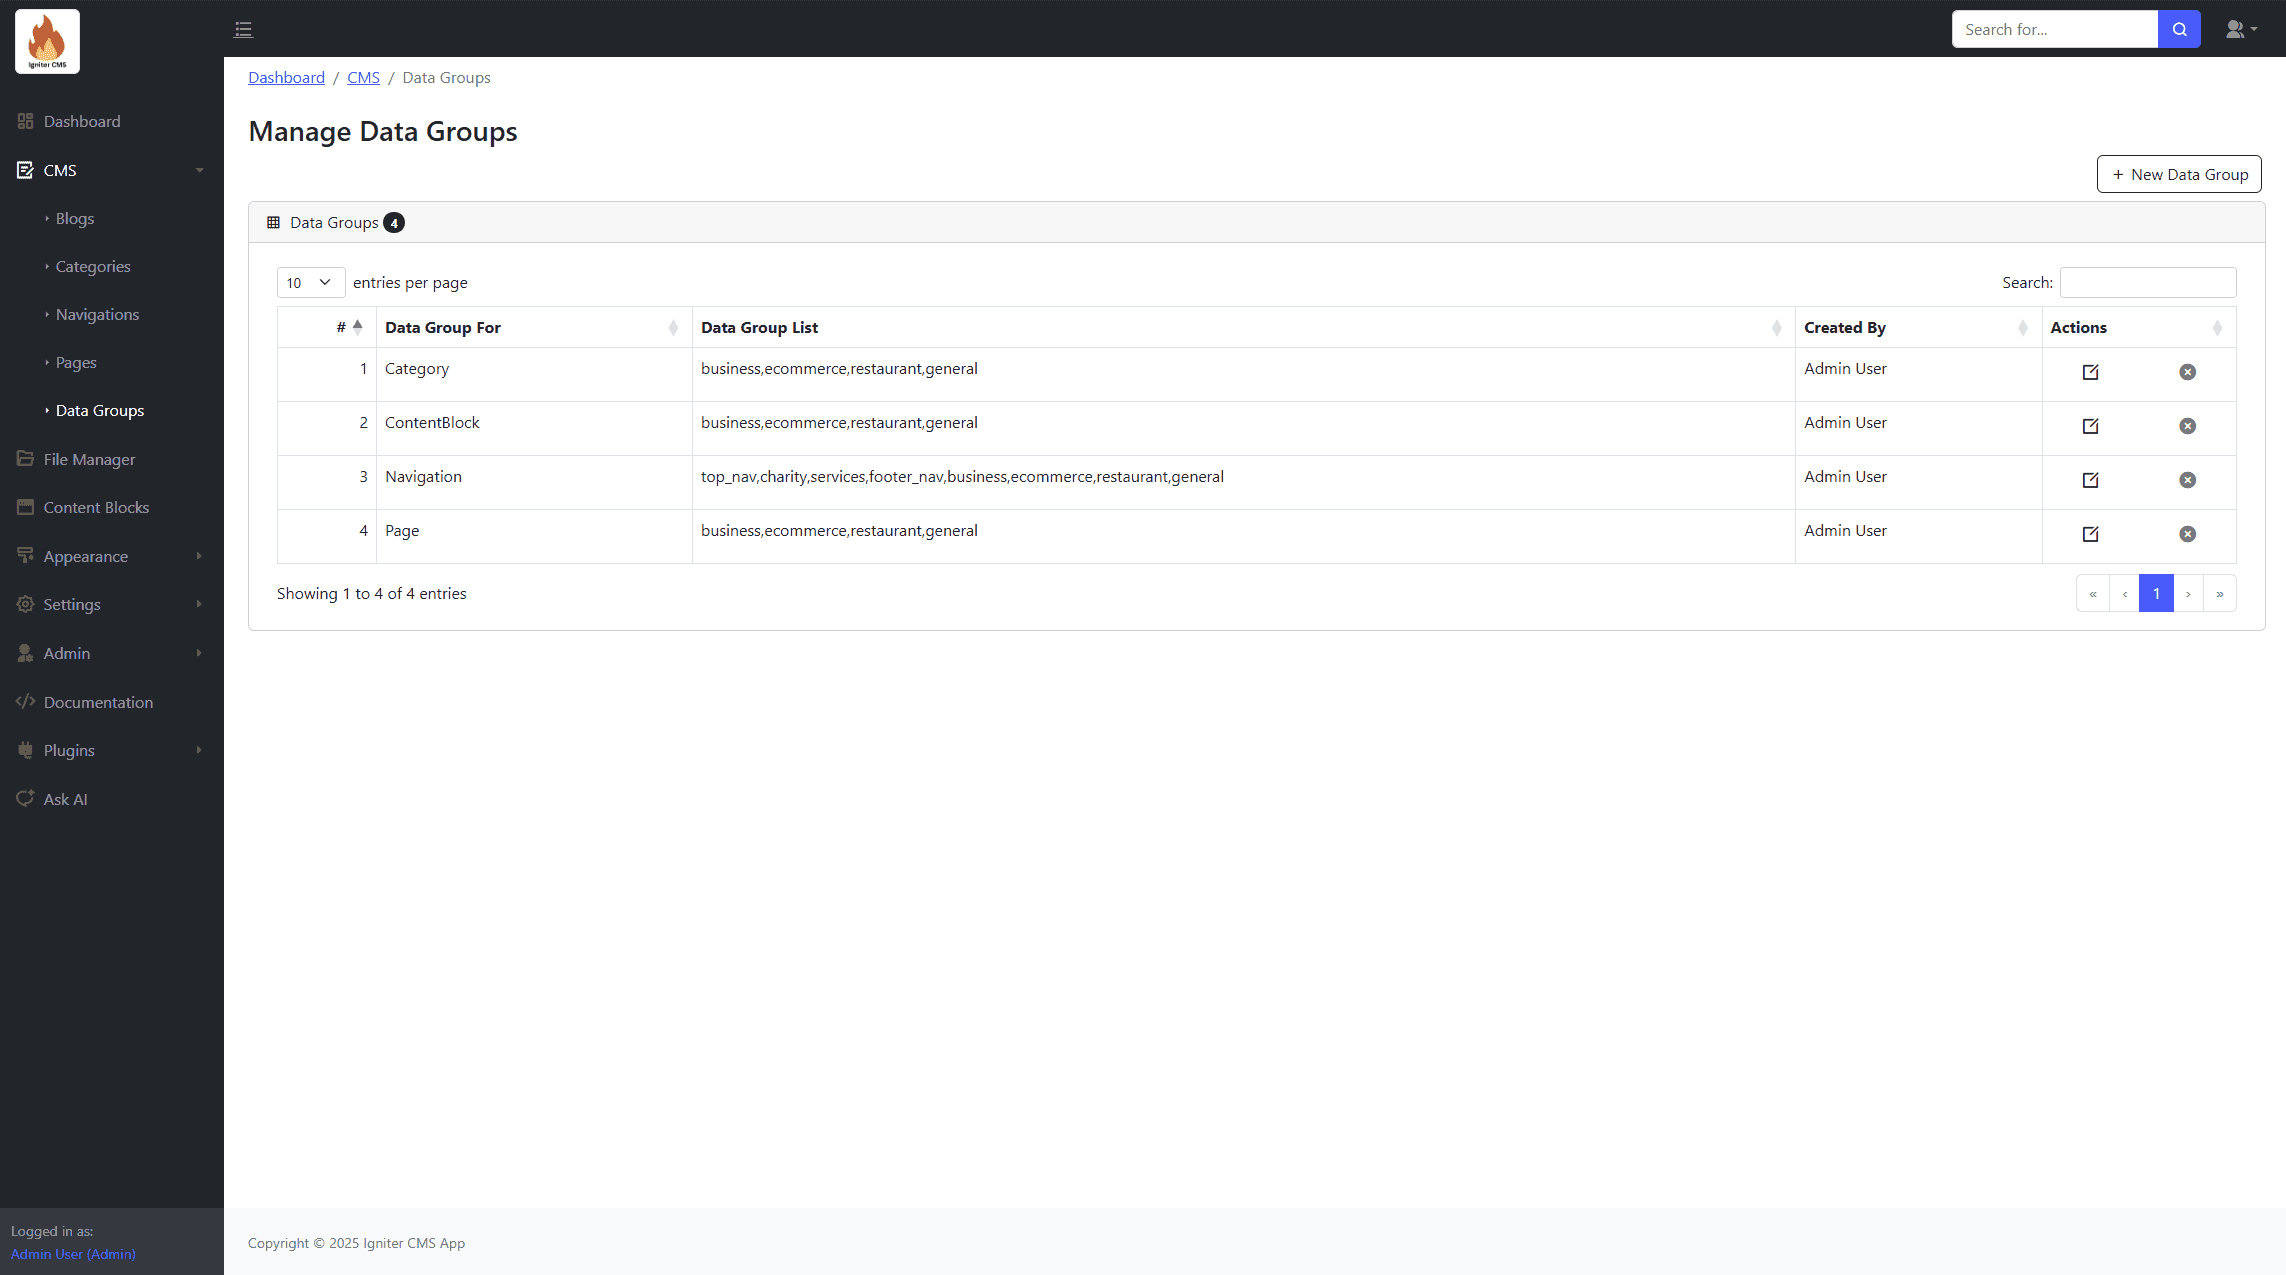
- Form for data group details.
- Structured data categorization.
- Export options for analytics.
- Fetching filters (e.g., for different themes).
Form Management
The Form Manager provides a robust toolset for creating, managing, and tracking various types of user-submitted forms directly from the admin panel.

Contact Messages
Use to manage contact form submissions

Bookings
Use to manage booking form submissions

Subscriptions
Use to manage subscription form submissions

File Manager
Upload, manage, and organize files (images, videos, audios, documents, etc.) for use within the application.
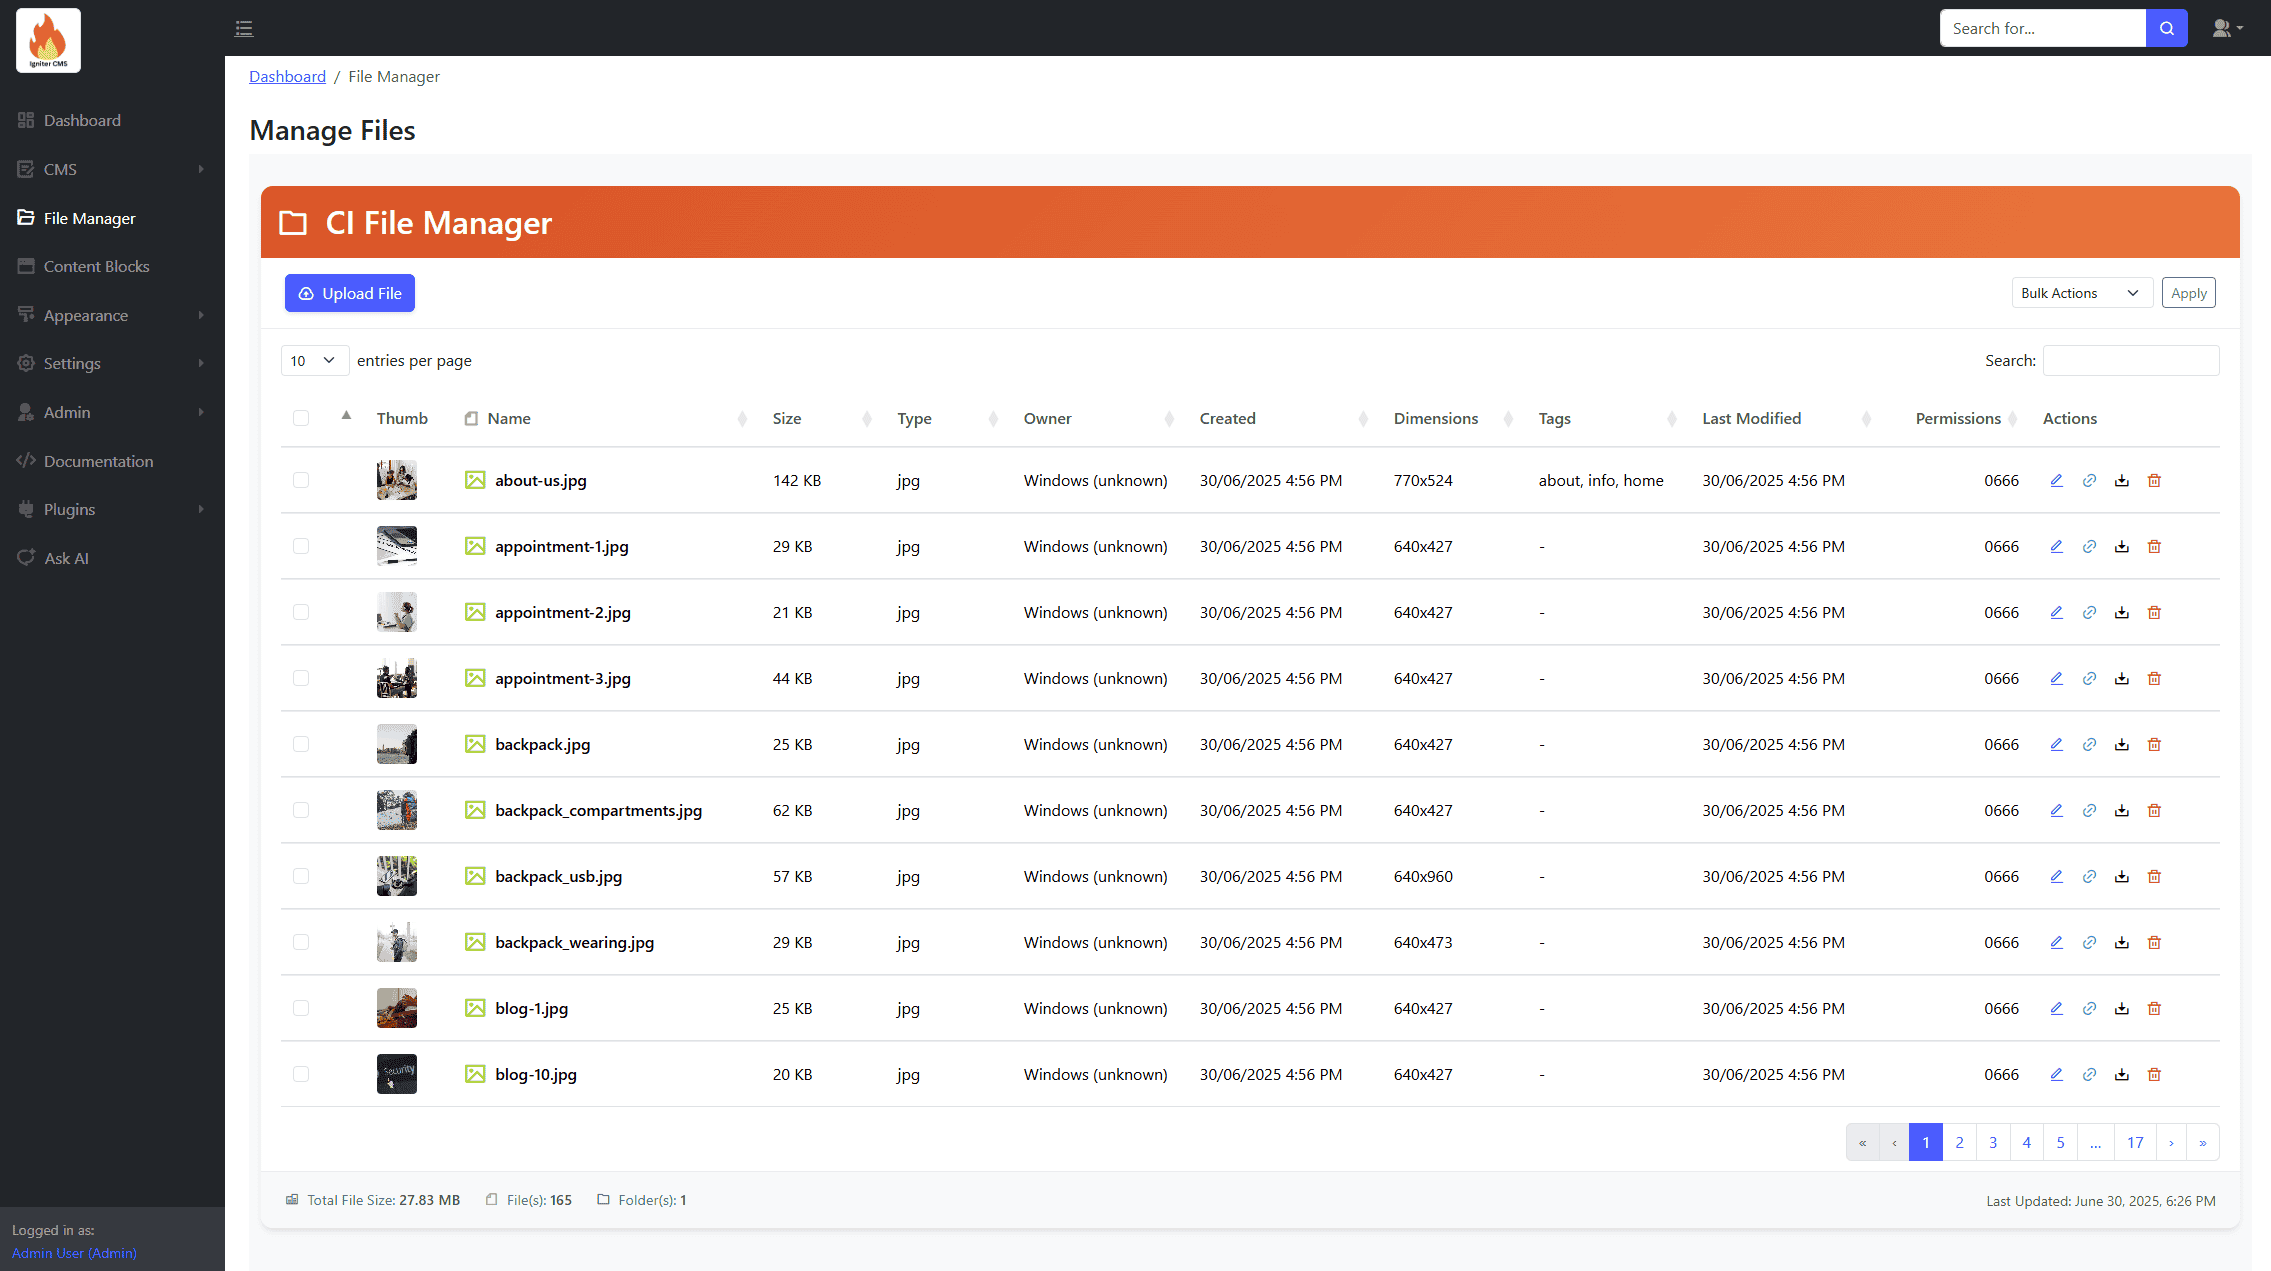
Upload, manage, and organize files, including images and documents.
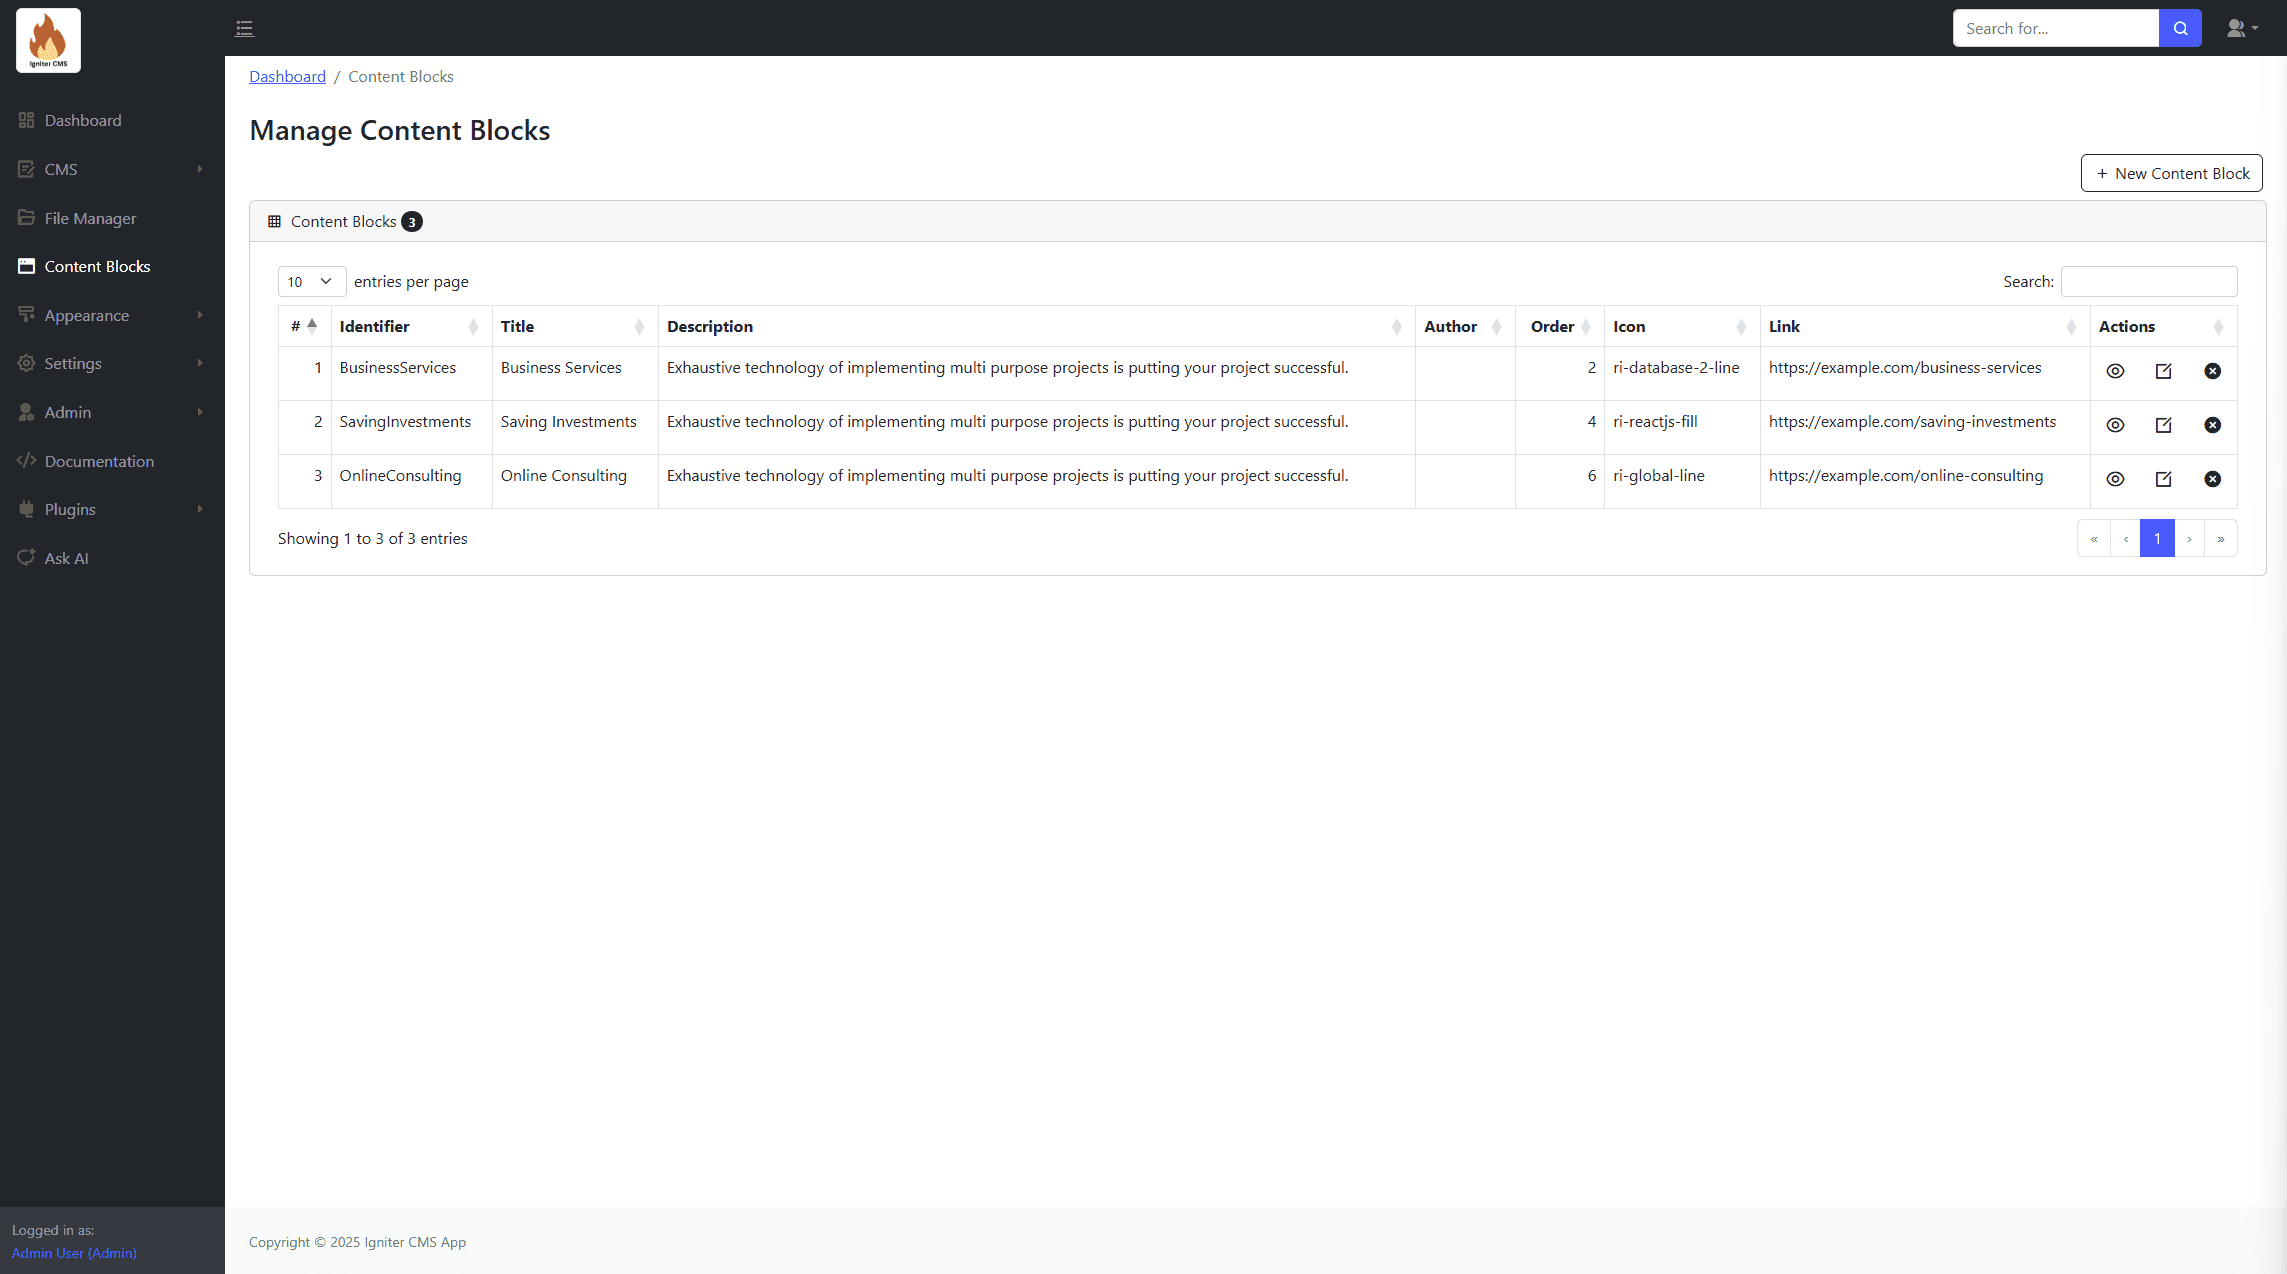
Content Blocks
Create reusable content blocks for other parts of the website.
Appearance
Themes
Manage application themes here. Add, Active or remove themes.
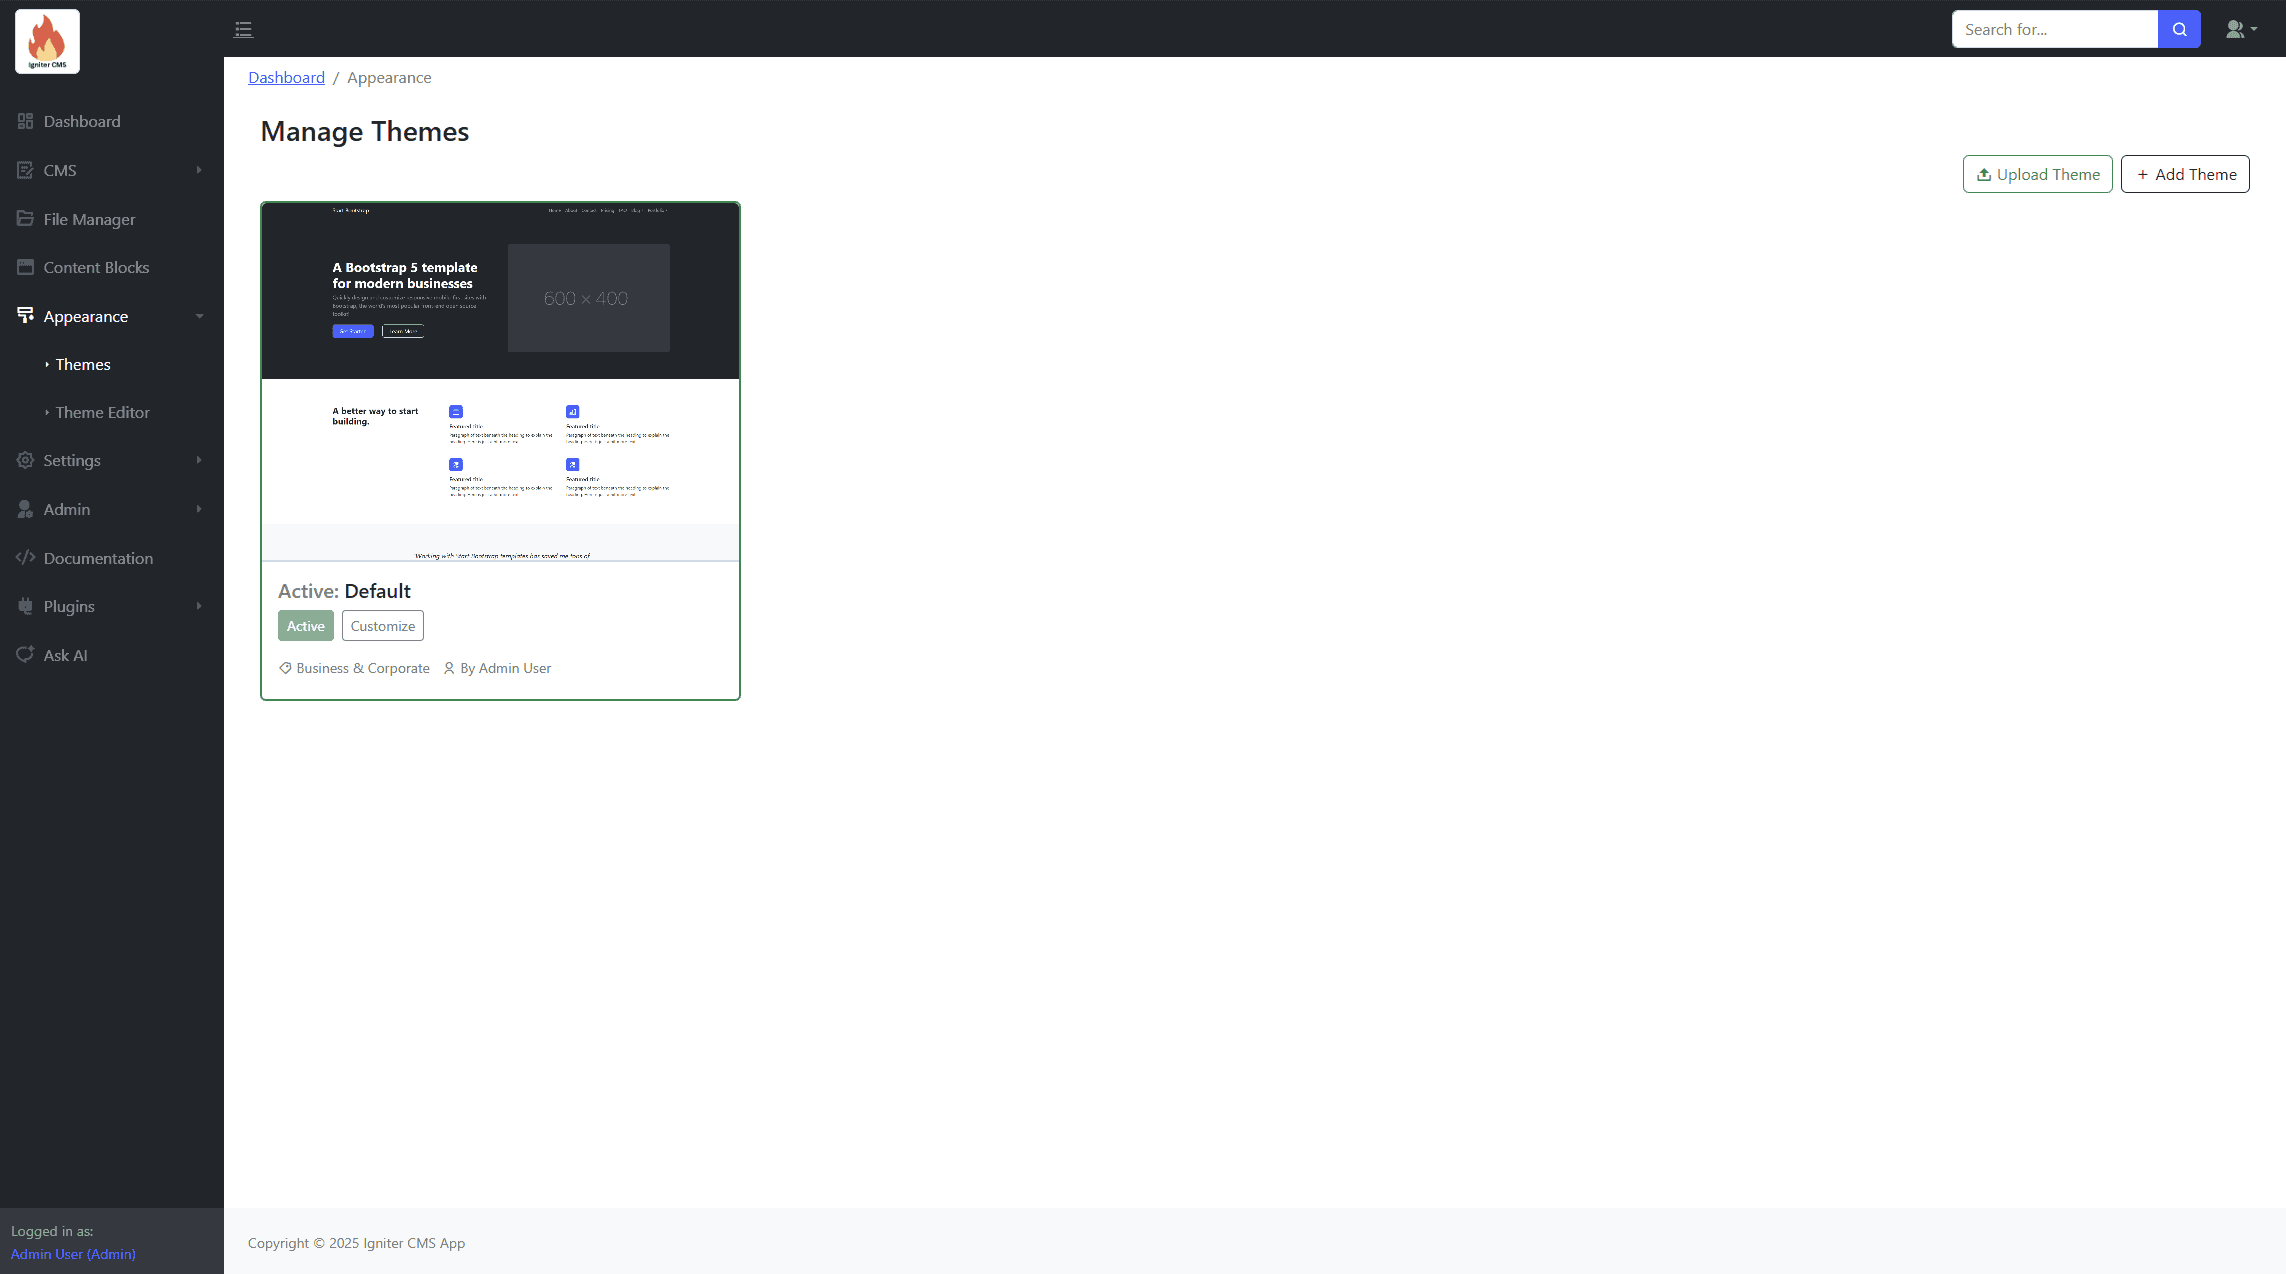
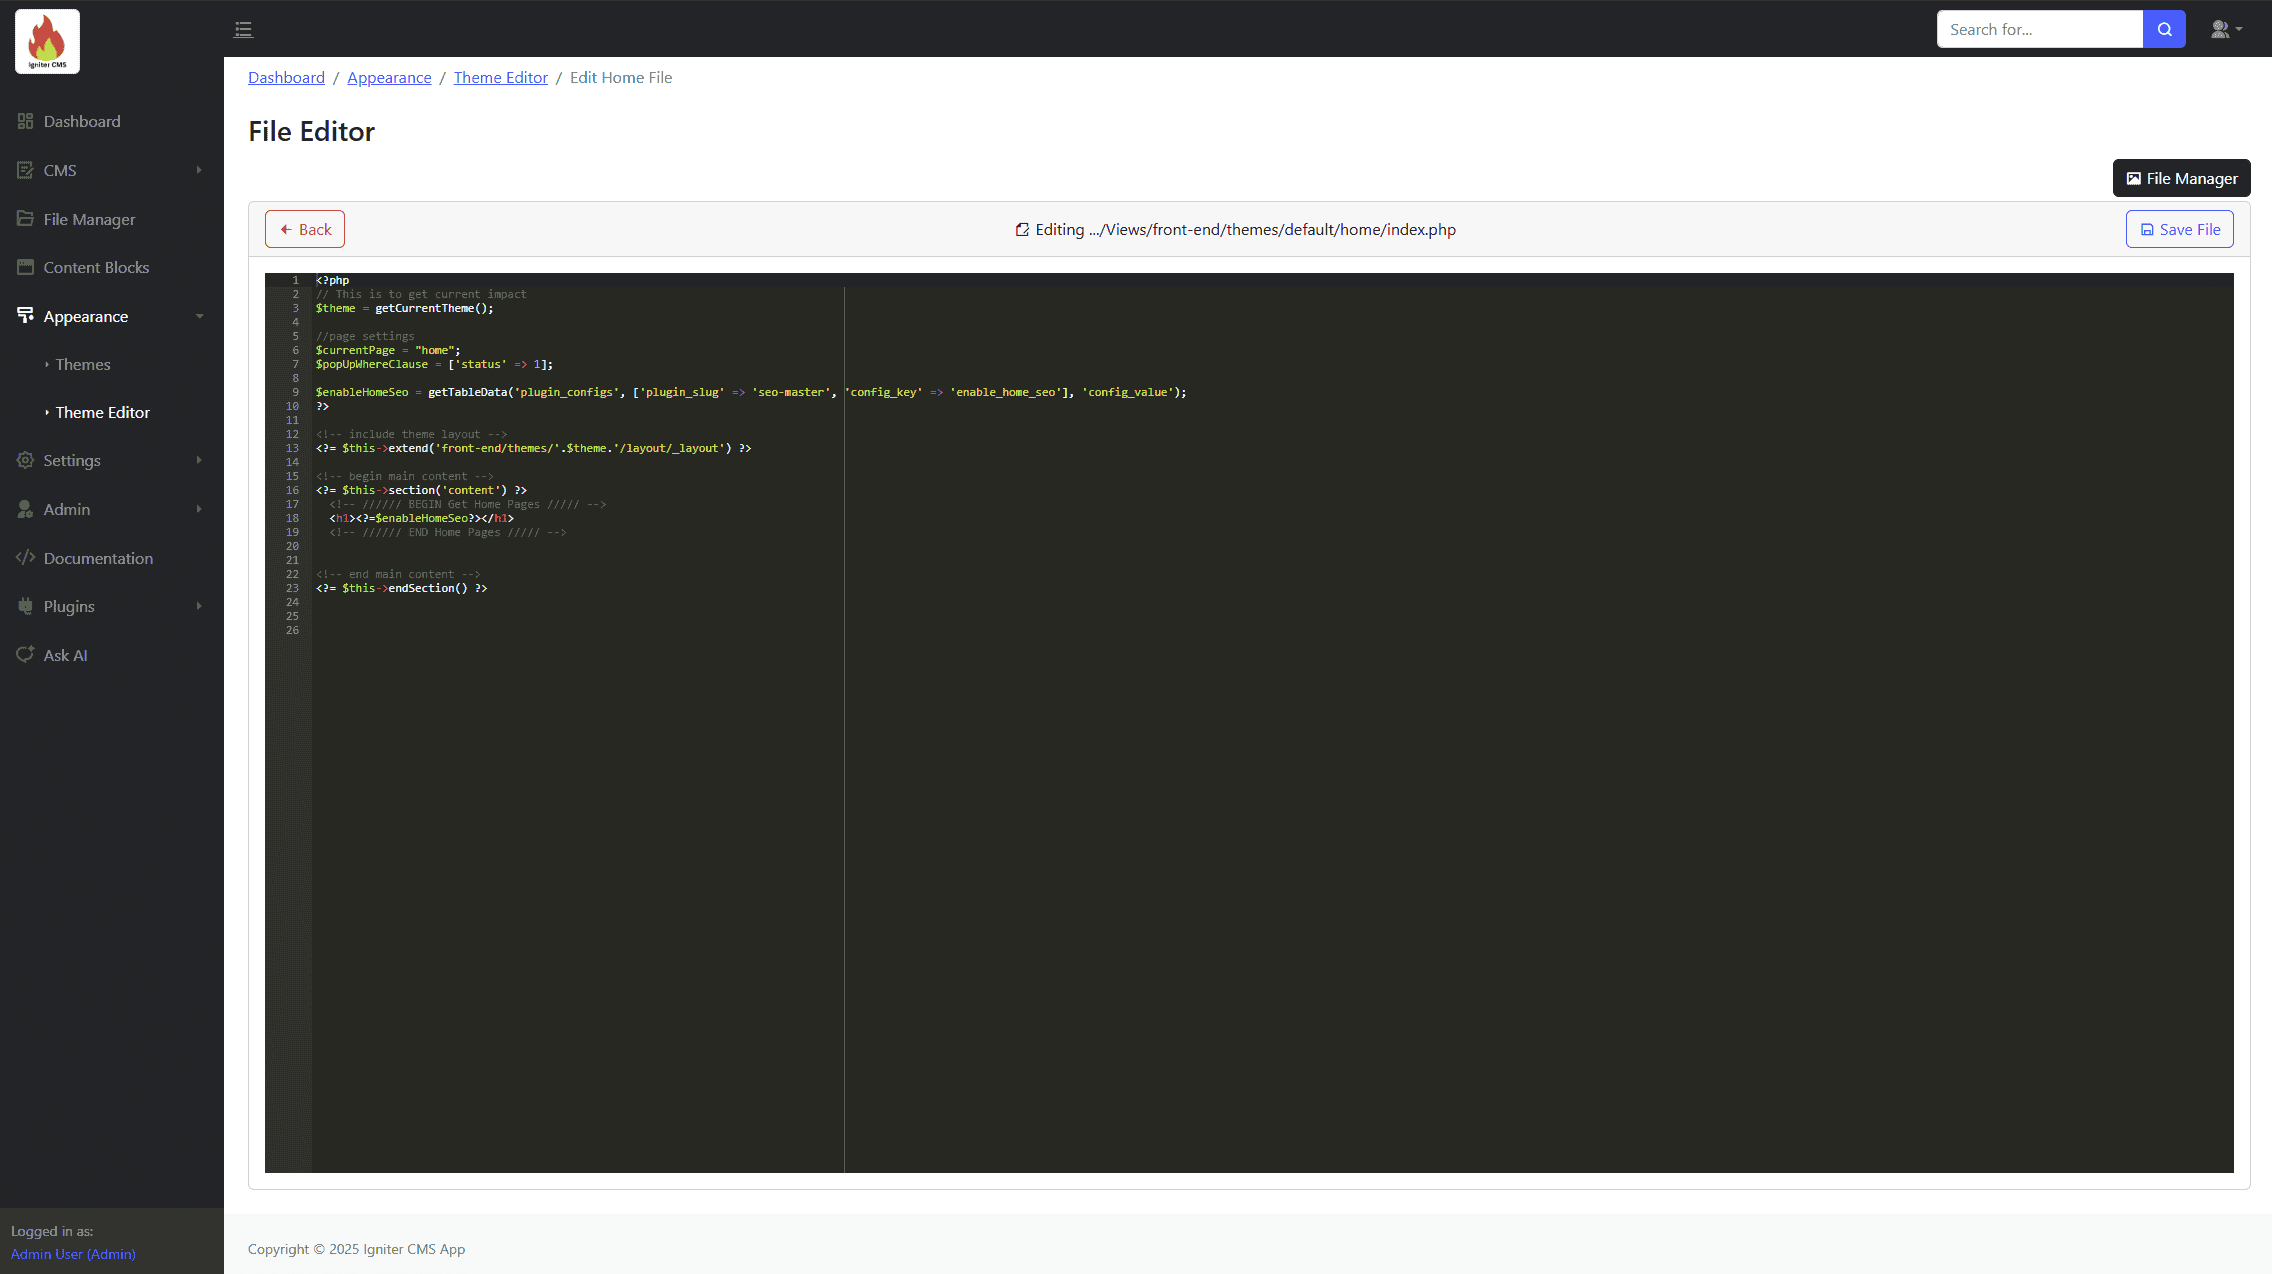
Theme Editor
Edit theme files here. Uses code editor to edit file contents.
Theme Revisions & Version Control
The CMS includes a built-in versioning system for your theme files, allowing you to experiment with code changes safely and revert to previous versions if something goes wrong.
1. Creating a Revision
Revisions are created automatically whenever you save a file in the Theme Editor:
- Go to Appearance > Theme Editor (
/account/appearance/theme-editor). - Select the file you wish to edit (e.g.,
_layout.phporsite.css). - Make your changes and click the "Save File" button. The system will instantly archive the previous version of the code as a new revision.
2. Managing & Restoring Revisions
To view your history or restore an old version of your theme, navigate to Appearance > Revisions (/account/appearance/theme-editor/revisions).
- View History: You will see a list of all saved versions, timestamped and organized by file name.
- Copy & Restore: Click on a revision to view the code. You can copy the code from a previous version and paste it back into the active Theme Editor to restore your site's appearance.
Settings
This is the module for managing your account details and changing passwords
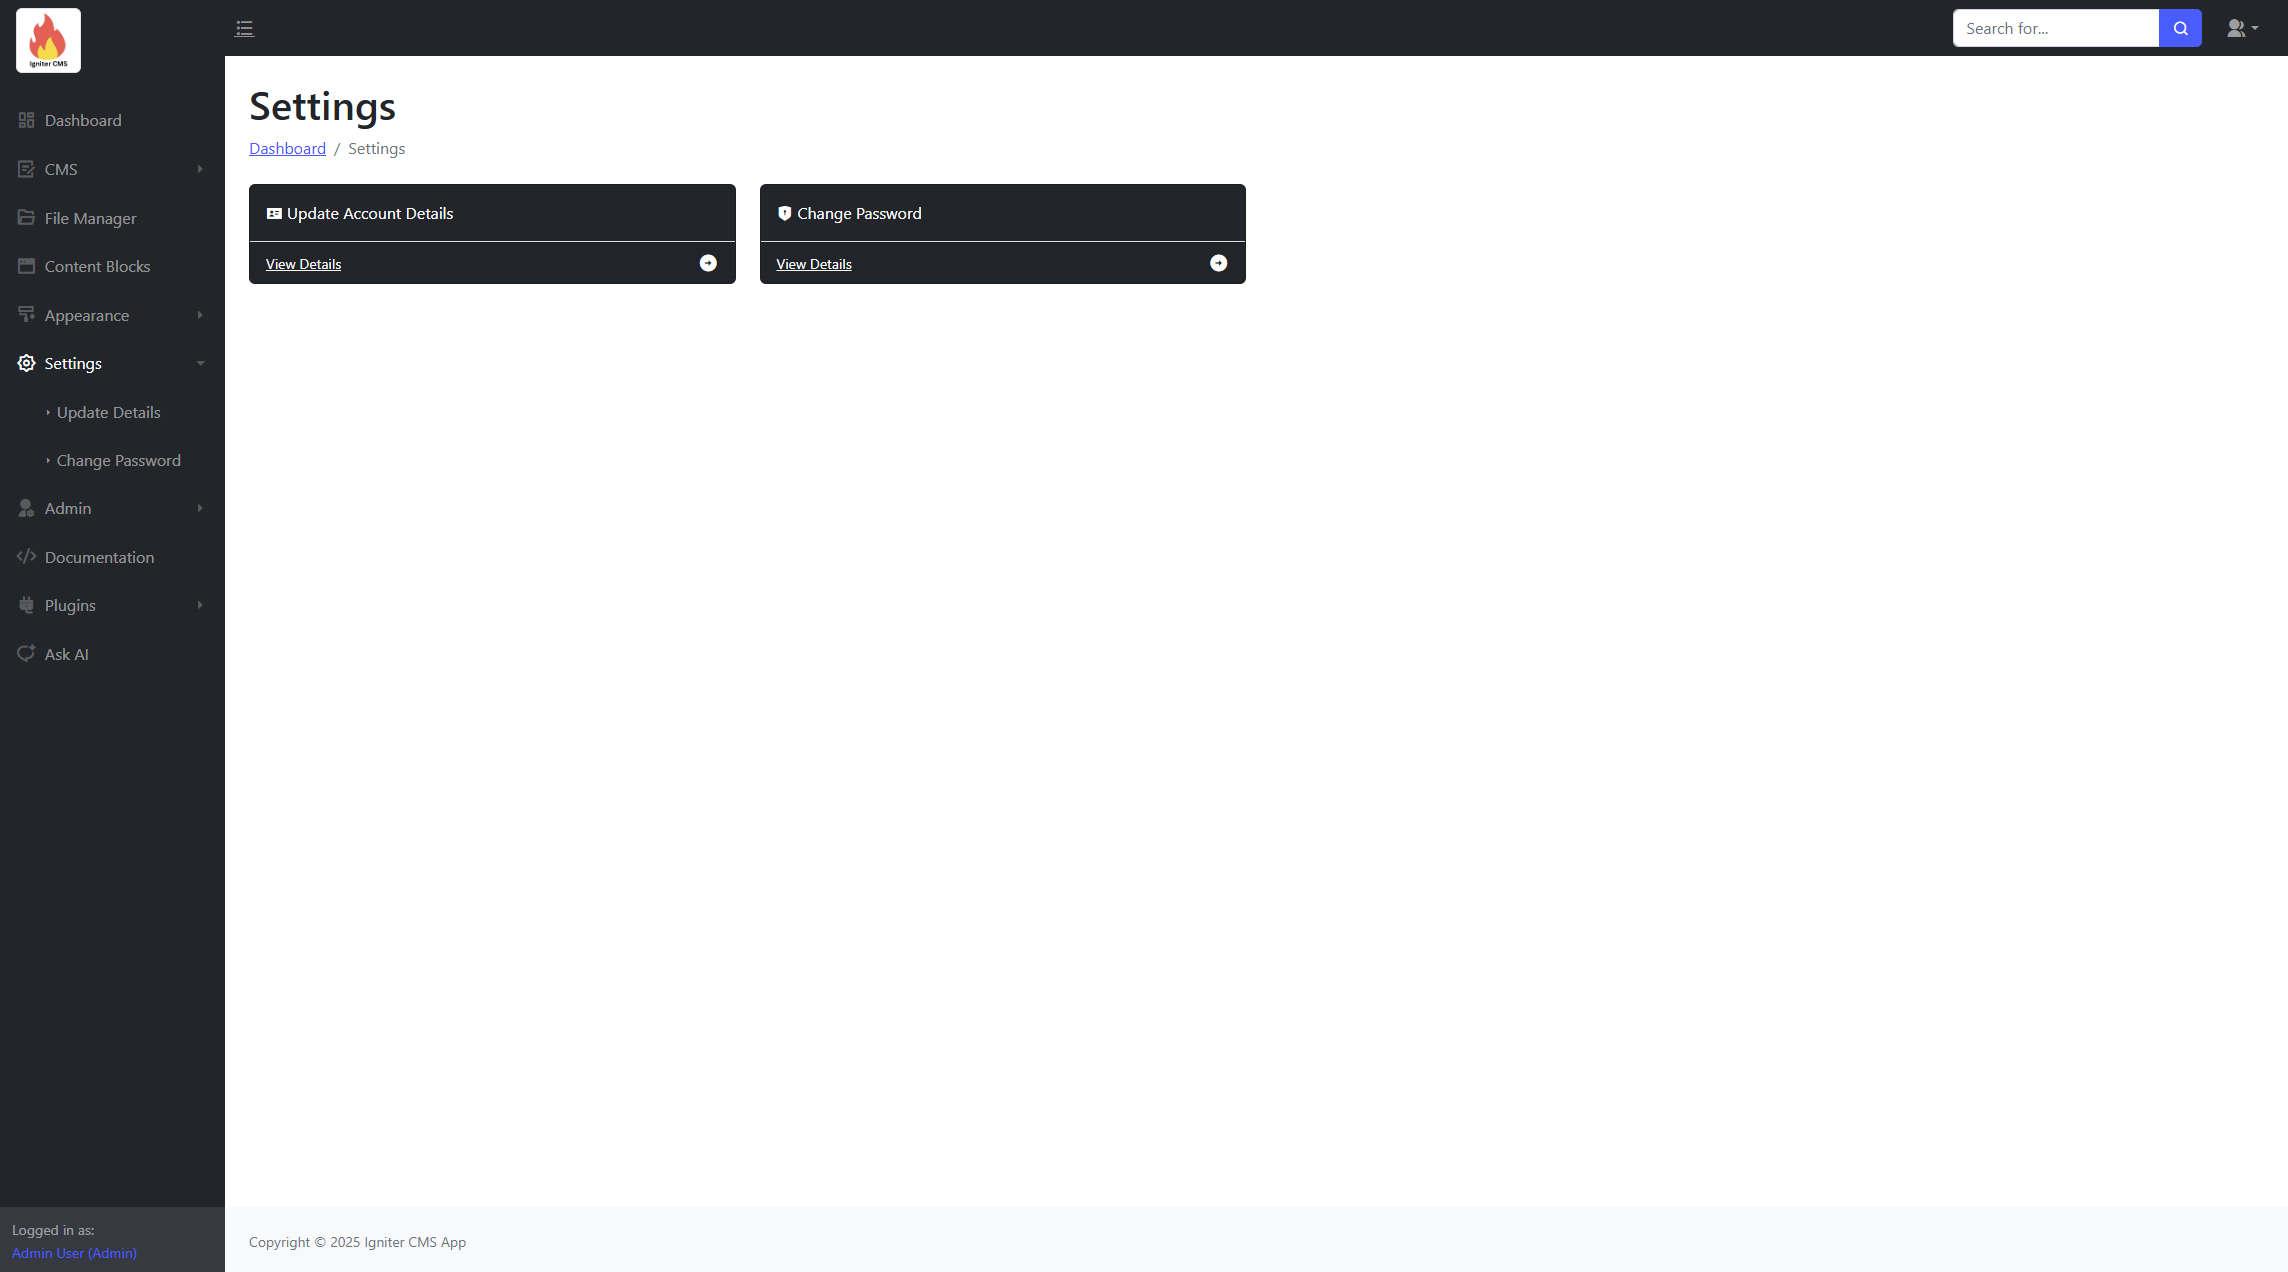
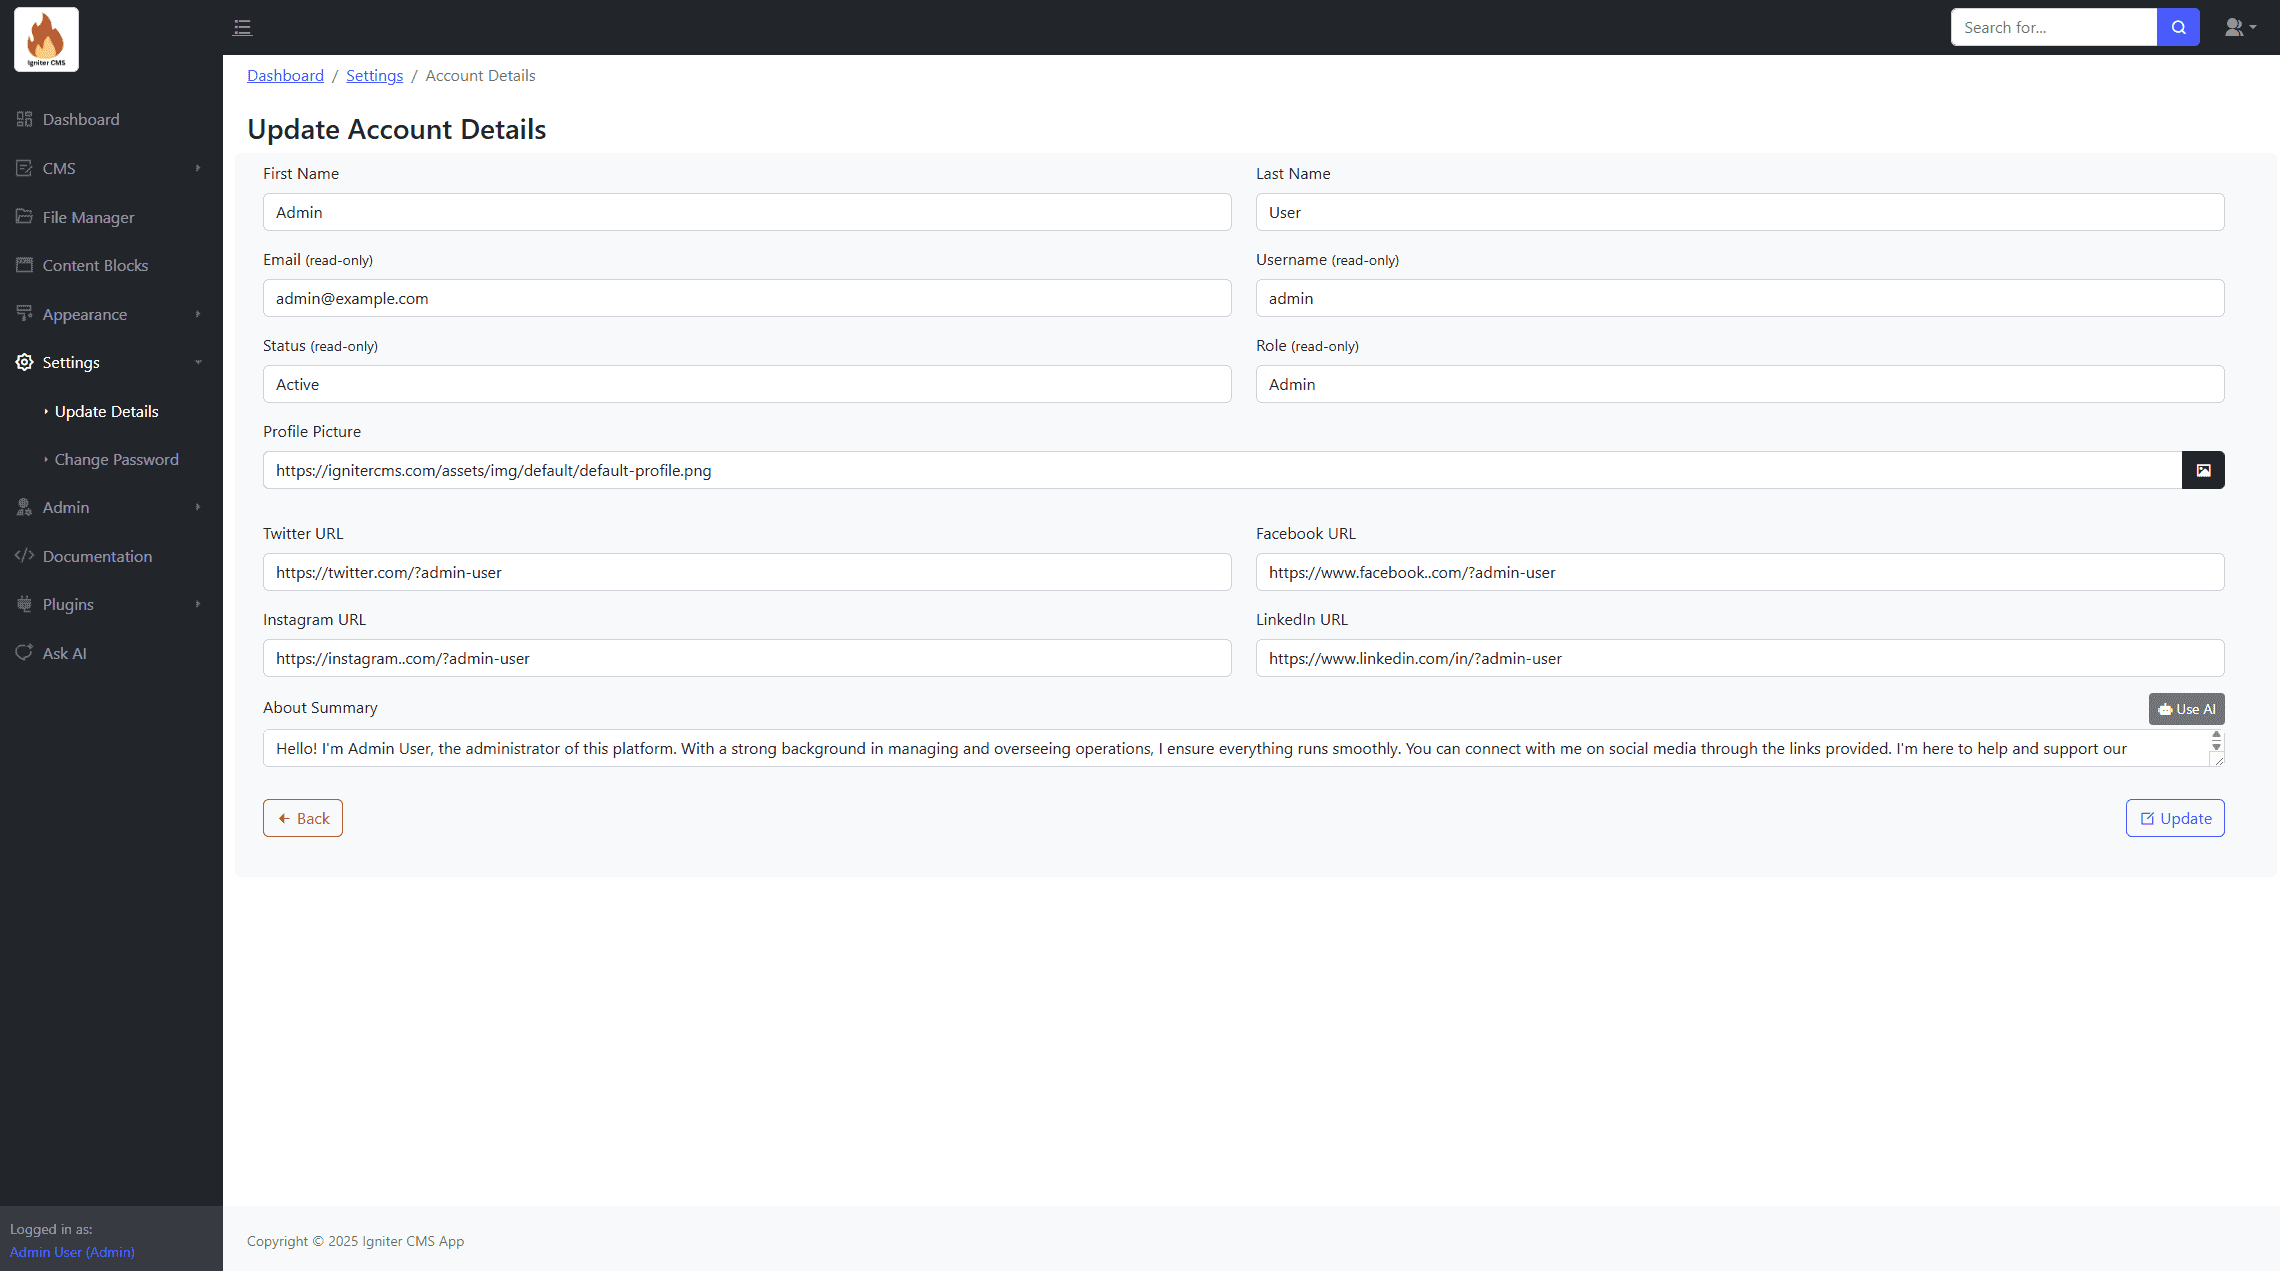
Update Details
Update your account information (name, bio, etc.).
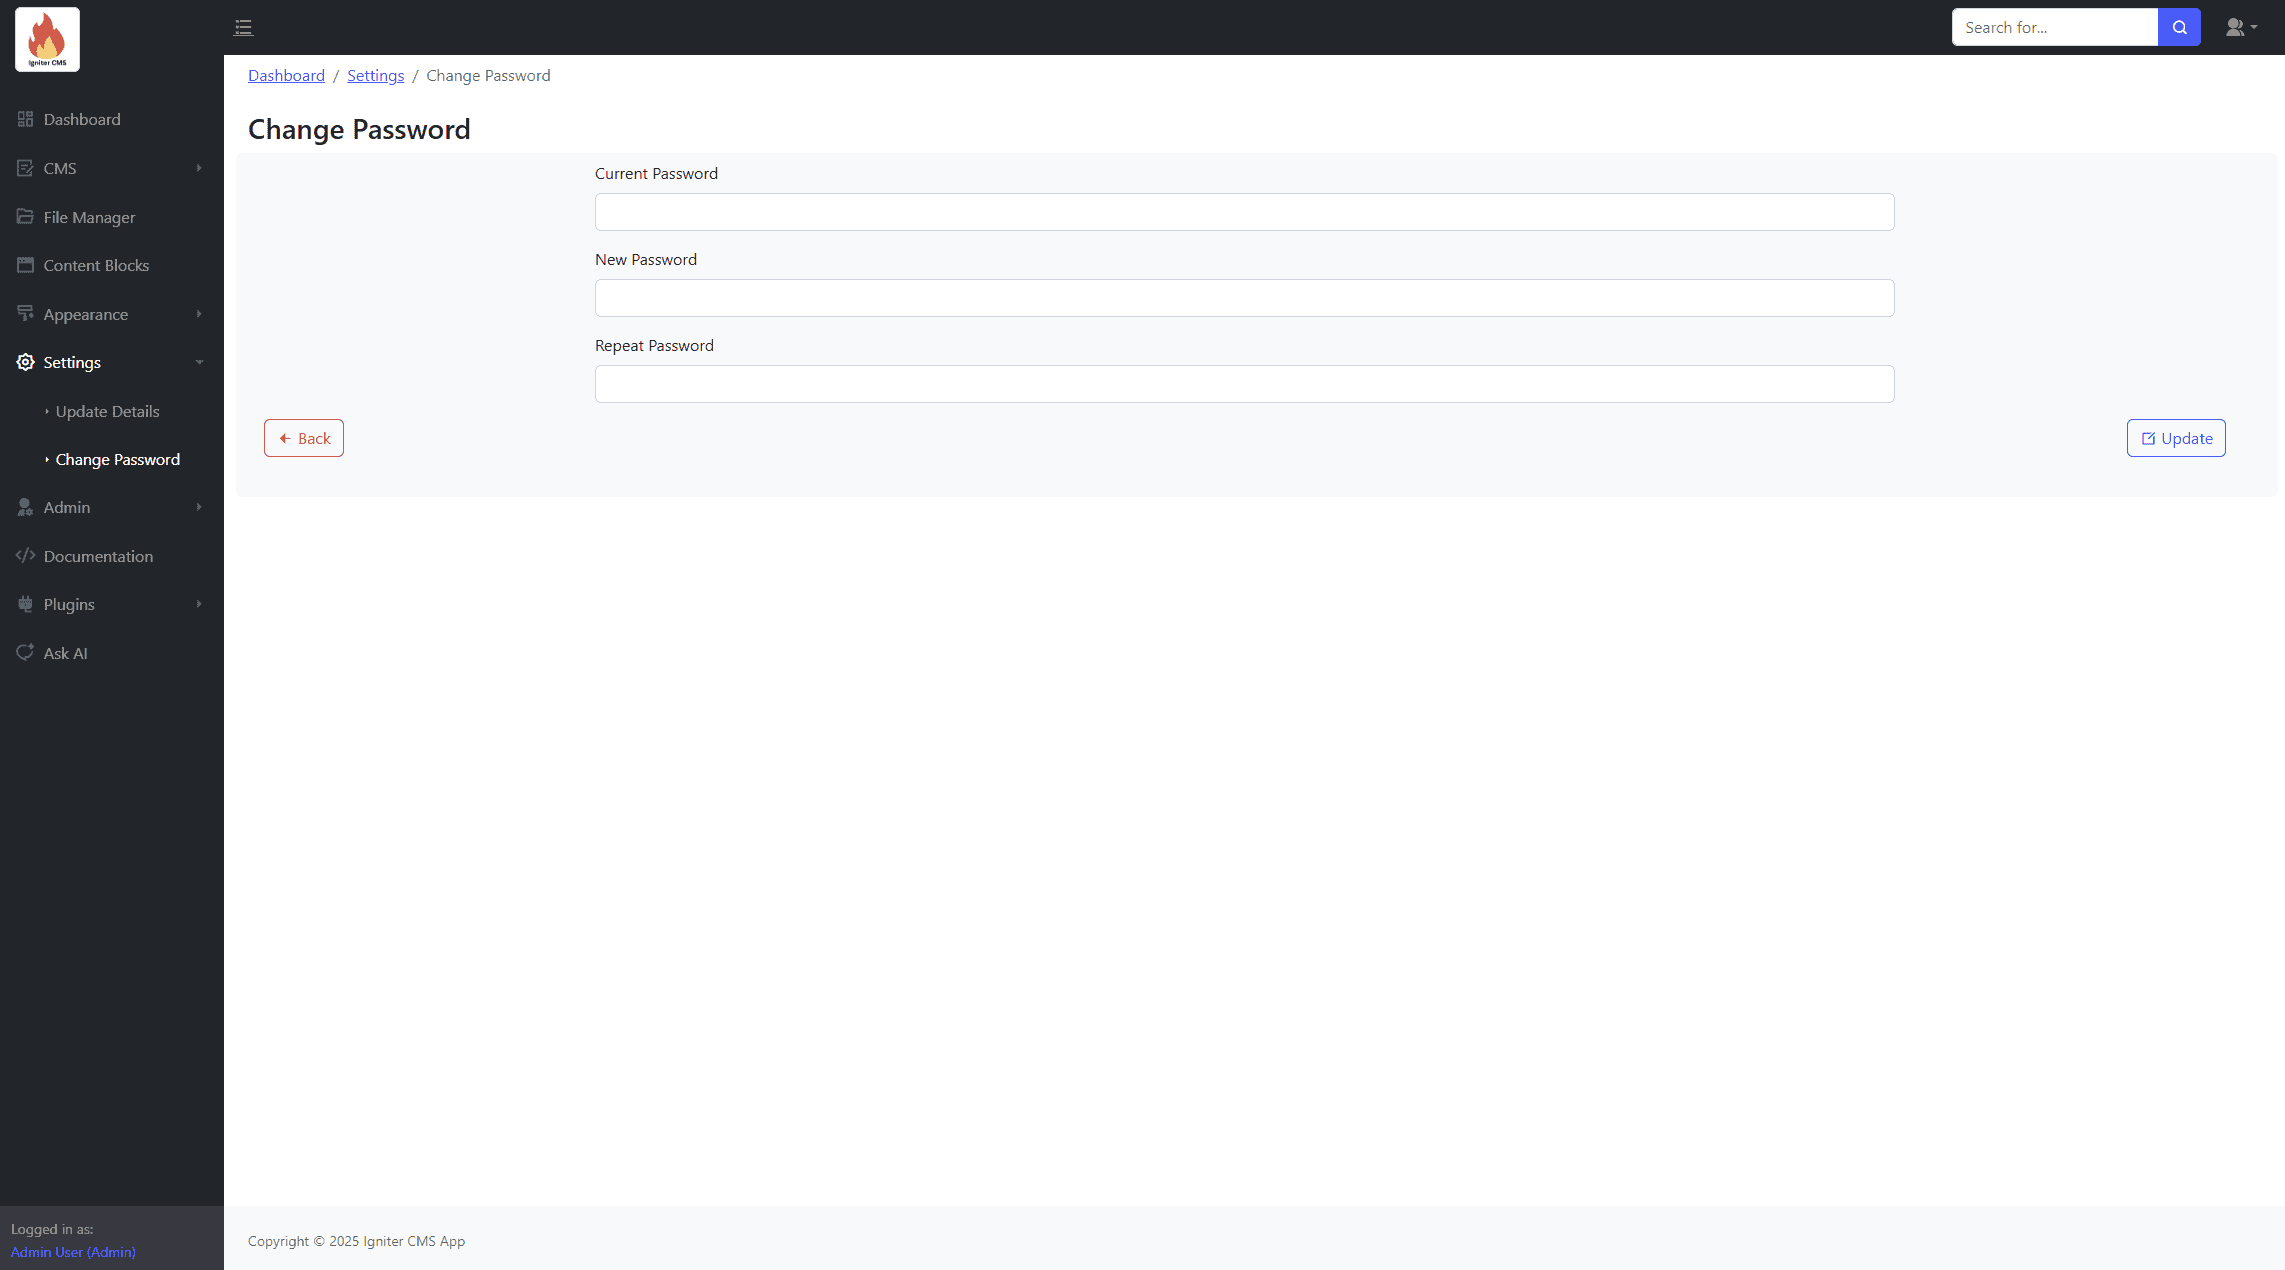
Change Password
Change your account password.
Admin Management
The Admin module provides features for managing users, system configurations, and website functionality.
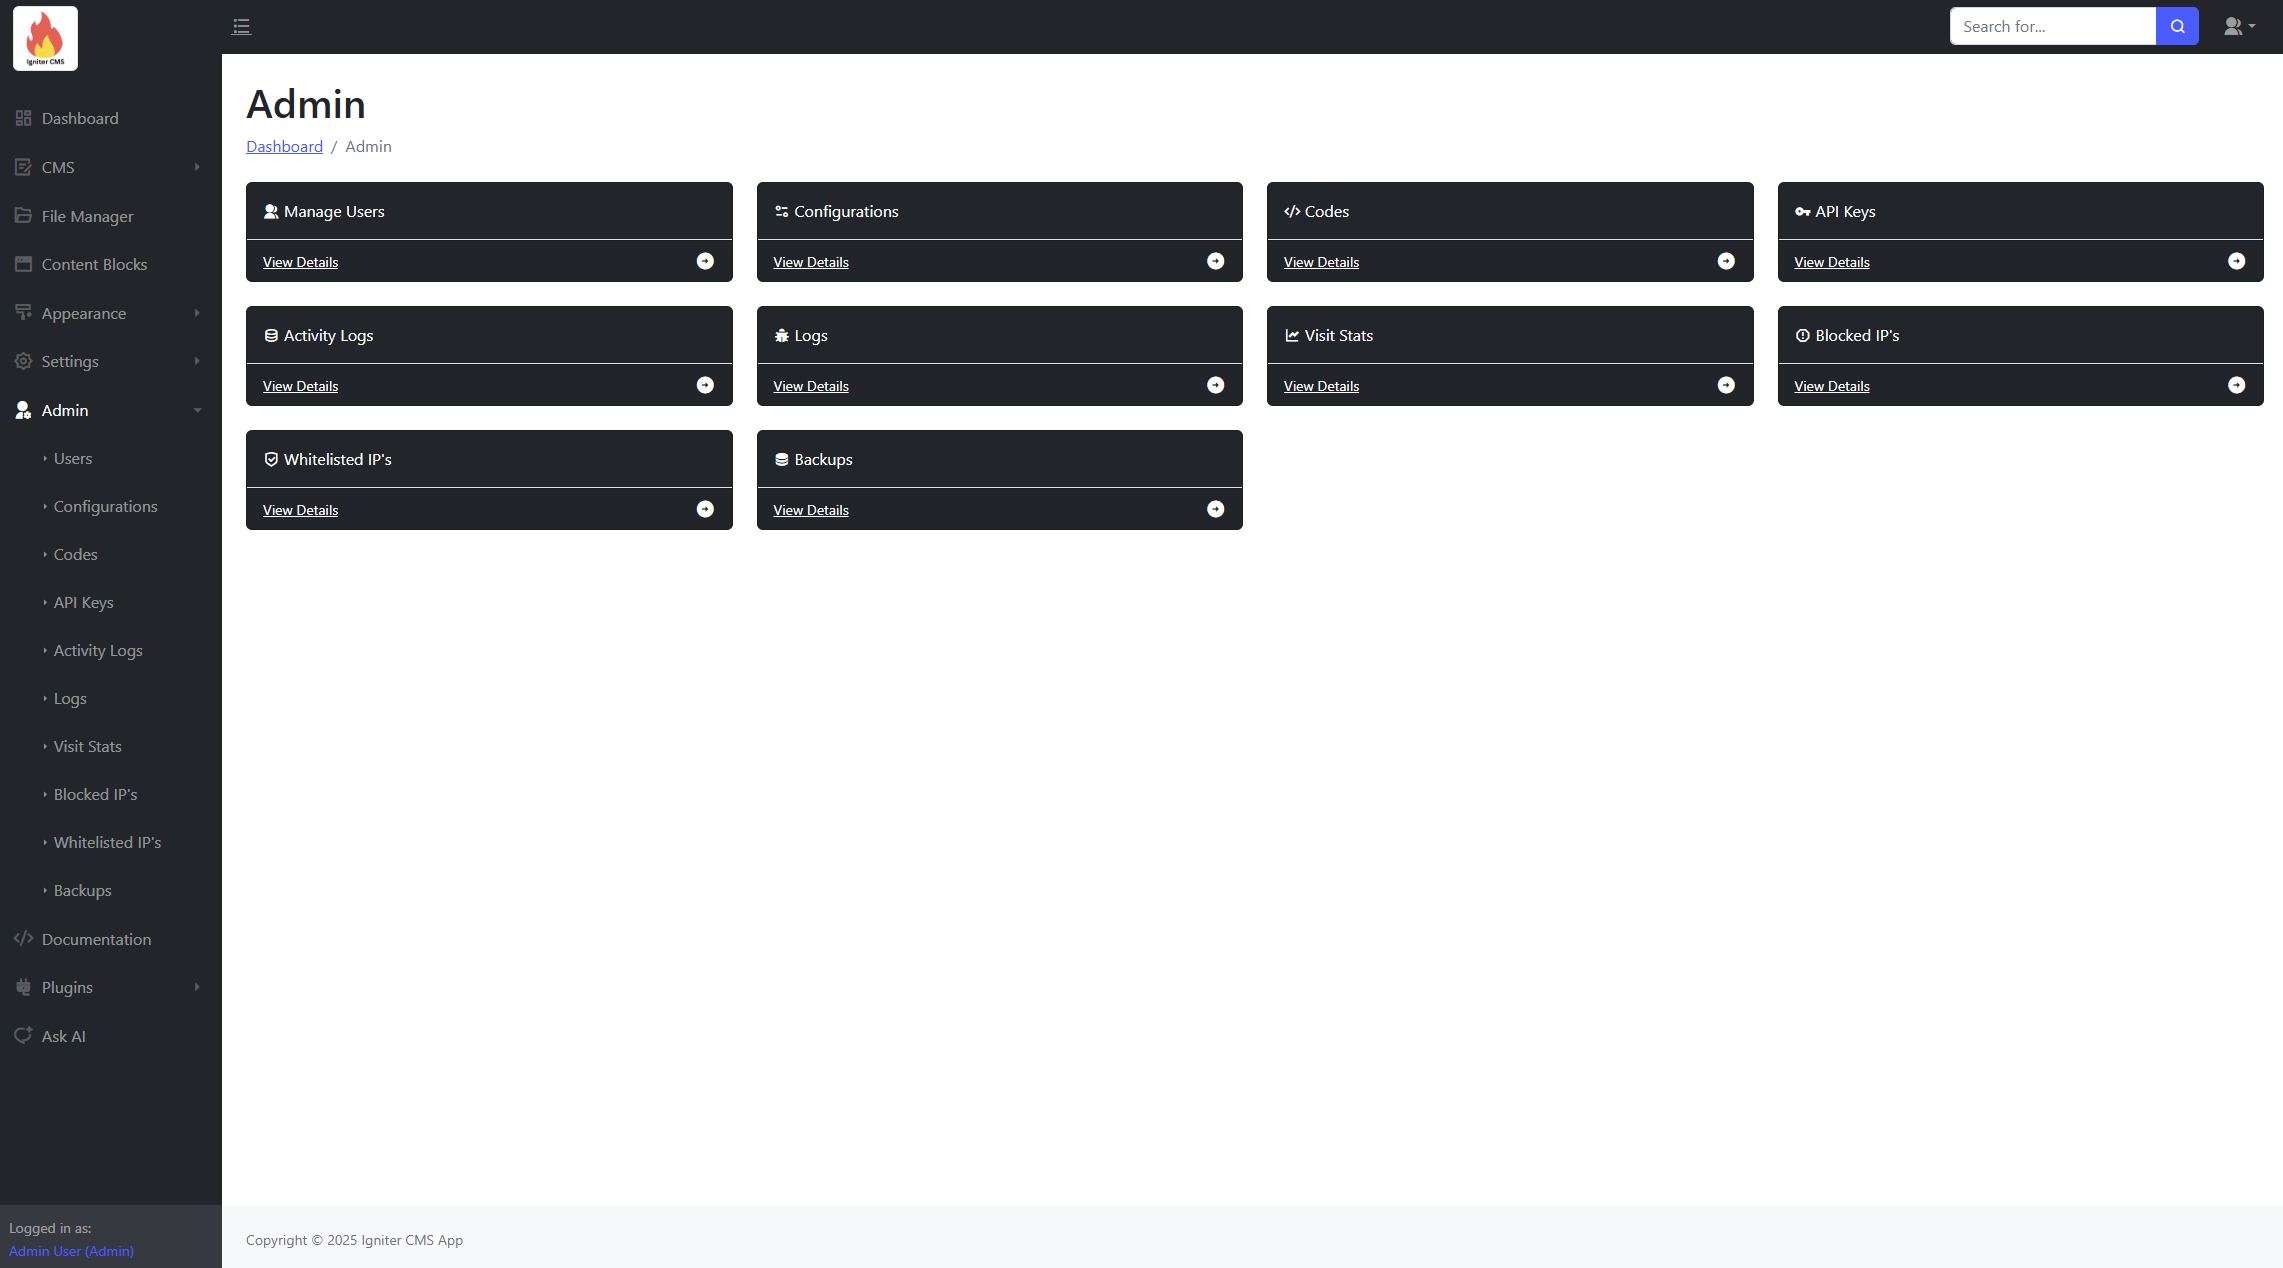
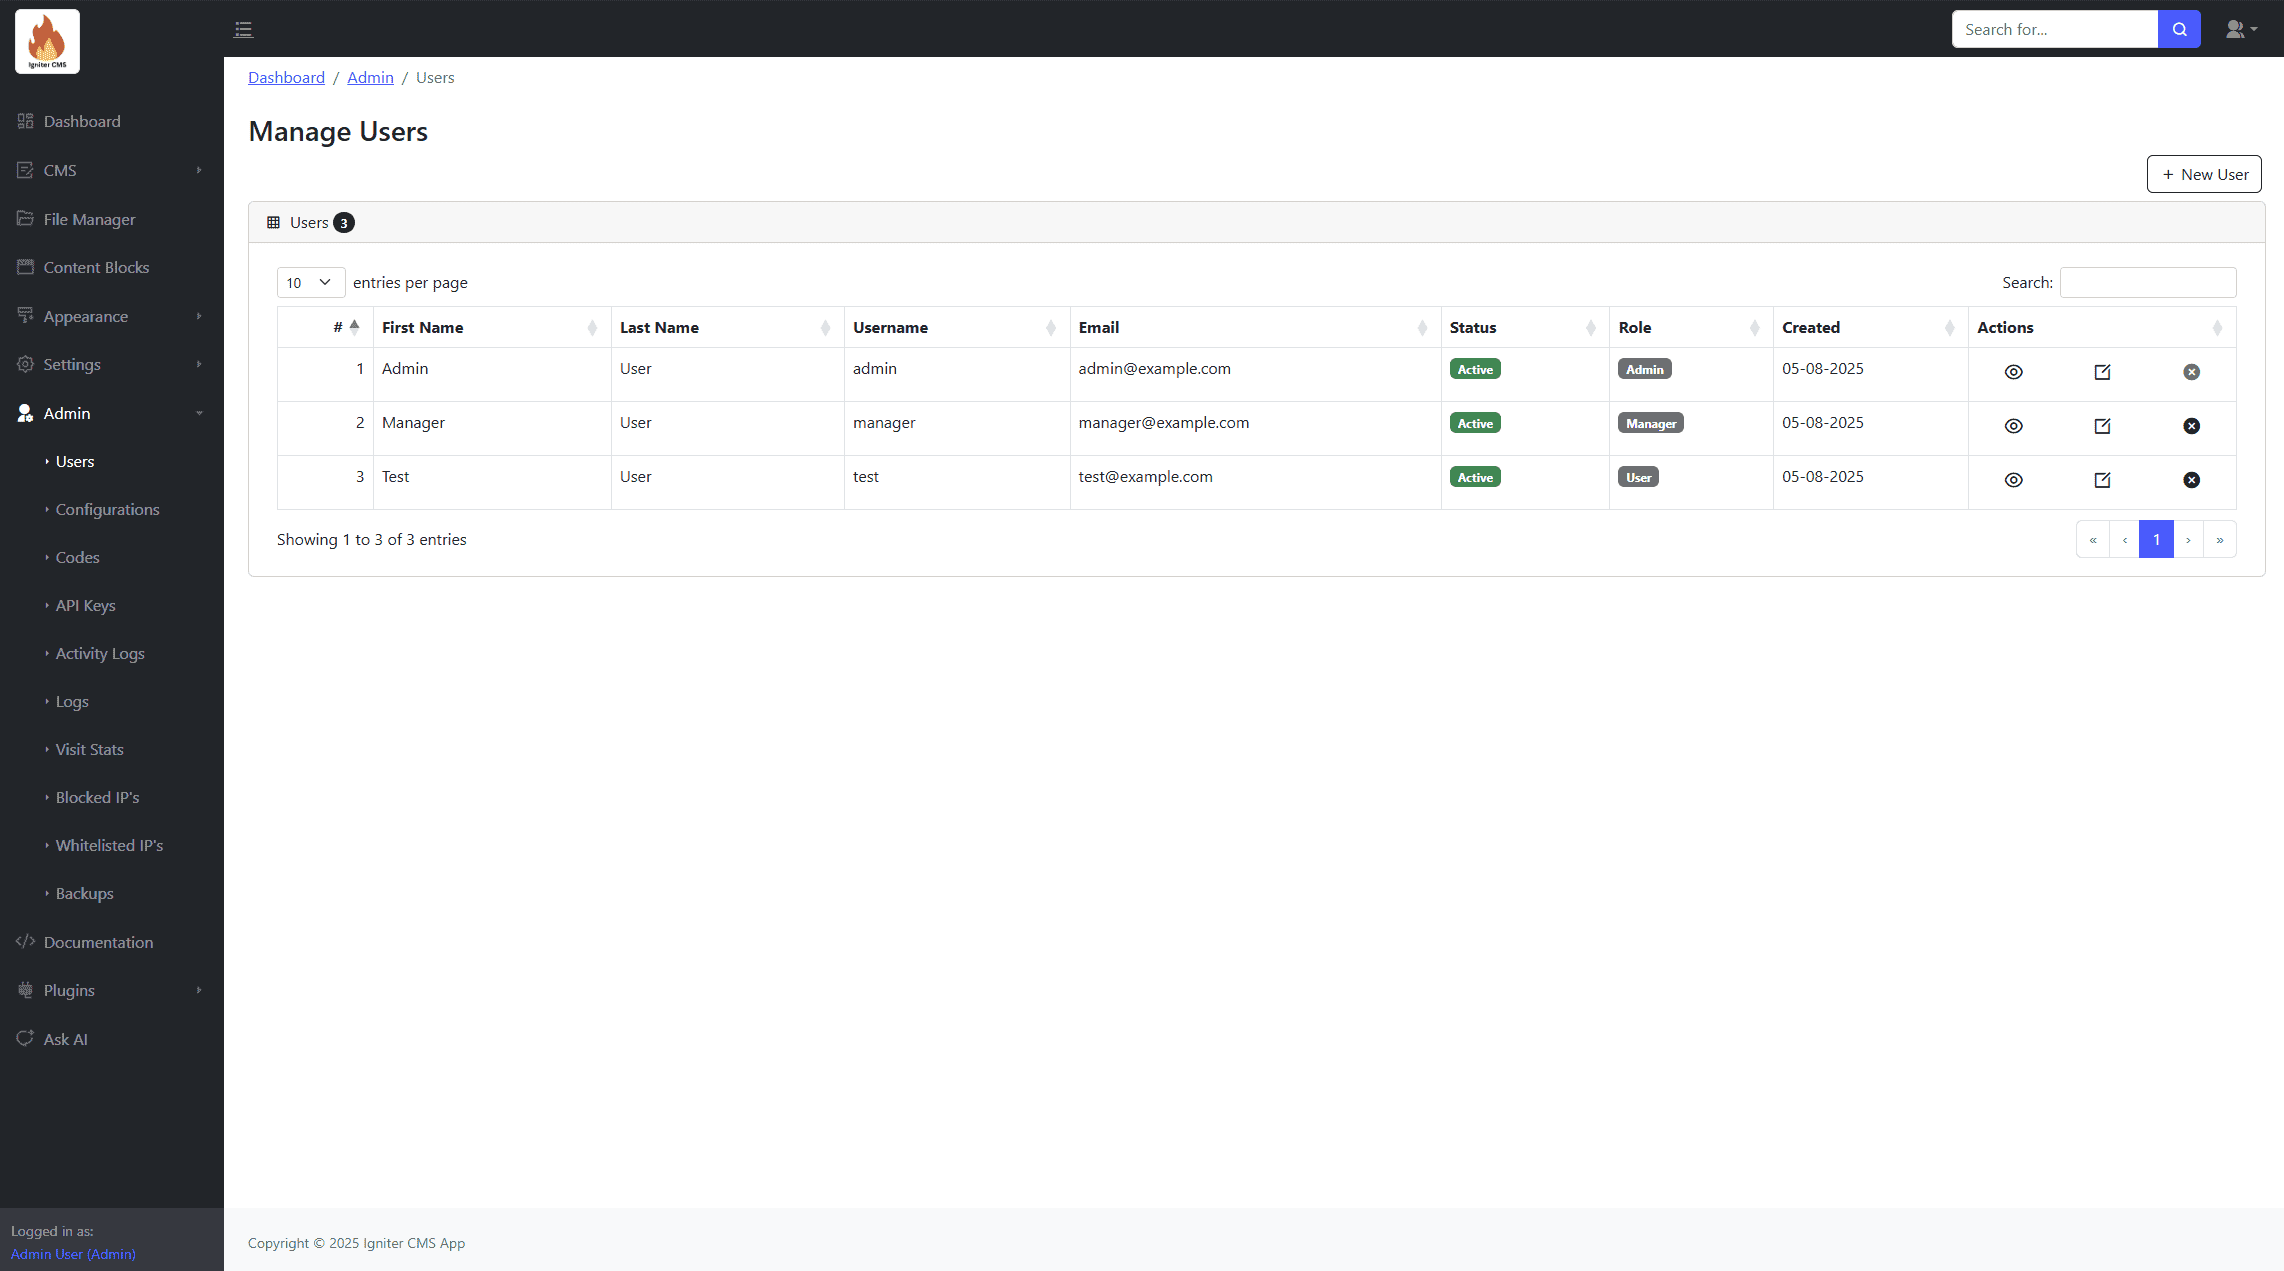
Manage Users
Create, edit, and manage user accounts and their permissions.
Account Roles
| Module | Admin | Manager |
|---|---|---|
| Dashboard | ||
CMS
|
||
| File Manager | ||
Settings
|
||
Admin
|
||
| Manage Themes | ||
| Plugins | ||
| Documentation | ||
| AI Assistance |
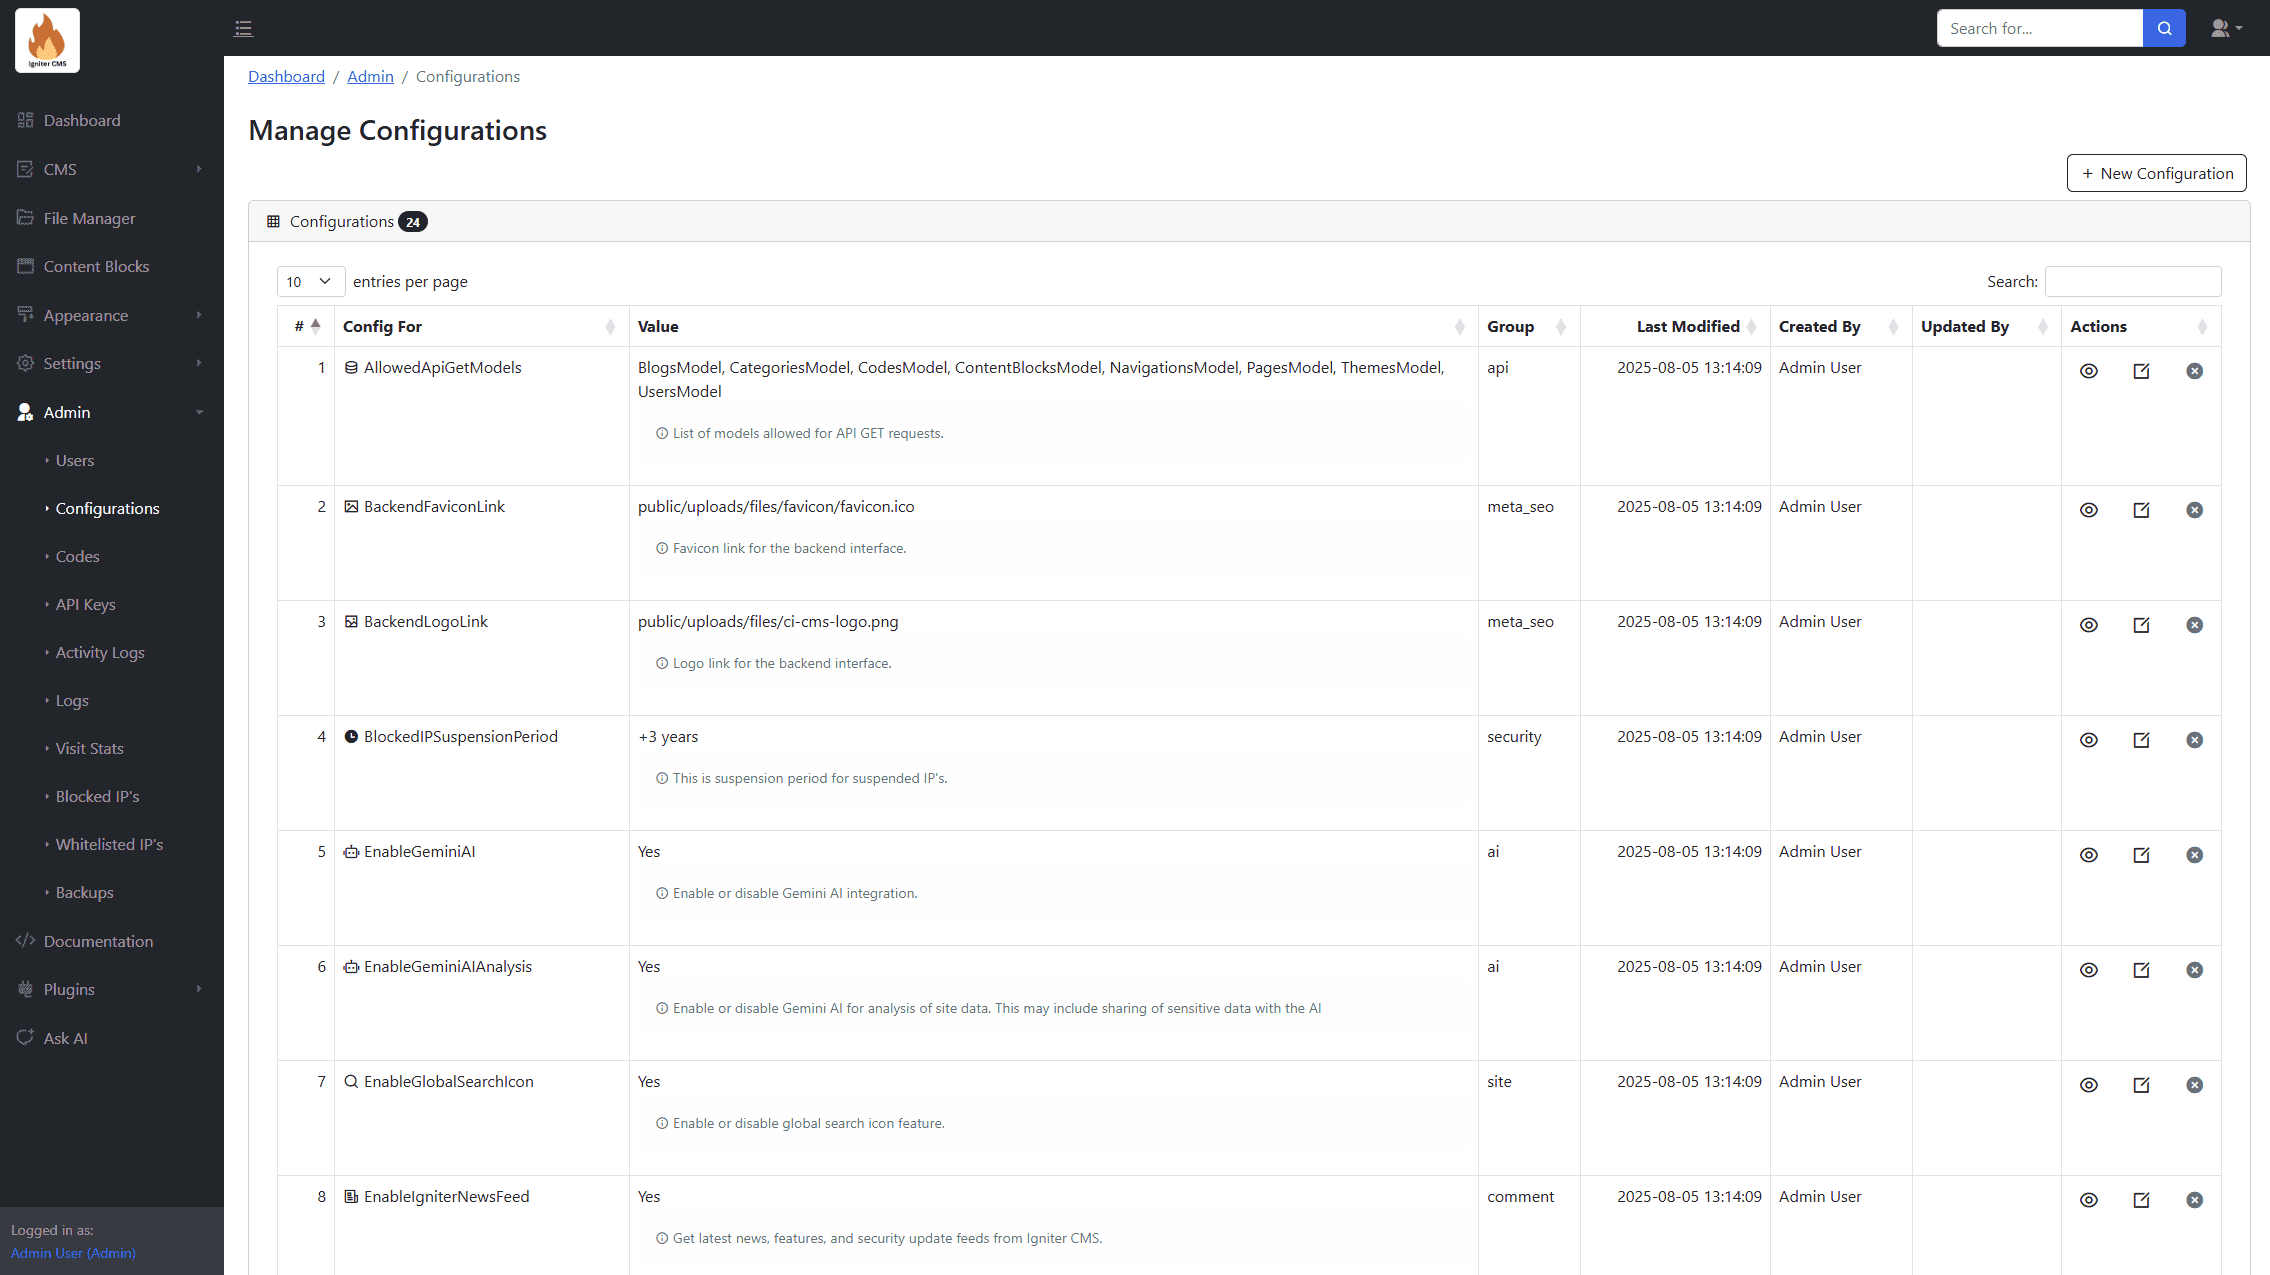
Configurations
Adjust application settings and configurations to suit your needs.
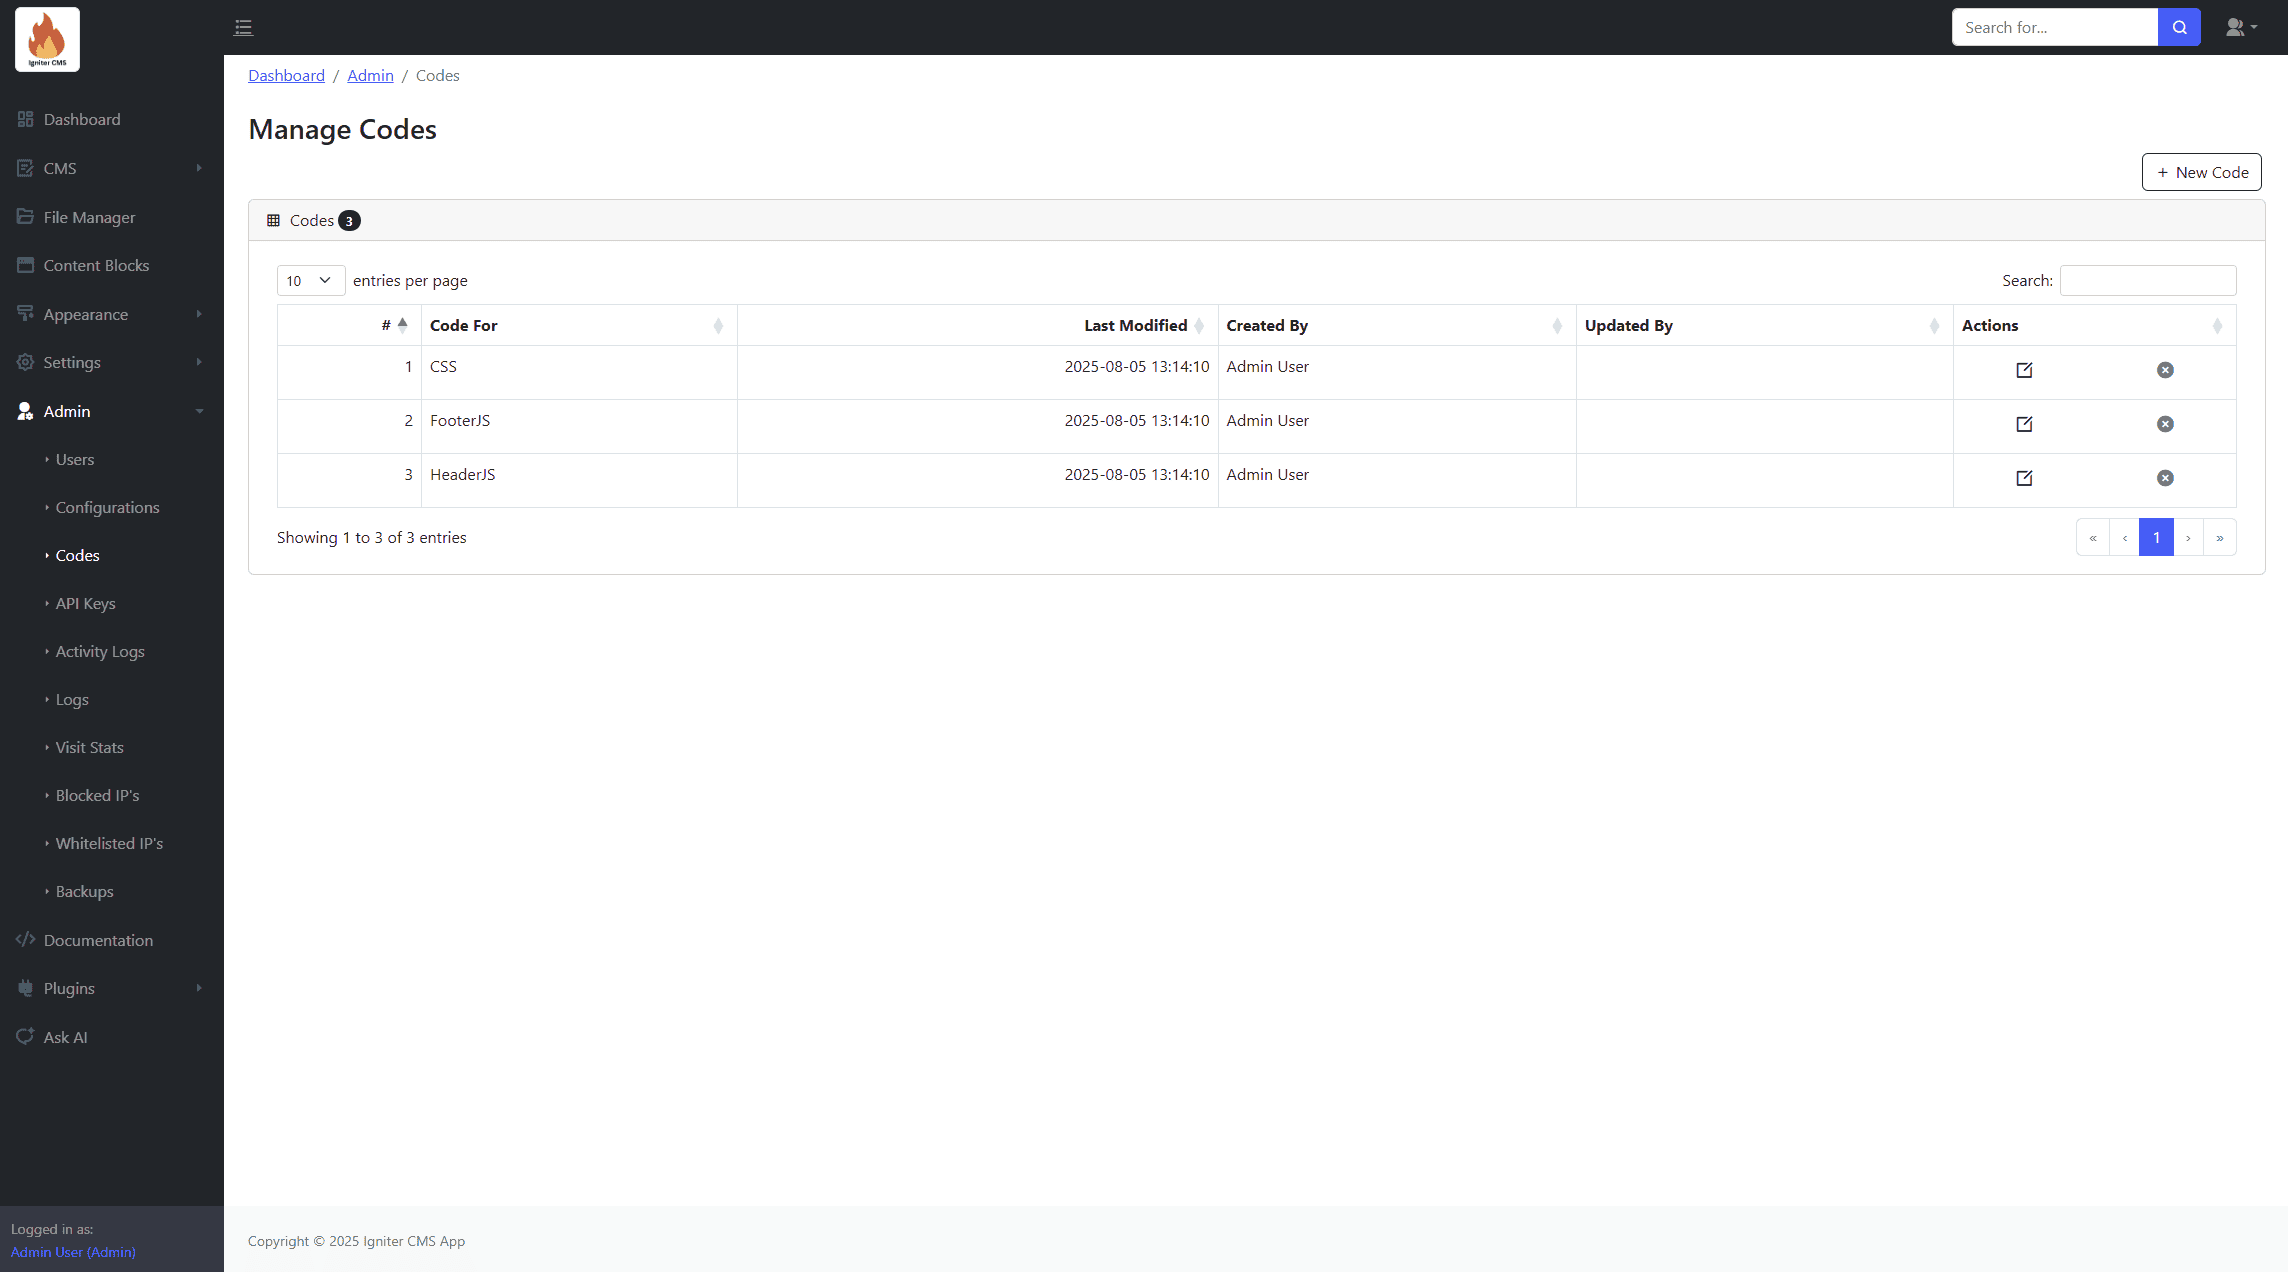
Codes
Edit header and footer JavaScript as well as custom CSS.
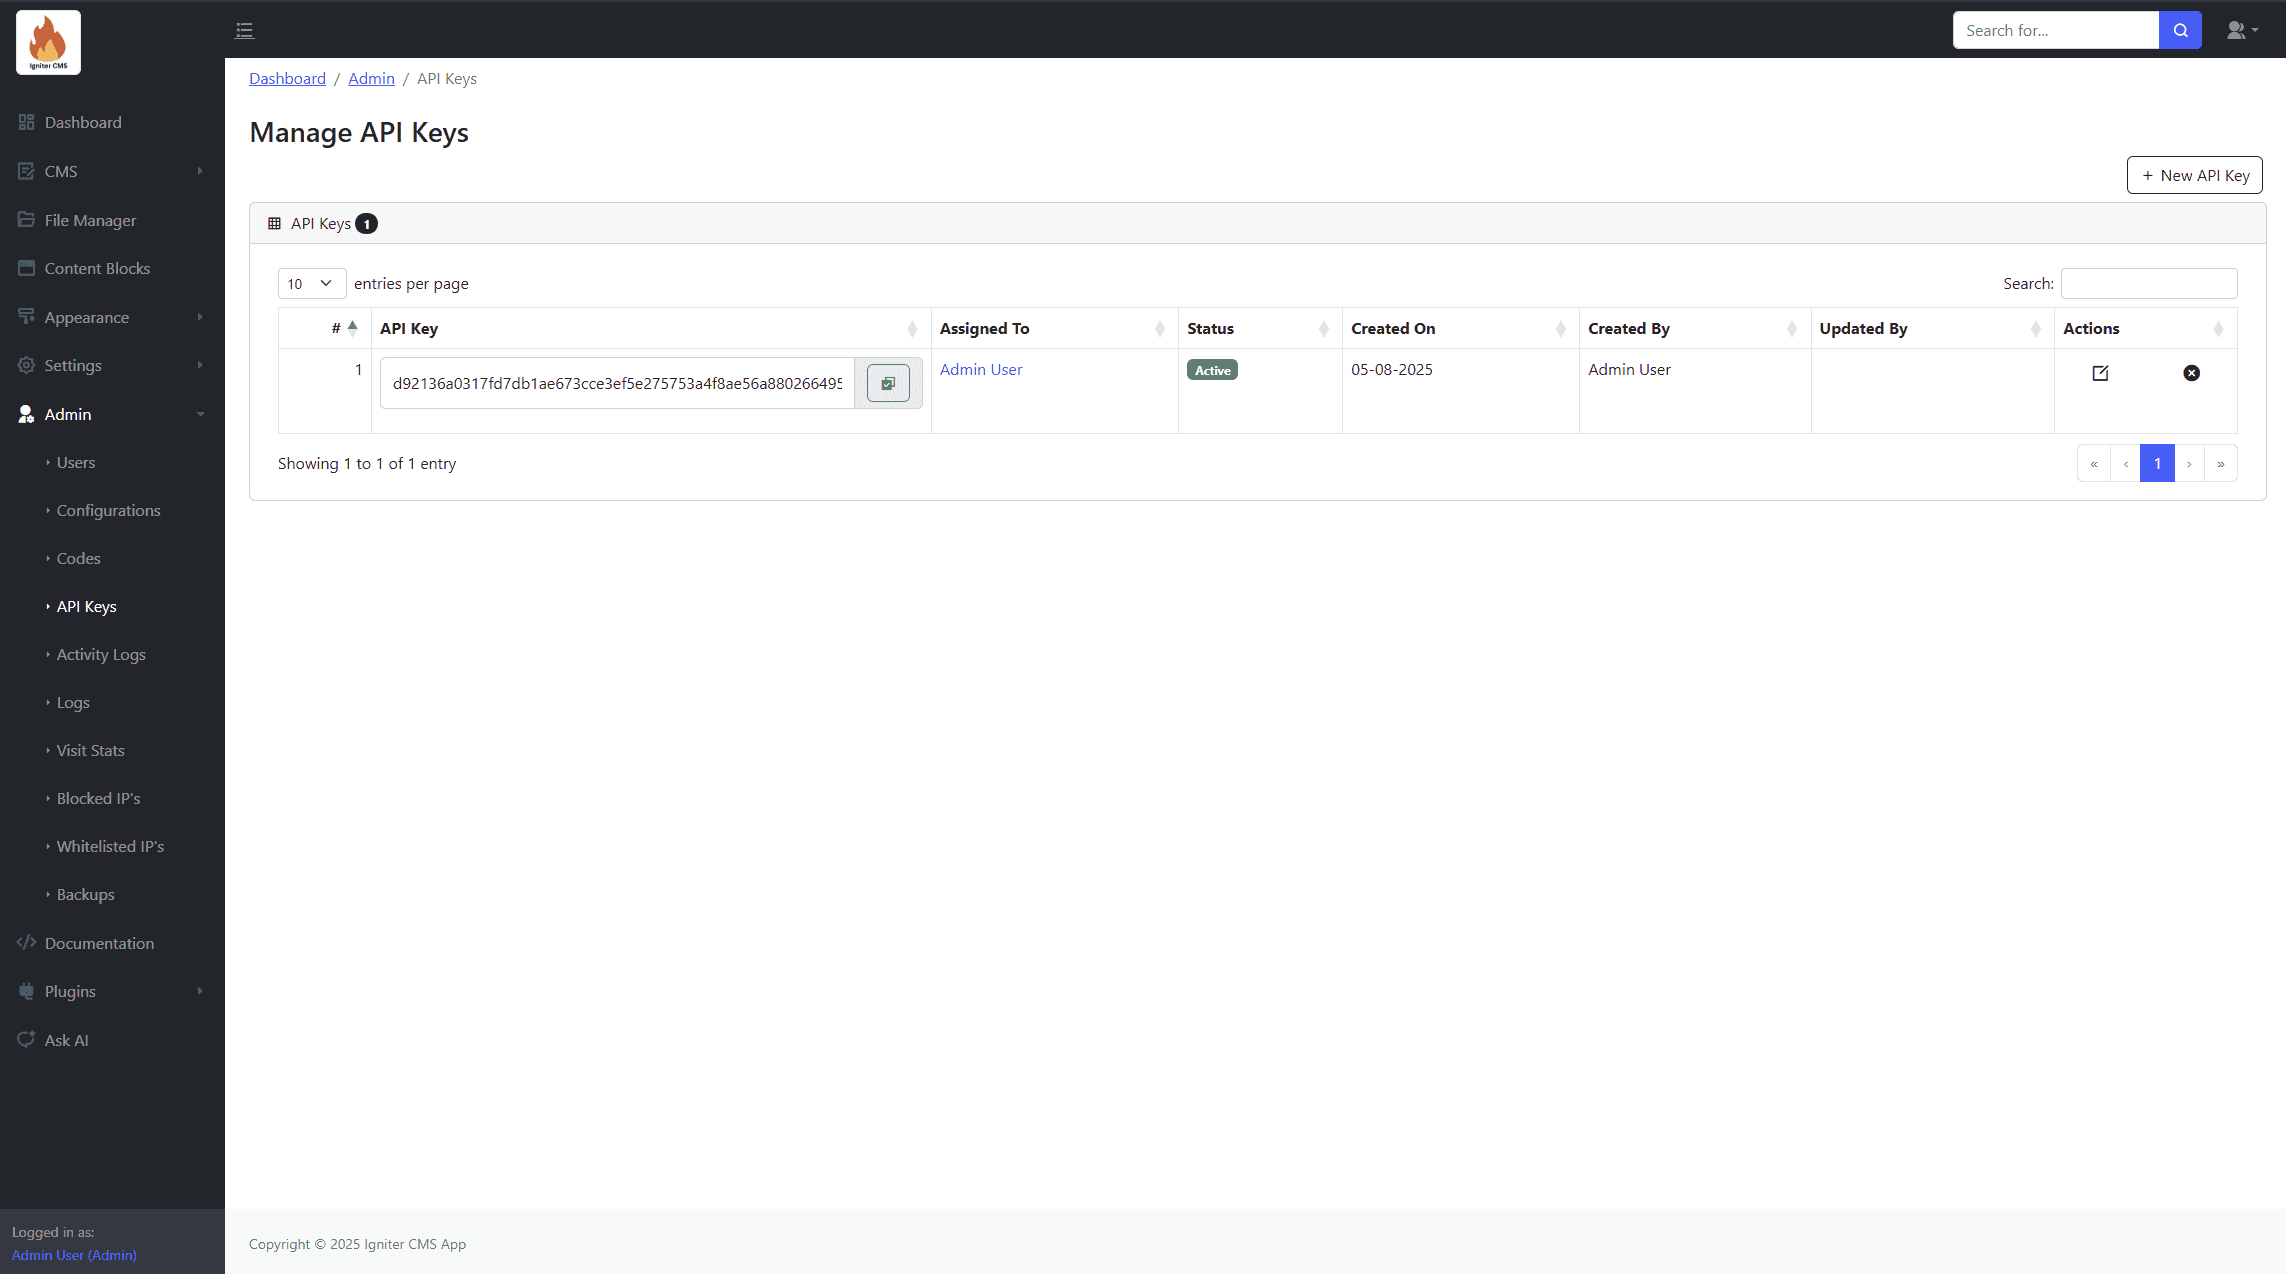
API Keys
Generate and manage API keys for accessing CMS data via the API.
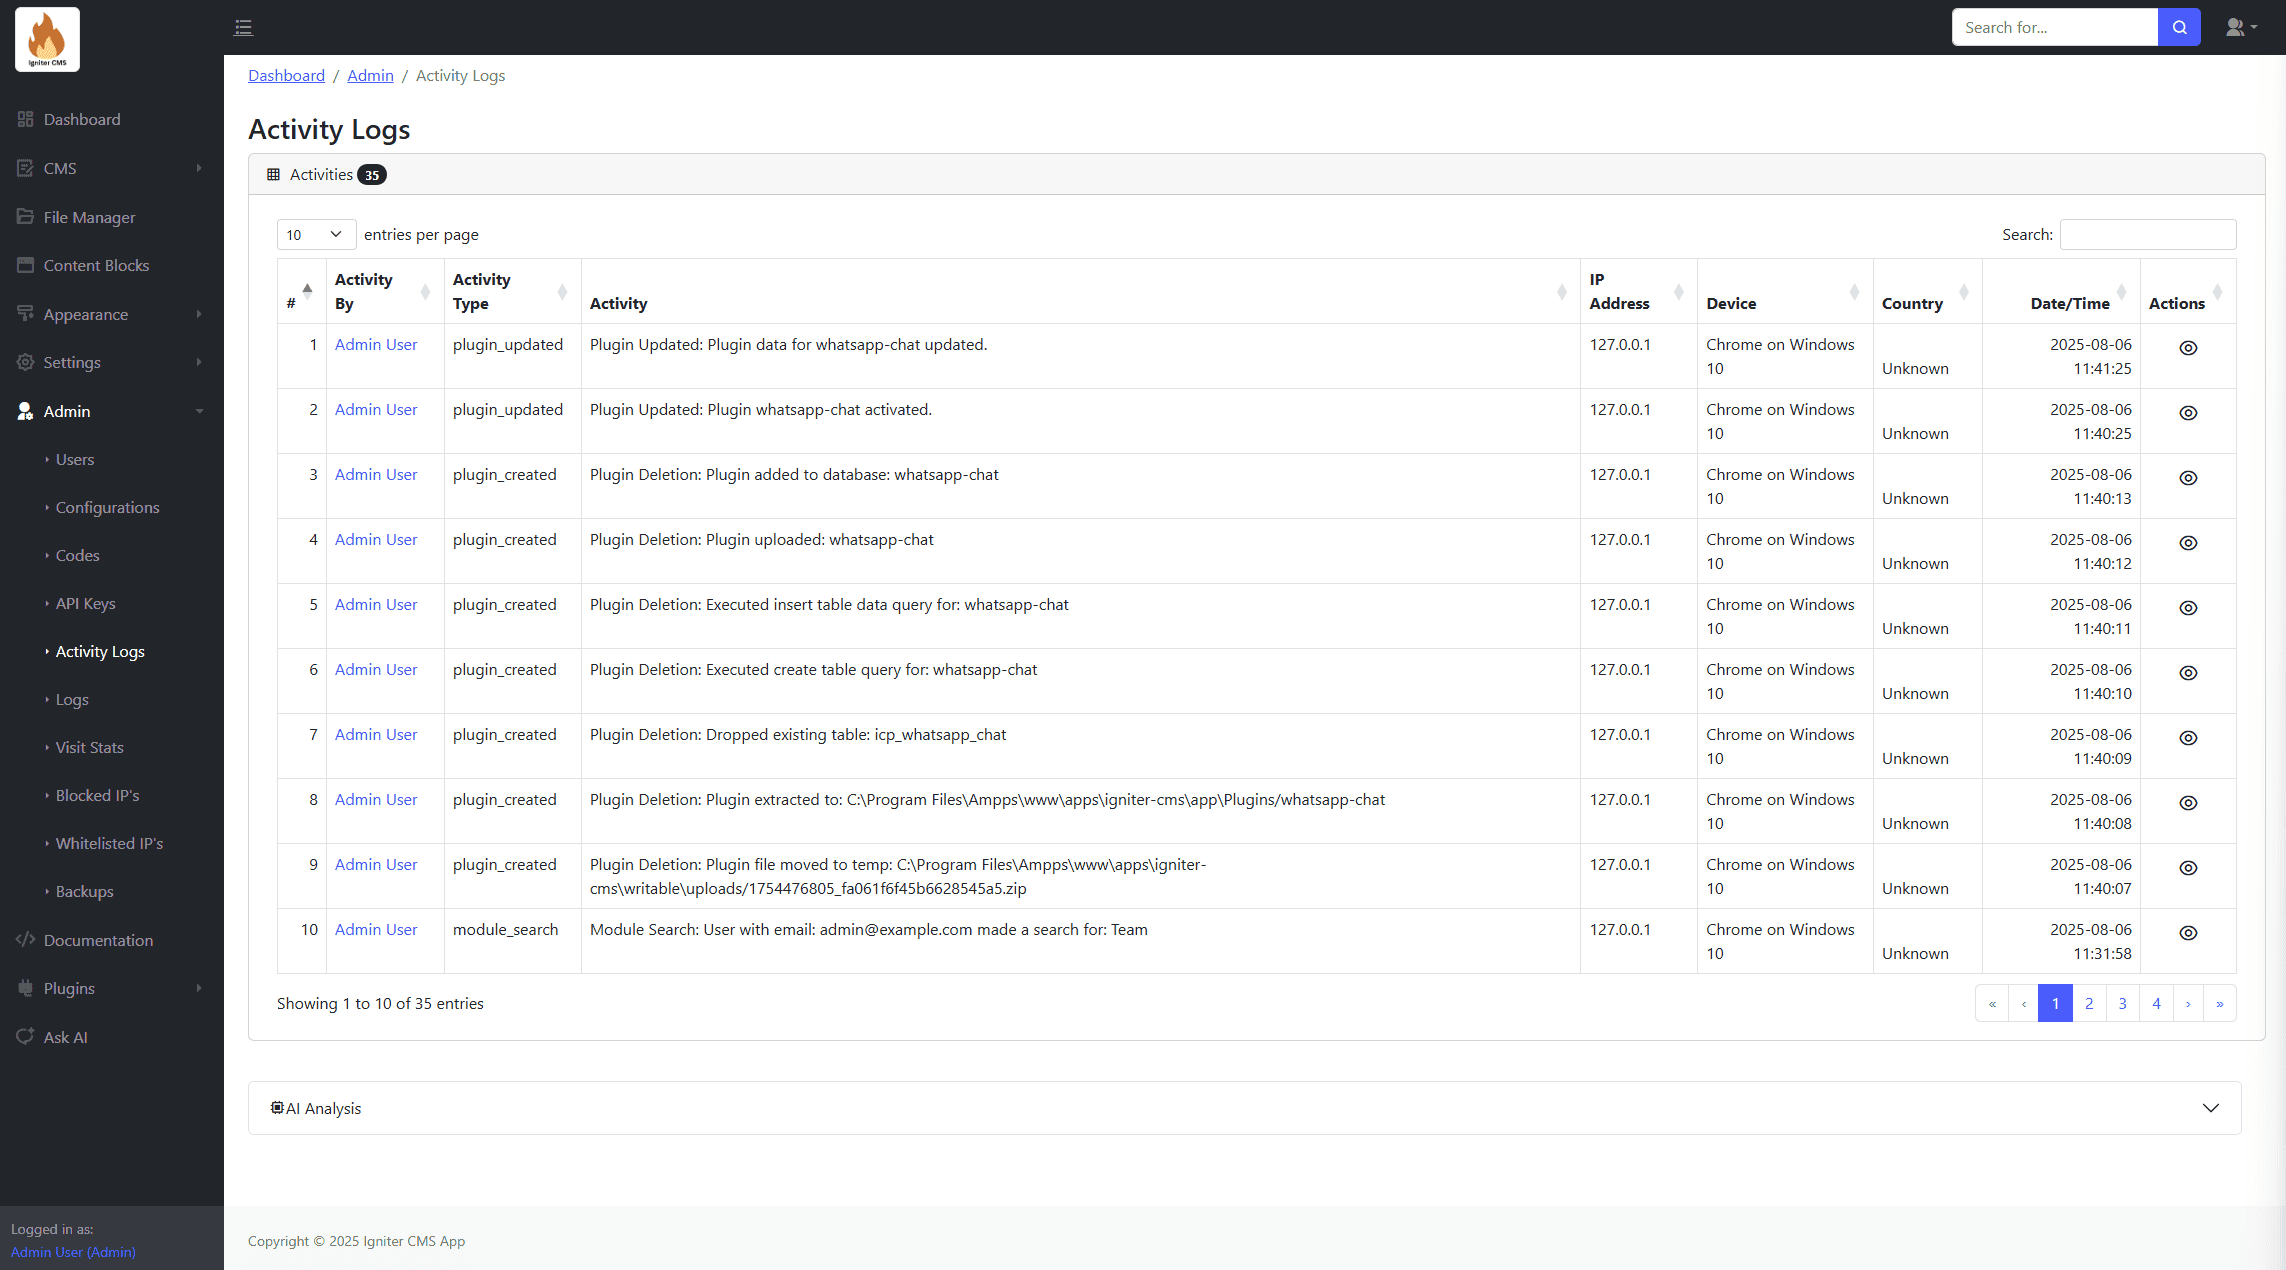
Activity Logs
View a history of user actions and system events for tracking changes.
Logs
Track system events and actions with detailed logs. Features include:
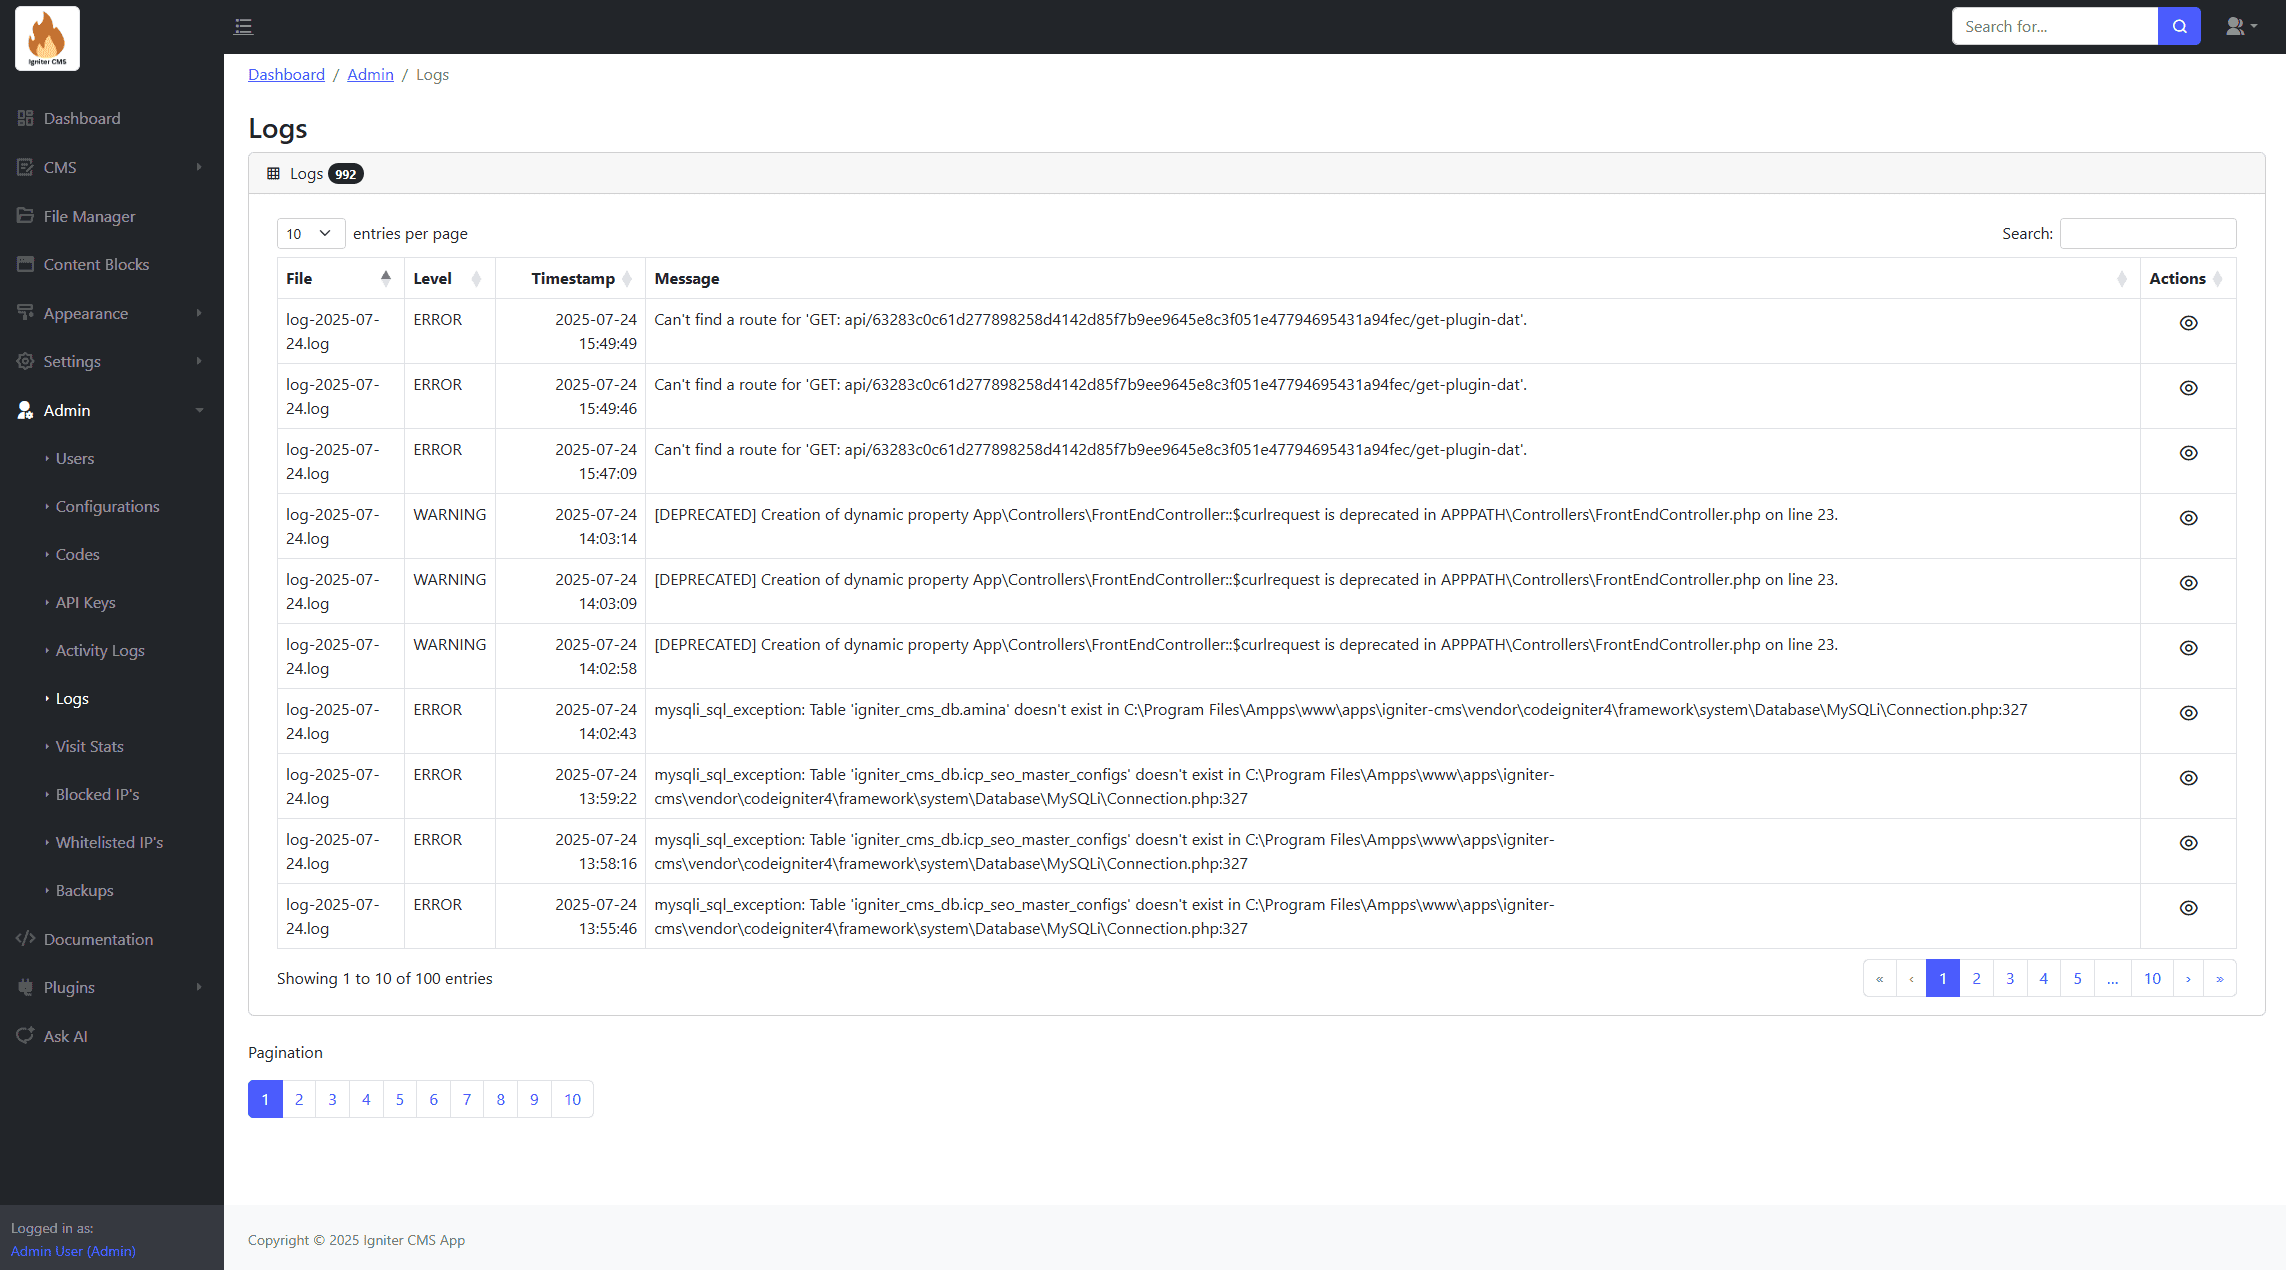
- Detailed logs for system events.
- Export functionality.
- Error tracking.
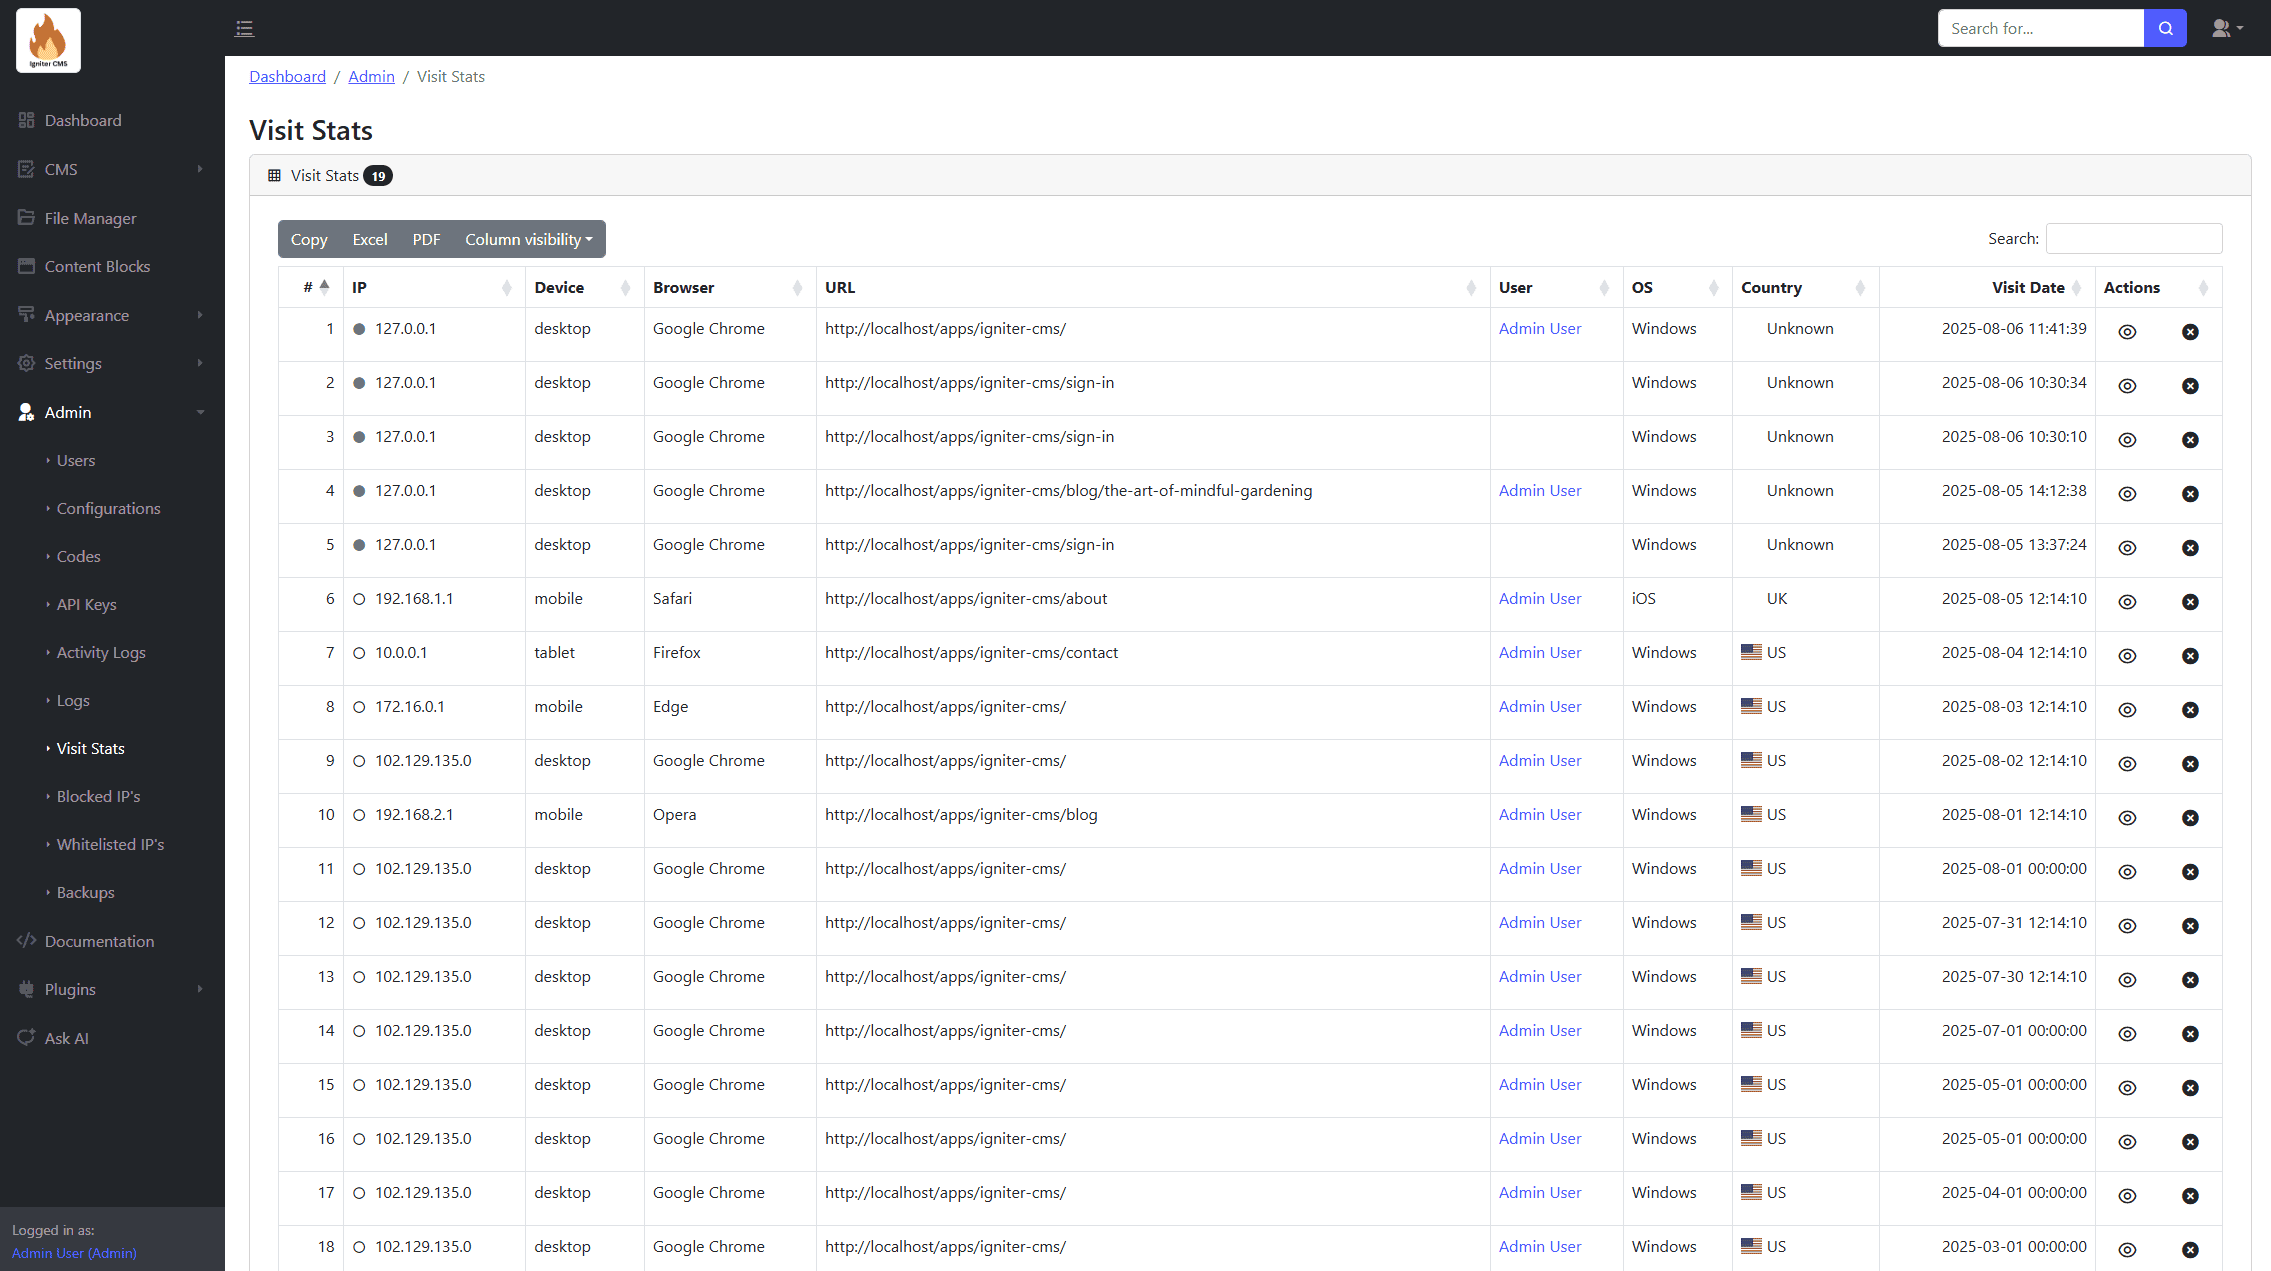
Visit Stats
Analyze website traffic statistics and view detailed analytics.
Blocked IPs
Manage and restrict access from unwanted IP addresses. Features include:

- Form for adding blocked IP addresses.
- Manual or automated blocking.
- Search and removal options.
Whitelisted IPs
Allow specific IP addresses for privileged access. Features include:

- Form for adding whitelisted IP addresses.
- Search and removal options.
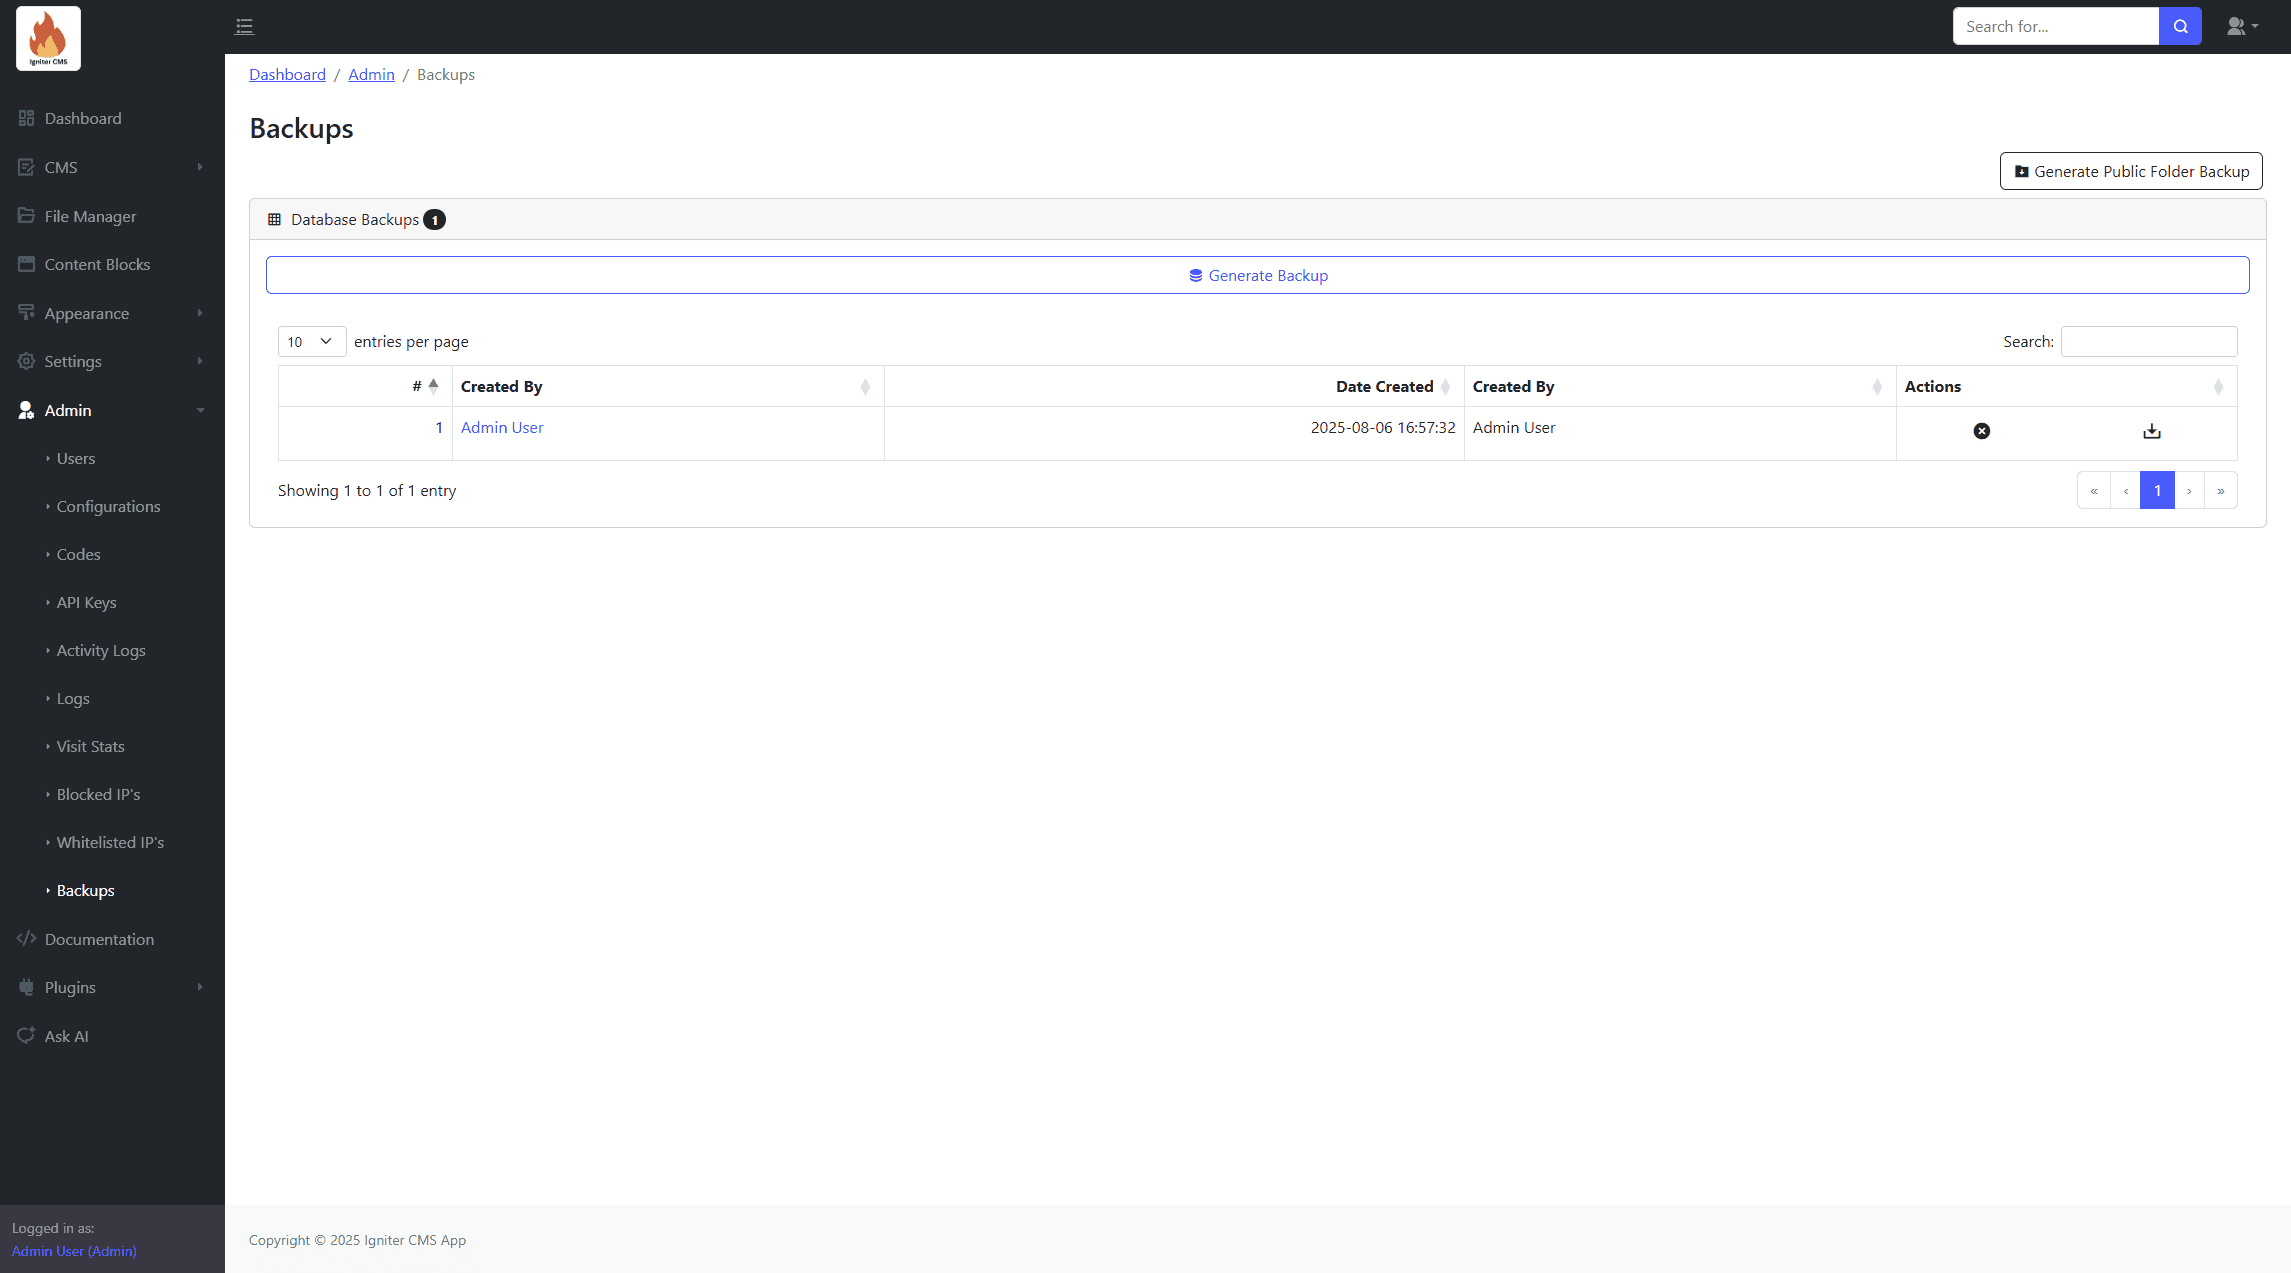
Backups
Create and manage backups for the database and website files.
File Editor
Edit theme files directly within the admin panel (use this feature with caution).
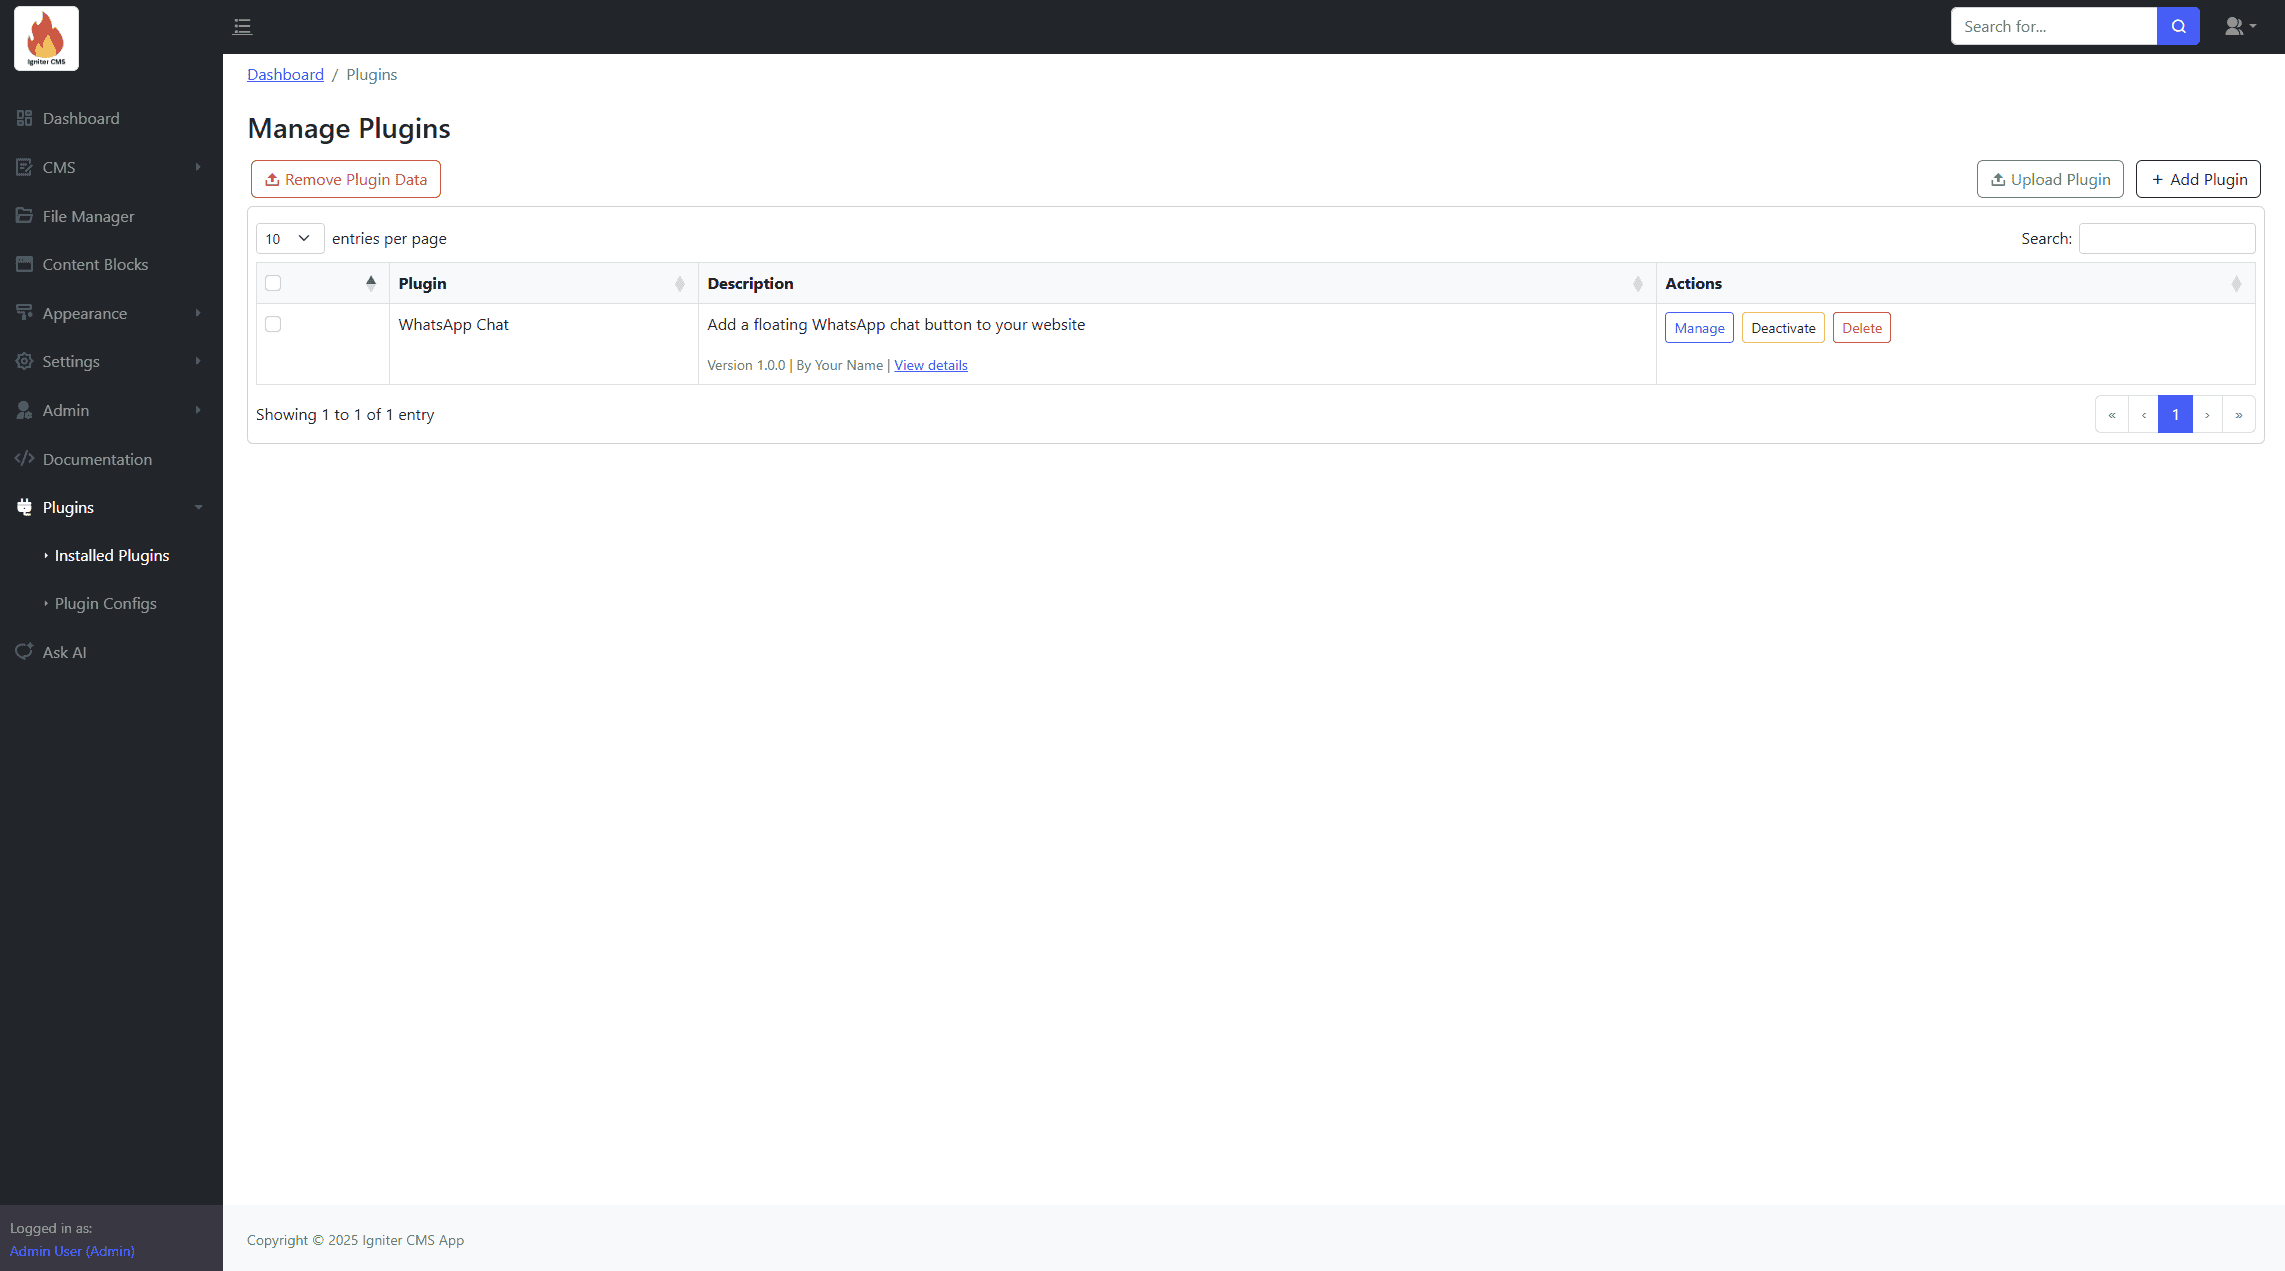
Plugins
Installed Plugins
Manage installed plugins.
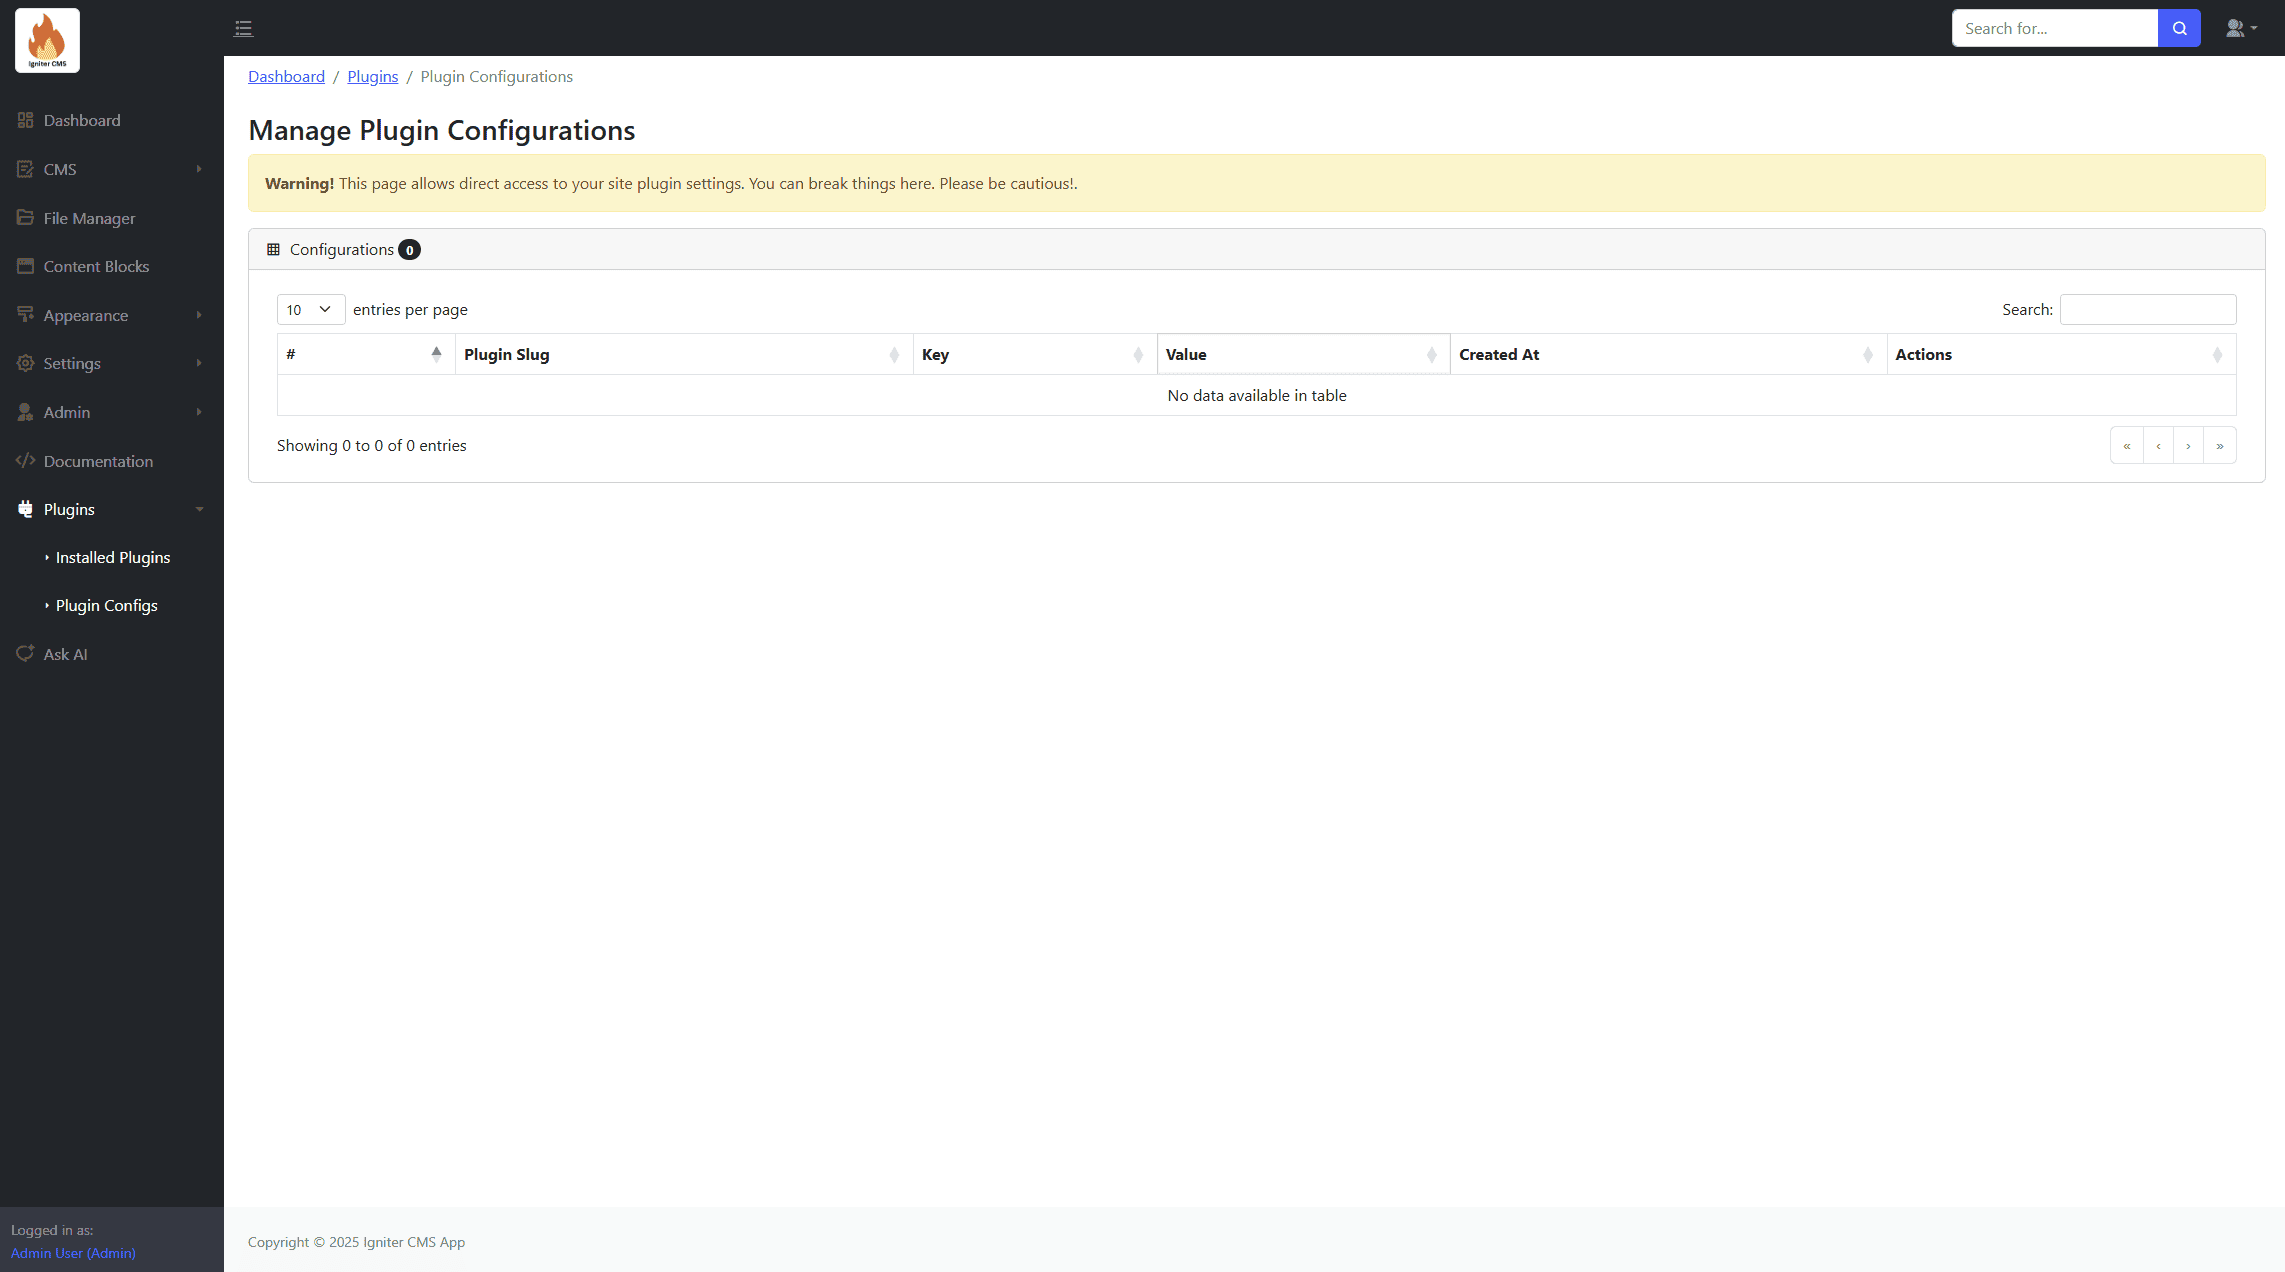
Plugin Configs
Manage plugin's configuration data.
AI Assistance
Enhance productivity and streamline workflows with AI-powered features tailored for Igniter CMS.
Ask AI
Get instant AI-powered assistance for any questions related to Igniter CMS. Features include:
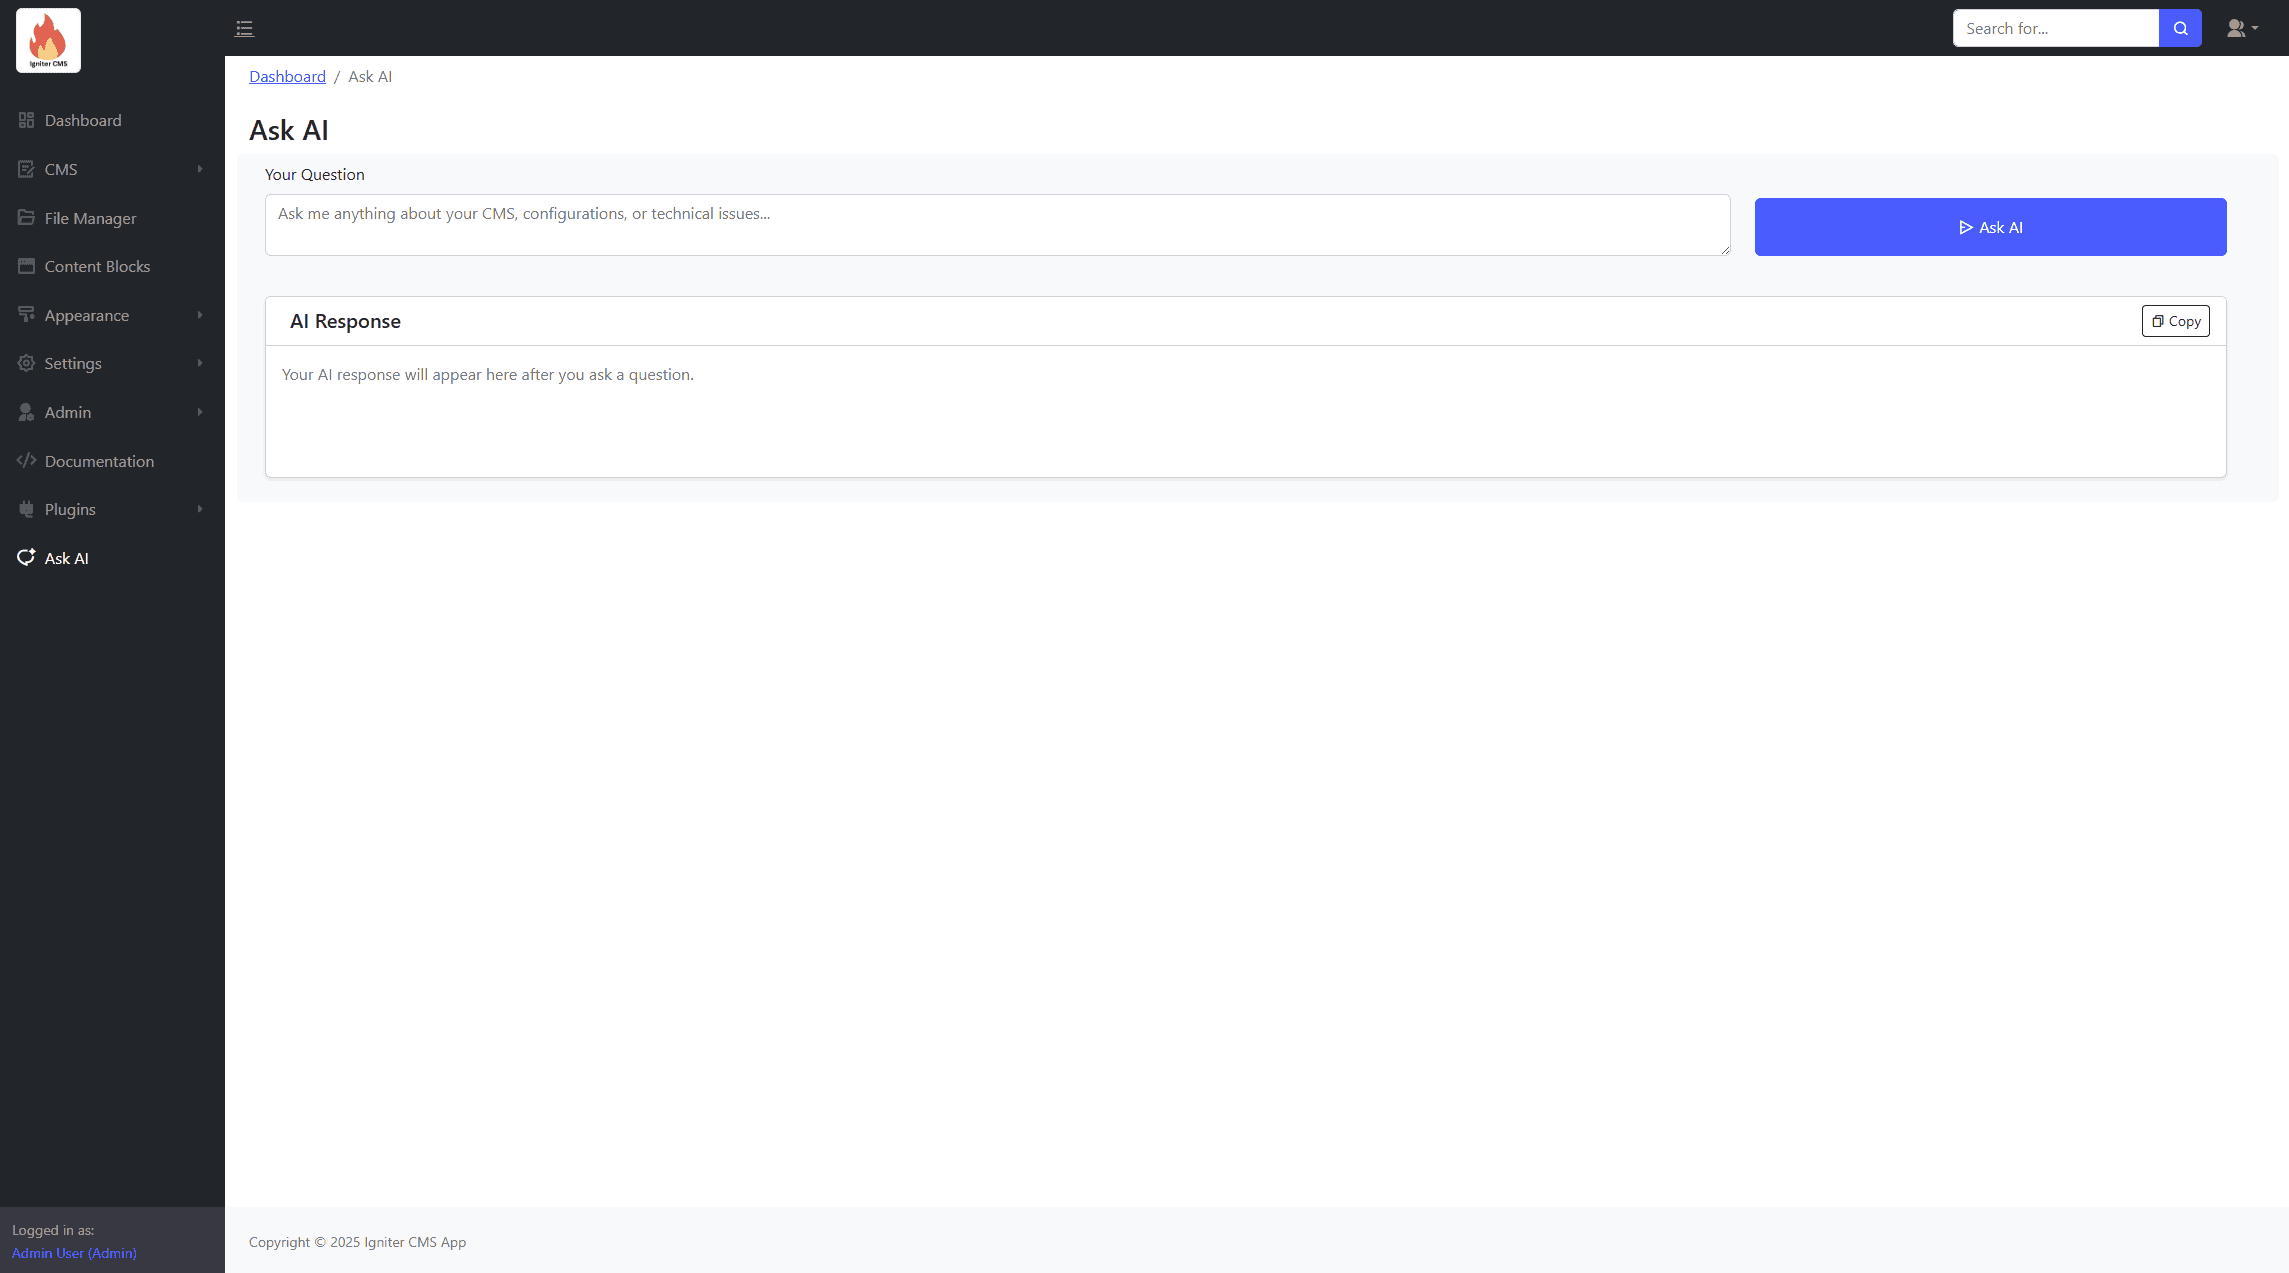
- AI-powered responses for troubleshooting and best practices.
- Instant answers for common CMS-related queries.
- Guidance on module usage and integrations.
- Recommendations for optimizing CMS performance.
- Interactive search for documentation and support topics.
AI Text Generation
Generate content dynamically to improve site efficiency and SEO ranking. Features include:
- Generate CMS titles based on best practices.
- Automate description generation for pages and posts.
- Create dynamic SEO metadata to improve search visibility.
- Suggest relevant tags for categorization.
- Enhance user engagement with AI-crafted summaries.
AI Analysis
Leverage AI to gain insights into site performance and operational data. Features include:
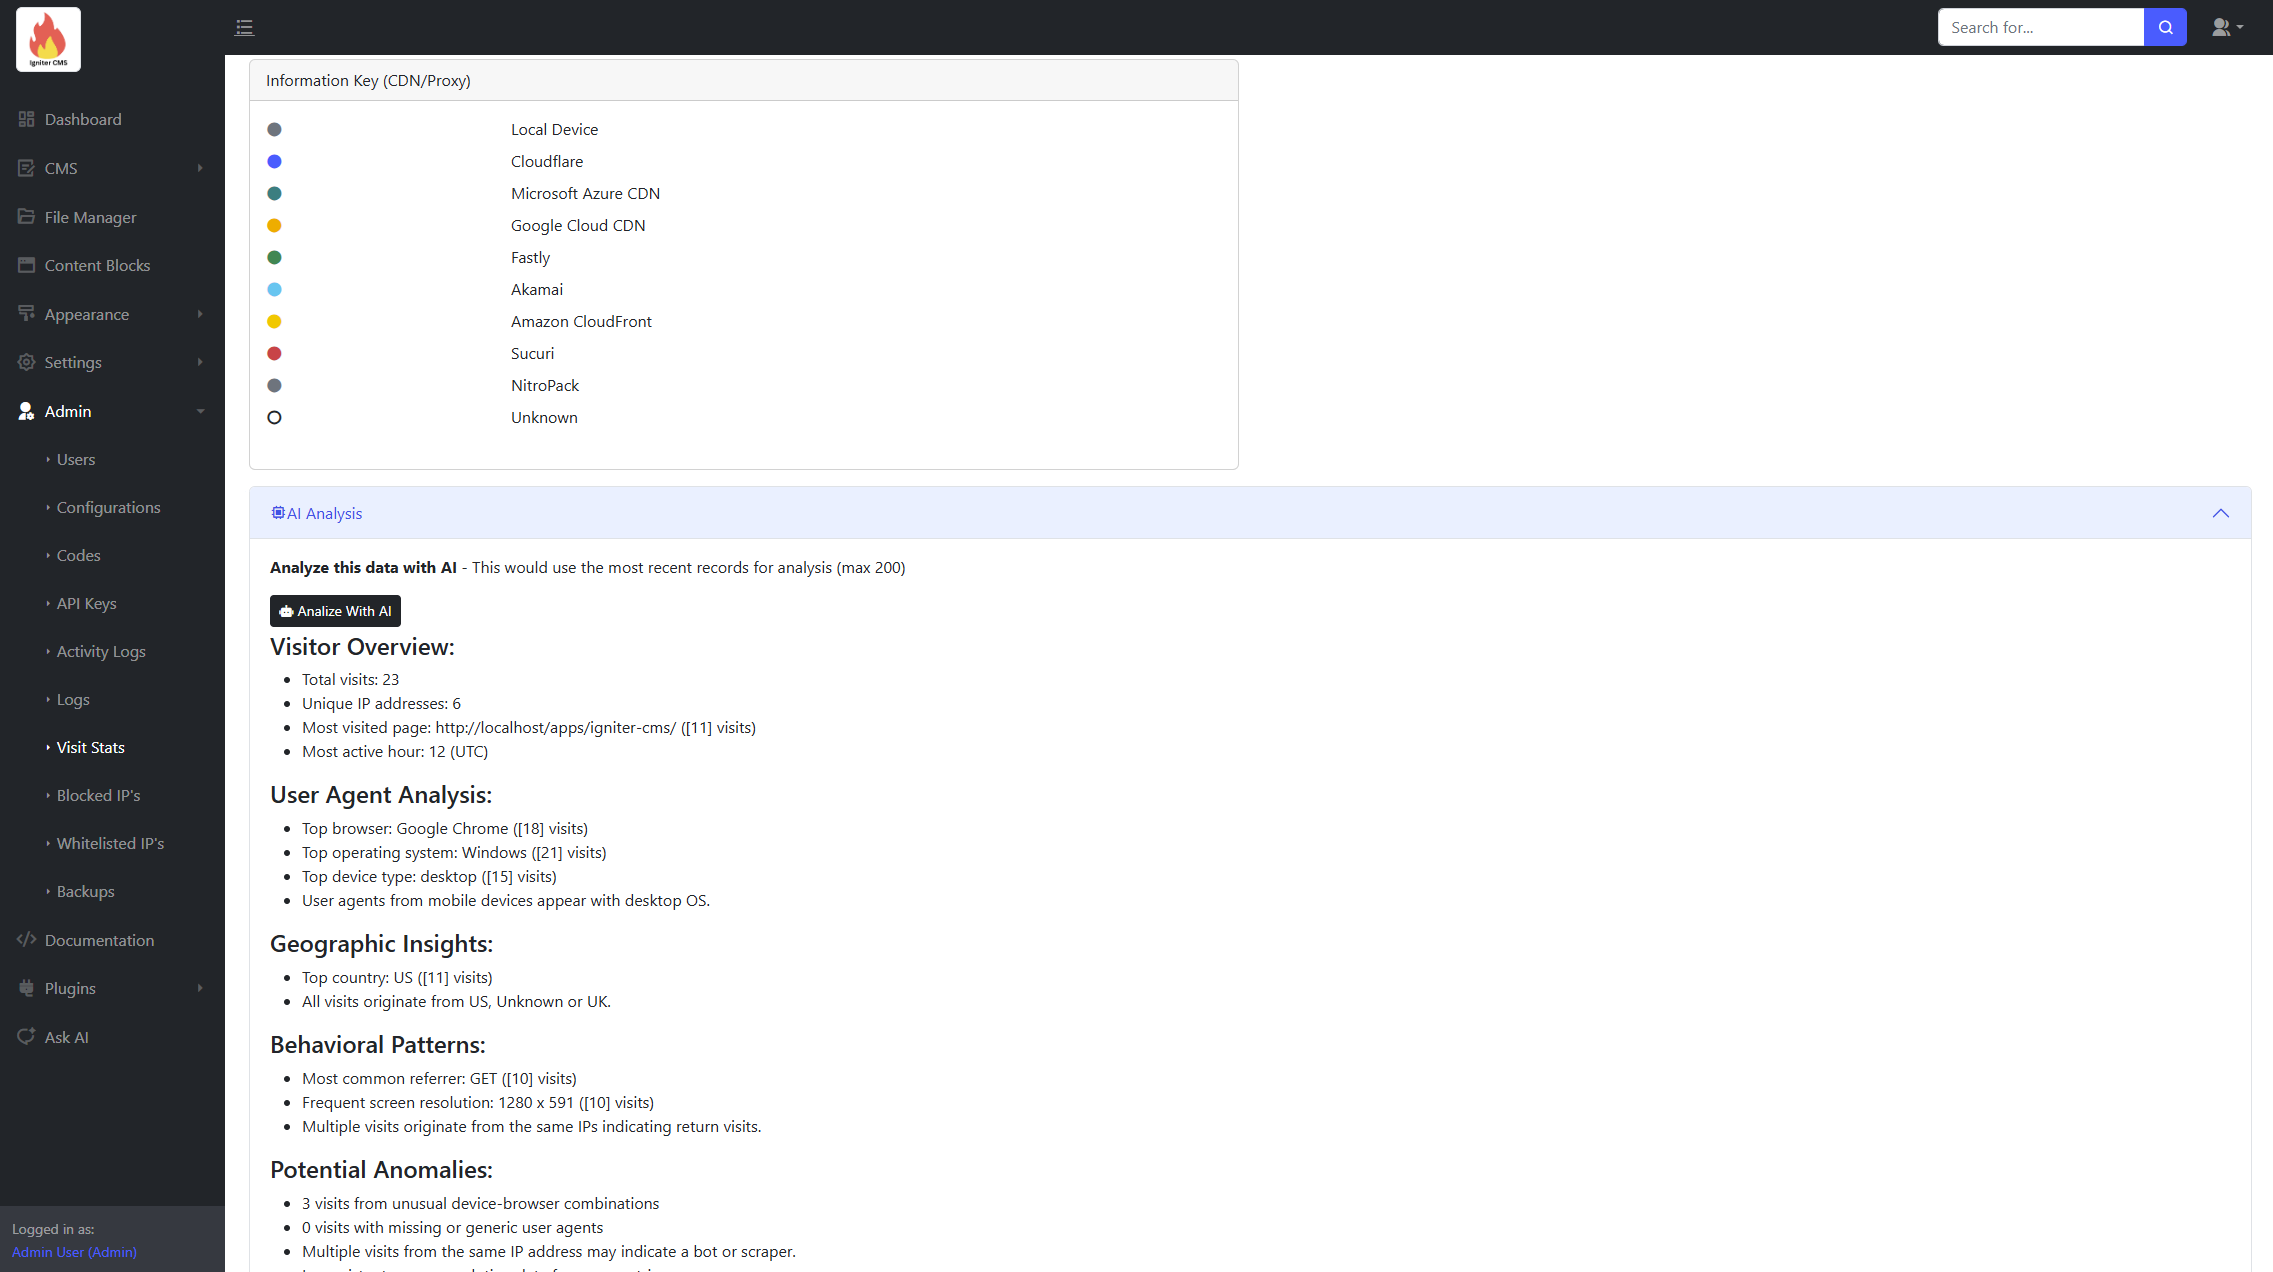
- Analyze site statistics for visitor trends.
- Review and interpret error logs for debugging.
- Track file logs for audit trails and security monitoring.
- Evaluate activity logs to monitor user engagement.
- Provide actionable insights for site optimization.
Deployment Instructions
This section outlines various methods to deploy your Igniter CMS application to a live server. Regardless of the deployment method chosen, you will always need to create and restore your database on the server.
Prerequisites for all Deployment Methods:
- Access to your hosting control panel (e.g.,
cPanel). - Your Igniter CMS project files.
FTP Deployment
Deploying via FTP involves manually transferring files and setting up your database.
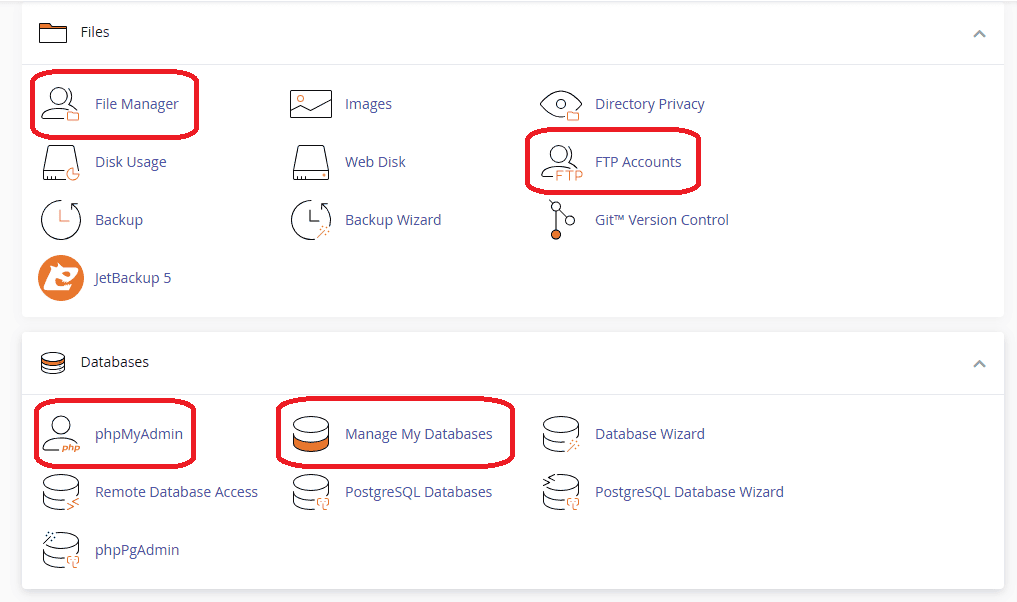
- Database Setup:
- Log in to your hosting control panel (e.g.,
cPanel). - Create a new database and a new database user.
- Grant the newly created user all necessary permissions on the database.
- Export your local Igniter CMS database from
phpMyAdmin(or your preferred database management tool). - Access
phpMyAdminin your hosting control panel and import the exported database file into the newly created database.
- Log in to your hosting control panel (e.g.,
- FTP Connection:
- If you don't already have one, create an FTP user in your hosting control panel.
- Connect to your server using an FTP client (e.g.,
FileZilla) with your FTP credentials. - Navigate to the desired directory on your server where your website files will reside (e.g.,
public_htmlor a subdirectory).
- File Transfer:
- Upload all Igniter CMS project files from your local machine to the chosen server directory.
- Configuration Updates:
- Open the
.envfile in your uploaded project root on the server and update the database connection details (database name, username, password). - Open
app/Config/Database.phpon the server and ensure the database connection settings are correct. - Open
app/Config/App.phpon the server and set thebaseURLto your domain (e.g.,https://your-domain.com/).
- Open the
CI/CD Pipeline (GitHub Actions)
This method leverages a Continuous Integration/Continuous Deployment pipeline using GitHub Actions for automated deployment.
- Workflow File Preparation:
- Navigate to the
.github/workflows/directory in your local Igniter CMS project. - Rename
main.yaml.txttomain.yaml. - Open the
main.yamlfile. - Uncomment the YAML configuration by removing the
#symbol from the beginning of relevant lines. - Update the
serverkey with your FTP server address (e.g.,server: ftp.your-domain.com). - Update the
server-dirkey with the path to your website's directory on the server (e.g.,server-dir: /your-site-path).
- Navigate to the
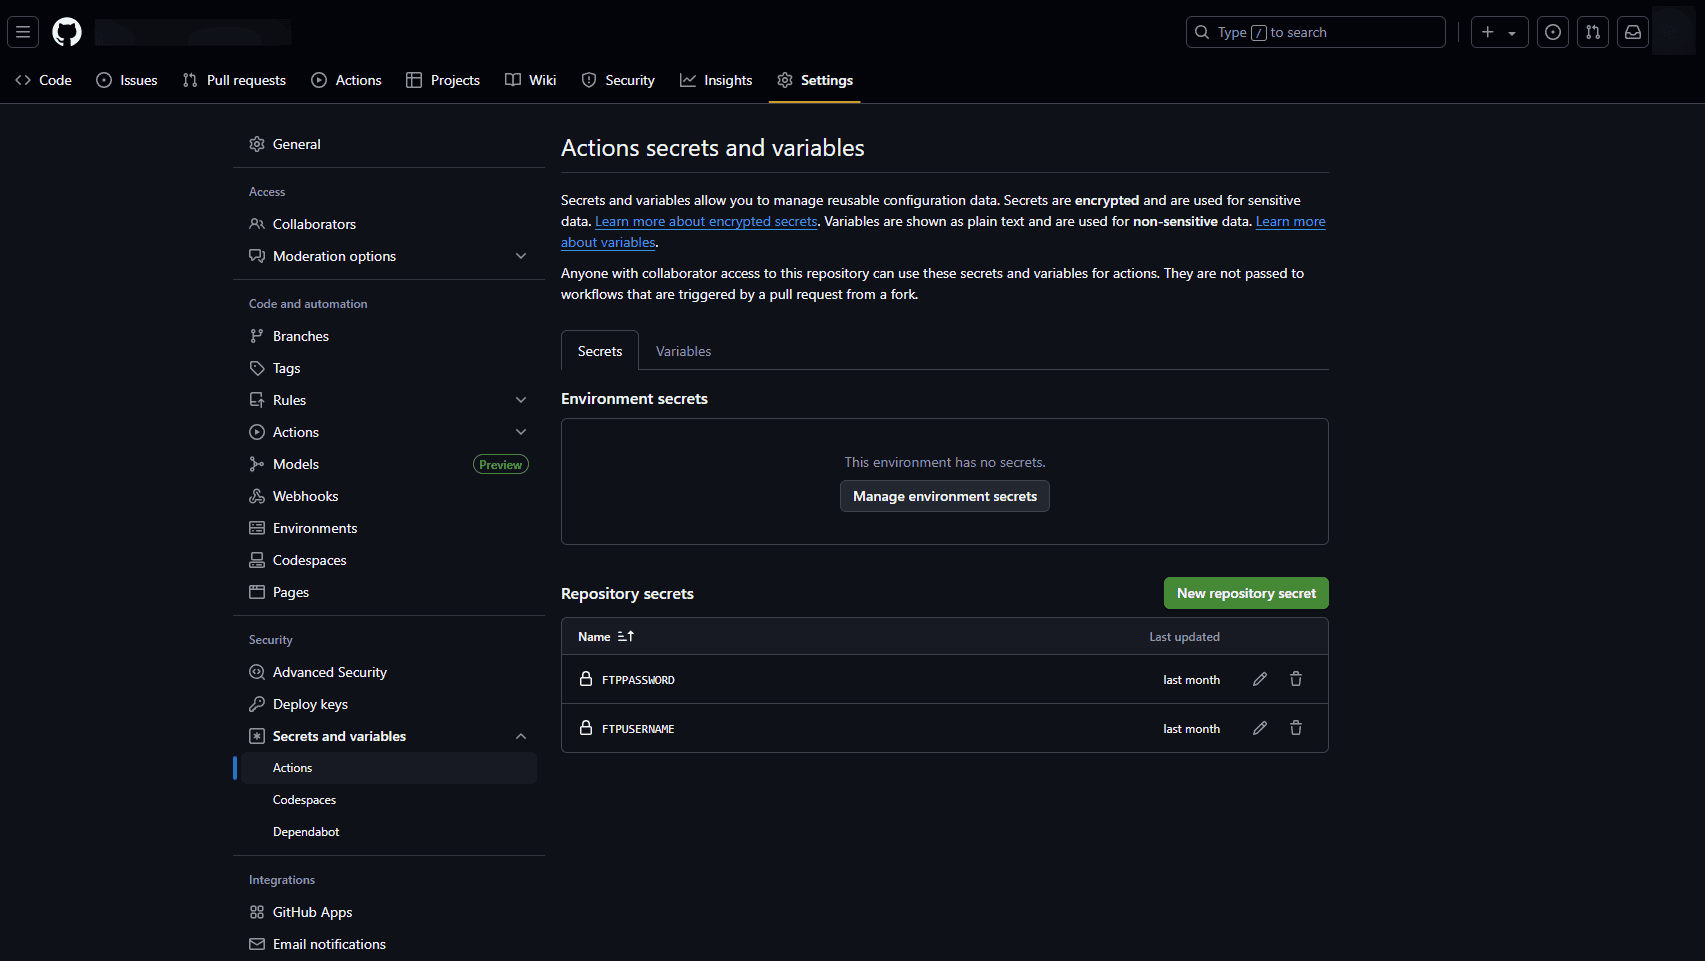
- GitHub Repository Setup:
- Create a new Git repository on GitHub.
- Add two repository secrets:
FTPUSERNAMEandFTPPASSWORD, using your FTP account details.
- Local Configuration Updates:
- Update your local
.envfile with the production database connection details. - Update
app/Config/Database.phpwith the production database connection settings. - Set the
baseURLin your localapp/Config/App.phpto your domain.
- Update your local
- Vendor Folder Handling:
- Zip your local
vendorfolder (e.g.,vendor.zip). - Manually upload
vendor.zipto your server's deployment directory (e.g., using FTP or File Manager). - Extract the
vendor.zipfile in the server's deployment directory. Thevendorfolder is typically not pushed to Git due to its size and dynamic nature.
- Zip your local
- Server
.envFile:- Create an
.envfile directly on your server in the root of your deployed application directory. This file will not be pushed by Git. Configure it with your production environment variables, especially database credentials.
- Create an
- Push to GitHub:
- Commit all your local changes (including the renamed
main.yamland updated configurations). - Push your committed changes to your GitHub repository. The CI/CD pipeline will automatically trigger and deploy your application.
- Commit all your local changes (including the renamed
- Database Setup: (Same as step 1.a-d in FTP Deployment)
- Log in to your hosting control panel (e.g.,
cPanel). - Create a new database and a new database user.
- Grant the newly created user all necessary permissions on the database.
- Export your local Igniter CMS database from
phpMyAdmin(or your preferred database management tool). - Access
phpMyAdminin your hosting control panel and import the exported database file into the newly created database.
- Log in to your hosting control panel (e.g.,
File Upload (cPanel File Manager)
This method utilizes your hosting provider's file manager to upload your entire project as a compressed archive.
- Local Configuration Updates:
- Update your local
.envfile with the production database connection details. - Update
app/Config/Database.phpwith the production database connection settings. - Set the
baseURLin your localapp/Config/App.phpto your domain.
- Update your local
- Compress Project:
- Zip your entire Igniter CMS project folder on your local machine. Ensure the zip file contains all necessary files and folders.
- Database Setup: (Same as step 1.a-d in FTP Deployment)
- Log in to your hosting control panel (e.g.,
cPanel). - Create a new database and a new database user.
- Grant the newly created user all necessary permissions on the database.
- Export your local Igniter CMS database from
phpMyAdmin(or your preferred database management tool). - Access
phpMyAdminin your hosting control panel and import the exported database file into the newly created database.
- Log in to your hosting control panel (e.g.,
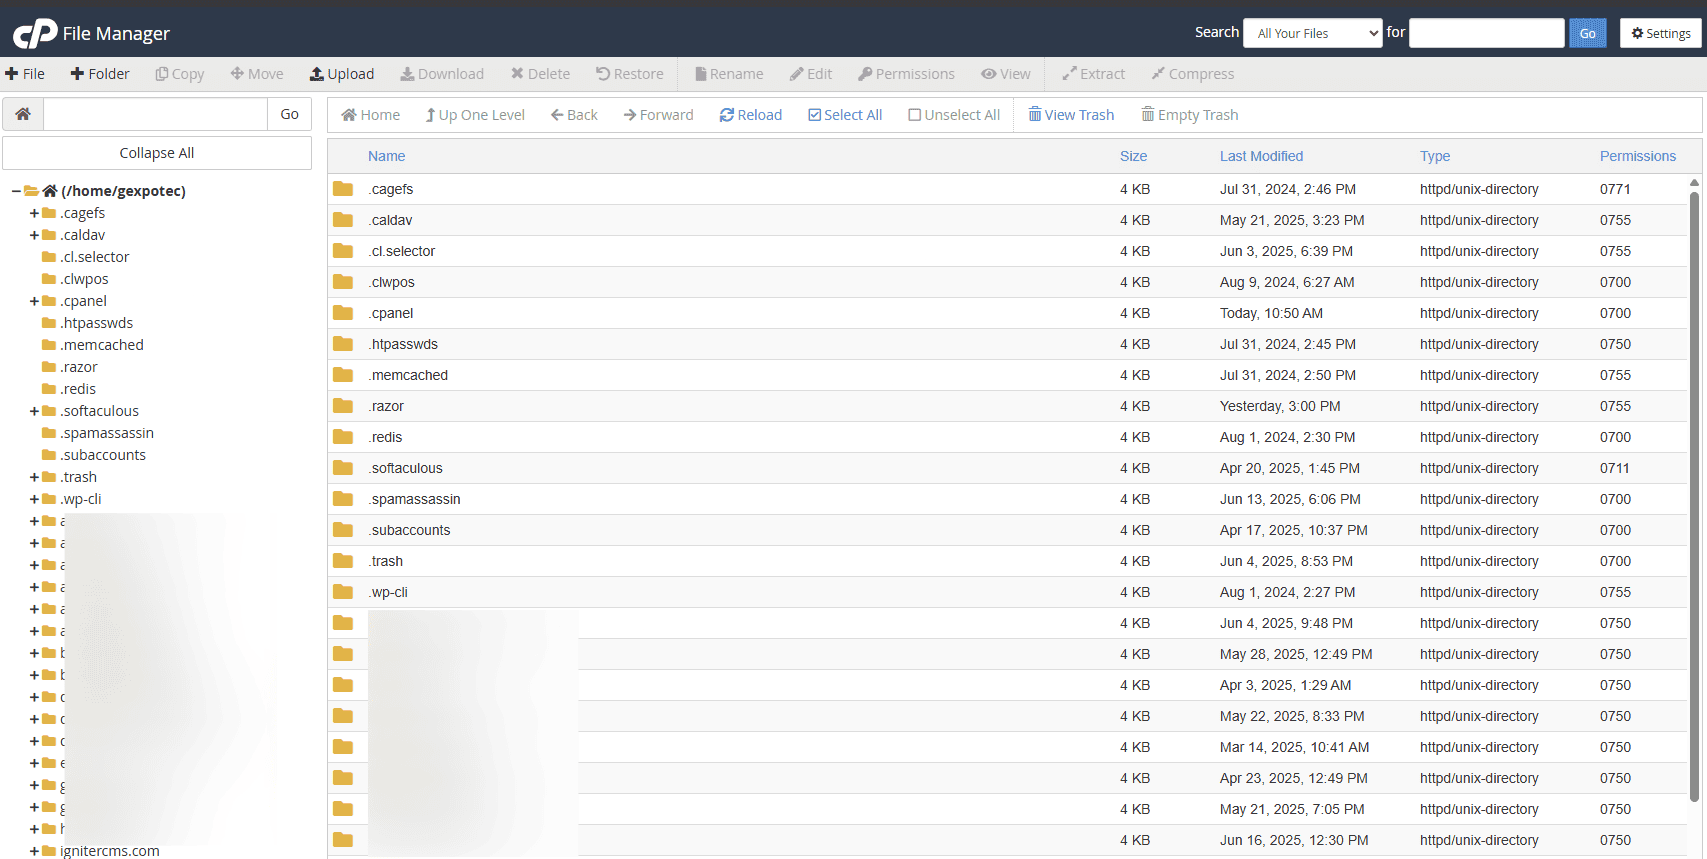
- Upload and Extract:
- Log in to your hosting control panel (e.g.,
cPanel). - Open the "File Manager".
- Navigate to the directory where you want to deploy your website (e.g.,
public_htmlor a specific subdirectory). - Click on the "Upload" button and select your zipped Igniter CMS project file.
- Once the upload is complete, select the uploaded zip file in the File Manager.
- Click on the "Extract" button and choose the target directory for extraction (usually the current directory).
- Make sure that the file permissions are set correctly.
0755for directories and0644for files
- Log in to your hosting control panel (e.g.,
For Developers
Frontend Format (Headless/MVC)
You can set the CMS as a headless CMS or use the Views to render data. To set the format for frontend, got the Admin > Configurations and search FrontEndFormat. Set it to either MVC or API
Endpoints
The app includes fetch-only APIs for retrieving CMS data.
- Generic Model Data
/api/{api-key}/get-model-data?model=navigations&take=10&skip=0: Generic - Fetch navigations (10 items, skip 0)./api/{api-key}/get-model-data?model=categories&where_clause={"status":1}: Generic - Fetch filtered categories (e.g., status = 1)./api/{api-key}/get-model-data?model=blogs&where_clause={"blog_id":"{blog-id}"}: Generic - Fetch filtered blogs (e.g., blog_id = {blog-id})./api/{api-key}/get-model-data?model=blogs&where_clause={"blog_id":"{blog-id}","status":1}: Generic - Fetch multiple filtered blogs (e.g., blog_id = {blog-id} and status = 1).
Model Names
| Model Name | Corresponding Model |
|---|---|
| blockedIPsModel | App\Models\BlockedIPsModel |
| blogs | App\Models\BlogsModel |
| categories | App\Models\CategoriesModel |
| codes | App\Models\CodesModel |
| contentBlocks | App\Models\ContentBlocksModel |
| dataGroupsModel | App\Models\DataGroupsModel |
| navigations | App\Models\NavigationsModel |
| pages | App\Models\PagesModel |
| themes | App\Models\ThemesModel |
| whitelistedIPsModel | App\Models\WhitelistedIPsModel |
Model Attributes
| Model Name | Model Fields |
|---|---|
| BlogsModel |
                                                blog_id(VARCHAR), title(VARCHAR), slug(VARCHAR), featured_image(VARCHAR), excerpt(VARCHAR),
                                            content(TEXT), category(VARCHAR), tags(VARCHAR), is_featured(BOOLEAN), status(INT), meta_title(VARCHAR),
                                            meta_description(TEXT), meta_keywords(TEXT), created_by(DATETIME), updated_by(DATETIME)
|
| BlockedIPsModel |
                                                blocked_ip_id(VARCHAR), ip_address(VARCHAR), country(VARCHAR), block_start_time(DATETIME),
                                                block_end_time(DATETIME), reason(VARCHAR), notes(VARCHAR), page_visited_url(VARCHAR)
|
| CategoriesModel |
                                                category_id(VARCHAR), title(VARCHAR), description(VARCHAR), group(VARCHAR), parent(VARCHAR),
                                            link(VARCHAR), new_tab(BOOLEAN), order(INT), status(INT), created_by(DATETIME), updated_by(DATETIME)
|
| CodesModel |
                                                code_id(VARCHAR), code_for(VARCHAR), code(VARCHAR), deletable(VARCHAR),
                                            created_by(DATETIME), updated_by(DATETIME)
|
| ContentBlocksModel |
                                                content_id(VARCHAR), identifier(VARCHAR), author(VARCHAR), title(VARCHAR), description(VARCHAR),
                                            content(TEXT), icon(VARCHAR), group(VARCHAR), image(VARCHAR), link(VARCHAR), new_tab(BOOLEAN),
                                            order(INT), custom_field(VARCHAR), created_by(DATETIME), updated_by(DATETIME)
|
| DataGroupsModel |
                                                data_group_id(VARCHAR), data_group_for(VARCHAR), data_group_list(VARCHAR),
                                                deletable(VARCHAR), created_by(VARCHAR), updated_by(VARCHAR)
|
| ThemesModel |
                                                theme_id(VARCHAR), name(VARCHAR), path(VARCHAR), primary_color(VARCHAR), secondary_color(VARCHAR), other_color(VARCHAR),
                                            image(VARCHAR), theme_url(VARCHAR), footer_copyright(VARCHAR), category(VARCHAR), sub_category(VARCHAR), selected(BOOLEAN),
                                            deletable(BOOLEAN), home_page(VARCHAR), created_by(DATETIME), updated_by(DATETIME)
|
| WhitelistedIPsModel |
whitelisted_ip_id(VARCHAR), ip_address(VARCHAR), reason(VARCHAR)
|
App Messages
Customize the messages in the app in app/Config/CustomConfig.php.
class CustomConfig extends BaseConfig
{
        #--------------------------------------------------------------------
        # MESSAGES
        #--------------------------------------------------------------------
        public $wrongCredentialsMsg = 'Sign In Failed. The provided username/email or password is incorrect.';
        public $loginSuccessMsg = 'Login successful.';
        public $logoutSuccessMsg = 'You have been successfully logged out.';
        public $pendingActivationMsg = 'Your account has not been activated yet or is no longer active. Please contact the administrator.';
        public $tooManyFailedLogins = 'Too many failed login attempts. Your IP has been blocked for 1 hour.';
        public $invalidAccessMsg = 'You do not have access to this area.';
        public $createSuccessMsg = 'Record created successfully.';
        public $editSuccessMsg = 'Record updated successfully.';
        public $deleteSuccessMsg = 'Record removed successfully.';
        public $missingRequiredInputsMsg = 'There are validation errors. Possible missing required inputs.';
        public $sentContactMsg = 'Message sent successfully.';
        public $failedContactMsg = 'Form submission failed.';
        public $notFoundMsg = 'Record not found.';
        public $alreadyExistMsg = '[Record] already exists in table.';
        public $errorMsg = 'Oops! Something went wrong. Please try again later.';
        public $resetLinkMsg = 'A password reset link has been sent to your email address. Please check your inbox and follow the instructions to reset your password. If you do not see the email in your inbox, please check your spam or junk folder.';
        public $invalidResetLinkMsg = 'Invalid or expired password reset link.';
        public $passwordResetRequiredMsg = 'For security reasons, you need to change your password before continuing. Your current password was either set by an administrator or is a default password.';
        public $passwordResetSuccessfulMsg = 'Your password has been reset successfully. You can now log in with your new password.';
        public $passwordResetFailedMsg = 'Unable to reset password. Please try again';
        public $nonExistingResetEmailMsg = 'We are sorry, but the email address you entered is not associated with any account. Please check the email address and try again.';
        public $exceptionMsg = 'There was an error processing your request. Please try again. If this error persists, please see or send an email to system administrator.';
        public $contactMessageSuccessful = 'Your message has been sent successfully.';
        public $contactMessageFailed = 'Oops! Something went wrong with your message submission. Please try again later.';
        public $bookingSuccessful = 'Your booking has been made successfully.';
        public $bookingFailed = 'Oops! Something went wrong with your booking submission. Please try again later.';
        public $subscriptionSuccessful = 'You have successfully subscribed!';
        public $subscriptionFailed = 'Sorry, something went wrong with your subscription. Please try again.';

        #--------------------------------------------------------------------
        # THEME CATEGORIES
        #--------------------------------------------------------------------
        public $themeCategories = [
            'Business' => 'Business & Corporate',
            'Ecommerce' => 'Ecommerce',
            'Portfolio' => 'Portfolio & Resume',
            'News' => 'Blog & News',
            'Events' => 'Event & Booking Websites',
            'Educational' => 'Educational & Membership Websites',
            'Restaurant' => 'Restaurant & Hospitality Websites',
            'Health' => 'Health & Wellness Websites',
            'Directory' => 'Directory & Listing Websites',
            'Entertainment' => 'Entertainment Websites',
            'General' => 'General',
        ];


        #--------------------------------------------------------------------
        # USER ROLES
        #--------------------------------------------------------------------
        public $userRoles = [
            'Admin' => 'Admin',
            'Manager' => 'Manager',
            'User' => 'User',
        ];
    }
Activity Types Message
Customize the data for activity types in logs in app/Constants/ActivityTypes.php.
class ActivityTypes
{
    //AUTH LOGS
    const USER_REGISTRATION = 'user_registration';
    const FAILED_USER_REGISTRATION = 'failed_user_registration';
    const USER_LOGIN = 'user_login';
    const USER_LOGOUT = 'user_logout';
    const FAILED_USER_LOGIN = 'failed_user_login';

    //CONTACT LOGS
    const CONTACT_CREATION = 'contact_created';
    const FAILED_CONTACT_CREATION = 'failed_contact_creation';
    const CONTACT_UPDATE = 'contact_updated';
    const FAILED_CONTACT_UPDATE = 'failed_contact_update';
    const CONTACT_DELETION = 'contact_delete';

    //USER LOGS
    const USER_CREATION = 'user_created';
    const FAILED_USER_CREATION = 'failed_user_creation';
    const USER_UPDATE = 'user_updated';
    const FAILED_USER_UPDATE = 'failed_user_update';
    const USER_DELETION = 'user_delete';

    .........................................................

    /**
        * Gets the description for a given activity type.
        *
        * @param string $type The activity type.
        * @return string The description of the activity type, or "Unknown Activity" if not found.
        */
    public static function getDescription($type)
    {
        $descriptions = [
            //Auth
            self::USER_REGISTRATION => 'User Registration',
            self::FAILED_USER_REGISTRATION => 'User Registration Failed',
            self::USER_LOGIN => 'User Login',
            self::USER_LOGOUT => 'User Logout',
            self::FAILED_USER_LOGIN => 'Failed User Login',

            //Contact
            self::CONTACT_CREATION => 'Contact Creation',
            self::FAILED_CONTACT_CREATION => 'Contact Creation Failed',
            self::CONTACT_UPDATE => 'Contact Update',
            self::FAILED_CONTACT_UPDATE => 'Contact Update Failed',
            self::CONTACT_DELETION => 'Contact Deletion',

            //User
            self::USER_CREATION => 'User Creation',
            self::FAILED_USER_CREATION => 'User Creation Failed',
            self::USER_UPDATE => 'User Update',
            self::FAILED_USER_UPDATE => 'User Update Failed',
            self::USER_DELETION => 'User Deletion',

            .........................................................
        ];

        return $descriptions[$type] ?? 'Unknown Activity';
    }
}
Theme Files
Customize the files by going to app/Views/front-end/themes/{theme-folder}.
CRON Jobs/Scheduler
Igniter CMS includes a built-in CRON controller to automate background tasks. These tasks are managed in app/Controllers/CronController.php.
1. Security Configuration
Define a strong secret key in your .env file to prevent unauthorized access:
CRON_SECRET_KEY = "your-strong-secret-key-here-12345"2. Automation Methods
Choose one of the following methods to trigger your CRON tasks every minute:
Method A: Using an External Web Cron Service (Easiest)
If you are on shared hosting or don't want to touch server logs, use a free service like cron-job.org or EasyCron.
- URL to call:
https://yourdomain.com/cron/run?key=your-secret-key - Execution interval: Every 1 minute (or as desired).
- Request Method: GET
Method B: Server-Side Crontab (Recommended for VPS)
Add this line to your server's crontab file to trigger the script internally:
* * * * * curl -s "https://yourdomain.com/cron/run?key=your-secret-key" > /dev/null 2>&1
3. Verifying Execution
When the CRON runs successfully, it returns a JSON response and logs the activity:
{
	"status": "success",
	"message": "Cron job(s) executed successfully",
	"timestamp": "2026-02-17 13:22:23"
}
AI Configuration (Gemini)
Igniter CMS integrates with Google Gemini to provide advanced AI features, including blog generation assistance and automated data analysis for site logs and visits.
1. Environment Setup
To begin, you must add your Gemini API credentials to your .env file. You can obtain a key from the Google AI Studio.
GEMINI_REQUEST_URL = "https://generativelanguage.googleapis.com/v1beta/models/gemini-3-flash-preview:generateContent"
                        GEMINI_REQUEST_KEY = "your-gemini-key-here"
2. System Settings
Once your credentials are set, you must enable the features within the Admin Dashboard:
- Navigate to: Settings > Configurations (or
/account/admin/configurations). - Enable Gemini AI: Set this to
Yesto activate the AI "Generate" buttons in the blog and content editors. - Enable Gemini AI Analysis: Set this to
Yesif you want the system to use AI to analyze site traffic, error logs, and user behavior. Set toNoto disable data processing while keeping text generation active.
gemini-3-flash-preview model by default for its high speed and low latency, making it ideal for real-time content generation.
Theme Development
Igniter CMS features a powerful theme system that separates presentation logic from core functionality. Themes are self-contained directories that include view templates, static assets, and configuration. This guide will help you create professional, feature-rich themes for your CMS installation.
1. Theme Directory Structure
Every theme must follow this exact structure to be recognized by the CMS:
theme-name/
├── assets/
│   ├── css/
│   │   └── site.css          # Your custom styles (optional)
│   ├── images/
│   │   └── preview.png       # Theme preview image (740x460px recommended)
│   └── js/
│       └── site.js           # Your custom JavaScript (optional)
├── views/
│   ├── blogs/
│   │   ├── index.php         # Blog listing page
│   │   └── view-blog.php     # Single blog post page
│   ├── home/
│   │   └── index.php         # Homepage template
│   ├── includes/
│   │   └── _functions.php    # Theme-specific helper functions
│   ├── layout/
│   │   └── _layout.php       # Master layout template
│   ├── pages/
│   │   └── view-page.php     # Static page template
│   └── search/
│       ├── filter.php        # Filtered search results (category/tag/author)
│       └── index.php         # General search results
└── theme.json                # Theme configuration file
2. Required View Templates
Each template file serves a specific purpose and receives specific data from the CMS:
| Template File | Purpose | Available Variables |
|---|---|---|
layout/_layout.php |
Master wrapper containing HTML structure, navigation, and footer | $theme, $siteName, $themeData[], $topNavLists, $footerNavLists, $servicesNavLists |
home/index.php |
Front page content display | $theme, $currentPage, $popUpWhereClause, $enableHomeSeo |
blogs/index.php |
Blog listing with pagination | $blogs, $pager, $total_blogs, $theme, $currentPage |
blogs/view-blog.php |
Single blog post with sidebar | $blog_data, $categories, $blogs, $theme |
pages/view-page.php |
Static CMS page display | $page_data, $theme, $currentPage |
search/index.php |
General search results page | $searchQuery, $blogsSearchResults, $pagesSearchResults, $theme |
search/filter.php |
Filtered results (category/tag/author) | $searchQuery, $blogsSearchResults, $pagesSearchResults, $type, $theme |
3. theme.json Configuration
The theme.json file defines your theme's metadata and visual settings. Here's a complete example with all available options:
{
    "name": "My Awesome Theme",
    "path": "my-awesome-theme",
    "description": "A modern, responsive theme for business websites",
    "version": "1.0.0",
    "author": "Your Name",
    "email": "your@email.com",
    "author_url": "https://yourwebsite.com",
    "theme_url": "https://yourwebsite.com/theme",
    "image": "preview.png",
    "category": "Business",
    "sub_category": "Corporate",
    "default_color": "#6c757d",
    "heading_color": "#212529",
    "accent_color": "#0d6efd",
    "surface_color": "#f8f9fa",
    "contrast_color": "#0d6efd",
    "background_color": "#ffffff",
    "use_static_theme_nav": 0,
    "override_default_style": 1,
    "plugins_required": "seo-master,easy-hide-login",
    "license": "MIT",
    "requires": {
        "php": ">=8.0",
        "igniter-cms": ">=2.0"
    }
}
pathmust match the theme folder name exactlyuse_static_theme_nav: Set to1to use hardcoded navigation instead of database-driven menusoverride_default_style: Set to1to enable custom CSS variables from theme.jsonplugins_required: Comma-separated list of plugin slugs required for theme functionality. If non required, leave empty.
4. Core Theme Functions
Your theme has access to these essential helper functions (defined in includes/_functions.php or available globally):
| Function | Description | Example |
|---|---|---|
getCurrentTheme() |
Returns the active theme folder name | $theme = getCurrentTheme(); |
getThemeData($theme, $key) |
Retrieves a specific value from theme.json | $color = getThemeData($theme, "accent_color"); |
getConfigData($key) |
Retrieves system configuration values | $siteName = getConfigData("SiteName"); |
getLinkUrl($link) |
Processes internal/external URLs safely | $url = getLinkUrl($navigation['link']); |
getImageUrl($path) |
Returns full URL for image assets | <img src="<?= getImageUrl($logoPath) ?>"> |
renderAdminBar() |
Renders admin toolbar for logged-in users | <?= renderAdminBar() ?> |
themef_renderNavigation($nav, $model) |
Recursively renders navigation with dropdowns (defined in _functions.php) |
<?= themef_renderNavigation($navigation, $navigationsModel) ?> |
5. Creating the Master Layout (_layout.php)
The layout file is the foundation of your theme. Here's a minimal working example:
<?php
$theme = getCurrentTheme();
$siteName = getConfigData("SiteName");
// Load theme data from theme.json
$themeData = [
'accentColor' => getThemeData($theme, "accent_color"),
'backgroundColor' => getThemeData($theme, "background_color"),
];
// Load navigation
$navigationsModel = new \App\Models\NavigationsModel();
$topNavLists = $navigationsModel->where('group', 'top_nav')->findAll();
?>
<?= $this->include('front-end/themes/'.$theme.'/includes/_functions.php'); ?>
<!DOCTYPE html>
<html lang="en">
<head>
<meta charset="UTF-8">
<meta name="viewport" content="width=device-width, initial-scale=1.0">
<title><?= $siteName ?></title>
<!-- Bootstrap 5 (required) -->
<link href="https://cdn.jsdelivr.net/npm/bootstrap@5.3.2/dist/css/bootstrap.min.css" rel="stylesheet">
<!-- Theme Custom CSS -->
<link href="<?= base_url('public/front-end/themes/'.$theme.'/assets/css/site.css') ?>" rel="stylesheet">
</head>
<body>
<?= renderAdminBar() ?>
<!-- Navigation -->
<nav class="navbar navbar-expand-lg navbar-dark bg-dark">
<div class="container">
<a class="navbar-brand" href="<?= base_url() ?>">
<?= $siteName ?>
</a>
<div class="collapse navbar-collapse" id="navbarNav">
<ul class="navbar-nav ms-auto">
<?php foreach ($topNavLists as $navigation): ?>
<?= themef_renderNavigation($navigation, $navigationsModel) ?>
<?php endforeach; ?>
</ul>
</div>
</div>
</nav>
<!-- Main Content Area -->
<main>
<?= $this->renderSection('content') ?>
</main>
<!-- Footer -->
<footer class="bg-dark text-white text-center py-3">
<p>© <?= date('Y') ?> <?= $siteName ?>. All rights reserved.</p>
</footer>
<!-- Bootstrap JS Bundle -->
<script src="https://cdn.jsdelivr.net/npm/bootstrap@5.3.2/dist/js/bootstrap.bundle.min.js"></script>
<script src="<?= base_url('public/front-end/themes/'.$theme.'/assets/js/site.js') ?>"></script>
</body>
</html>
6. Working with Helper Functions (renderBlogContent, renderSearchResults, etc.)
Igniter CMS provides built-in helper functions that render consistent, theme-agnostic output. These are perfect for rapid development:
Available Helper Functions:
renderBlogContent($blog_data)- Displays full blog post with formatted contentrenderBlogSidebar($categories, $recentBlogs, $currentBlog)- Renders categories and recent posts sidebarrenderBlogsGrid($blogs)- Creates responsive blog listing gridrenderSearchResults($query, $blogs, $pages)- Unified search results displayrenderFilterSearchResults($query, $blogs, $pages, $type)- Filtered results with type indication
7. Navigation Rendering
The themef_renderNavigation() function handles multi-level menus automatically. Define it in includes/_functions.php:
<?php
/**
 * Renders navigation with dropdown support for child items
 */
function themef_renderNavigation(array $navigation, object $navigationsModel): string
{
    $navId = $navigation['navigation_id'];
    $title = $navigation['title'];
    $link = getLinkUrl($navigation['link']);
    $target = $navigation['new_tab'] === "1" ? "_blank" : "_self";

    // Get child items
    $children = $navigationsModel->where('parent', $navId)
                                 ->orderBy('order', 'ASC')
                                 ->findAll();

    if (empty($children)) {
        return '<li class="nav-item">
                    <a class="nav-link" href="'.$link.'" target="'.$target.'">
                        '.$title.'
                    </a>
                </li>';
    }

    // Render dropdown menu
    $output = '<li class="nav-item dropdown">
                <a class="nav-link dropdown-toggle" href="#" data-bs-toggle="dropdown">
                    '.$title.'
                </a>
                <ul class="dropdown-menu">';

    foreach ($children as $child) {
        $childLink = getLinkUrl($child['link']);
        $childTarget = $child['new_tab'] === "1" ? "_blank" : "_self";
        $output .= '<li><a class="dropdown-item" href="'.$childLink.'" target="'.$childTarget.'">
                        '.$child['title'].'
                    </a></li>';
    }

    $output .= '</ul></li>';
    return $output;
}
?>
8. CSS Variables & Theming
When override_default_style is enabled in theme.json, your CSS variables are automatically injected:
/* Use these variables in your site.css */
:root {
    --default-color: #6c757d;    /* Body text and default elements */
    --heading-color: #212529;    /* Headings (h1-h6) */
    --accent-color: #0d6efd;     /* Buttons, links, primary actions */
    --surface-color: #f8f9fa;    /* Cards, modals, secondary backgrounds */
    --contrast-color: #0d6efd;   /* Highlights and focus states */
    --background-color: #ffffff;  /* Page background */
}

/* Example usage */
.btn-primary {
    background-color: var(--accent-color);
    border-color: var(--accent-color);
}

.card {
    background-color: var(--surface-color);
    color: var(--default-color);
}

h1, h2, h3 {
    color: var(--heading-color);
}
9. Adding Custom JavaScript
Place your JavaScript in assets/js/site.js. It will be automatically loaded in the footer. For page-specific scripts, use conditional loading:
// assets/js/site.js
document.addEventListener('DOMContentLoaded', function() {
    // Initialize tooltips
    var tooltipTriggerList = [].slice.call(document.querySelectorAll('[data-bs-toggle="tooltip"]'));
    tooltipTriggerList.map(function(tooltipTriggerEl) {
        return new bootstrap.Tooltip(tooltipTriggerEl);
    });

    // Mobile menu handling
    const navbarToggler = document.querySelector('.navbar-toggler');
    if (navbarToggler) {
        navbarToggler.addEventListener('click', function() {
            document.querySelector('.navbar-collapse').classList.toggle('show');
        });
    }
});
10. Theme Installation & Activation
- Zip Theme : Zip your theme files with the name of your theme (as written in theme.json). Make sure files are not in a sub-folder of the theme.
- Go to Appearance > Themes: Click on "Upload Theme", select the theme zip file and click "Upload Theme"
- Navigate back to Appearance > Themes: Click on activate to "Activate" the theme
- Activate: Find your theme in the list and click "Activate"
- Set as Default: Use the "Set as Default" option to make it the active theme for all visitors
- Test thoroughly: Check responsiveness on mobile, tablet, and desktop devices
- Use environment detection: Wrap development notes in
<?php if (ENVIRONMENT !== 'production'): ?>to hide them in production - Leverage Bootstrap 5: The CMS includes Bootstrap 5.3.2 - use its utility classes for faster development
- Follow accessibility standards: Use semantic HTML, proper ARIA labels, and sufficient color contrast
- Optimize assets: Minify CSS/JS and optimize images for faster loading
- Document your code: Add comments explaining complex logic for other developers
- Test with plugins: Ensure compatibility with popular plugins like SEO Master and Analytics
11. Common Customization Examples
Custom Blog Listing (Replace helper function):
<!-- In blogs/index.php, replace <?= renderBlogsGrid($blogs) ?> with: -->
<div class="row">
    <?php foreach ($blogs as $blog): ?>
        <div class="col-md-4 mb-4">
            <div class="card h-100">
                <?php if (!empty($blog['featured_image'])): ?>
                    <img src="<?= getImageUrl($blog['featured_image']) ?>"
                         class="card-img-top" alt="<?= esc($blog['title']) ?>">
                <?php endif; ?>
                <div class="card-body">
                    <h5 class="card-title"><?= esc($blog['title']) ?></h5>
                    <p class="card-text"><?= character_limiter(strip_tags($blog['content']), 150) ?></p>
                    <a href="<?= base_url('blogs/' . $blog['slug']) ?>" class="btn btn-primary">
                        Read More
                    </a>
                </div>
                <div class="card-footer text-muted">
                    Posted on <?= date('F j, Y', strtotime($blog['created_at'])) ?>
                </div>
            </div>
        </div>
    <?php endforeach; ?>
</div>
Custom Search Results:
<!-- In search/index.php, replace helper function with: -->
<h2>Search Results for "<?= esc($searchQuery) ?>"</h2>

<?php if (empty($blogsSearchResults) && empty($pagesSearchResults)): ?>
    <div class="alert alert-info">
        No results found. Please try different keywords.
    </div>
<?php else: ?>
    <?php foreach ($blogsSearchResults as $blog): ?>
        <div class="search-result mb-4">
            <h3><a href="<?= base_url('blogs/' . $blog['slug']) ?>">
                <?= esc($blog['title']) ?>
            </a></h3>
            <p><?= character_limiter(strip_tags($blog['content']), 200) ?></p>
            <small>Blog Post</small>
        </div>
    <?php endforeach; ?>

    <?php foreach ($pagesSearchResults as $page): ?>
        <div class="search-result mb-4">
            <h3><a href="<?= base_url('page/' . $page['slug']) ?>">
                <?= esc($page['title']) ?>
            </a></h3>
            <p><?= character_limiter(strip_tags($page['content']), 200) ?></p>
            <small>Page</small>
        </div>
    <?php endforeach; ?>
<?php endif; ?>
12. Theme Development Checklist
- ✓
theme.jsonwith valid JSON syntax - ✓
layout/_layout.phpmaster template - ✓
home/index.phphomepage template - ✓
blogs/index.phpandview-blog.php - ✓
pages/view-page.phpstatic page template
- ✓ Responsive on all device sizes
- ✓ Cross-browser compatibility (Chrome, Firefox, Safari)
- ✓ Navigation dropdowns work correctly
- ✓ Search functionality displays results
- ✓ Pagination links function properly
- ✓ Admin bar visible for logged-in users
- Always use
esc()to escape output and prevent XSS attacks:<?= esc($variable) ?> - Never hardcode database credentials in theme files
- Validate and sanitize any user input before processing
- Keep third-party libraries updated to their latest secure versions
Plugin Development
Plugins allow you to extend the core functionality of Igniter CMS without modifying system files. Every plugin must be self-contained within its own folder.
1. Core Plugin Files
A standard plugin requires the following 6 files to function correctly:
- plugin.json: Metadata (Hooks, Name, Unique ID).
- plugin.php: The main entry point and class definition.
- database.php: Handles table creation/migrations on install.
- processor.php: Logic for handling POST/AJAX requests.
- manage.php: The admin interface view for the plugin.
- instructions.php: Documentation displayed to the user.
plugin.json contains a unique plugin_id to avoid conflicts with existing system plugins.
Copyright and License
Copyright (c) 2025 Abdoulie Kassama
This project is licensed under the MIT License - see the LICENSE file for details.
Blog Comments
Use to manage comment form submissions